Building your own bedside table is a satisfying project that adds a personal touch to your bedroom. Many people buy ready-made furniture, but making your own gives you control over the design, size, and materials. It can fit your space perfectly, and you can choose a style that matches your taste.
You do not need to be a master carpenter to build a sturdy, attractive table. With the right guidance and a few tools, even beginners can succeed. This article will walk you through every step, from planning and choosing materials to the final assembly and finishing touches.
You will find tips, common mistakes to avoid, and real examples to guide you. Let’s get started on building a bedside table that is both functional and unique.
Why Build Your Own Bedside Table?
Making your own bedside table offers several benefits. First, you can customize it to fit your needs. If your space is tight, you can build a narrow table that fits perfectly. Want extra storage? Add more shelves or drawers. This flexibility is hard to find in store-bought options.
Second, building furniture yourself can save money. Quality materials often cost less than buying a finished piece. You also avoid paying for brand names or expensive shipping.
Third, it’s a rewarding learning experience. You gain new skills, from measuring and cutting wood to assembling and finishing. This knowledge is useful for future projects, and the sense of achievement is real.
Finally, you can make eco-friendly choices. By picking sustainable wood or reusing materials, you reduce your environmental impact. Many people also enjoy the story and meaning behind a handmade item.
Planning Your Bedside Table
Careful planning is the key to a successful project. Rushing into building without a clear plan often leads to mistakes and wasted materials. Here’s how to prepare:
Decide On The Table’s Purpose
Think about how you will use the table. Do you need a place for a lamp, books, or a phone charger? If you want to store many items, consider adding drawers or shelves. For a simple, minimalist look, you might choose a basic tabletop with four legs.
Measure Your Space
Use a tape measure to find the right size for your table. Most bedside tables are between 22 and 28 inches high. The width and depth depend on your available space but are usually 16 to 20 inches. Leave enough room to walk and open drawers.
Choose A Style
Look at different designs for inspiration. Some common styles include:
- Modern: Clean lines, simple shapes, often with metal or painted surfaces.
- Rustic: Natural wood, visible grain, sometimes with distressed finishes.
- Traditional: Decorative edges, turned legs, classic colors.
Choose a style that matches your bedroom. If you like DIY, you can mix elements from different styles.
Sketch Your Design
Draw a simple plan with all measurements. Include the tabletop, legs, shelves, and drawers. You don’t need to be an artist, but clear sketches help you stay organized.
Make A Materials List
List every piece you will need: wood for the top, sides, legs, screws, glue, handles, and finish. Check your tools and buy or borrow anything you don’t have.
Choosing The Right Materials
Selecting good materials is important for strength, looks, and cost. Here’s what you should know before buying wood and hardware.
Types Of Wood
You have several options for wood. Each has pros and cons:
| Wood Type | Price | Strength | Appearance | Best For |
|---|---|---|---|---|
| Pine | Low | Medium | Light, soft grain | Budget builds, painting |
| Oak | Medium-High | High | Bold grain, strong | Durable, classic look |
| Plywood | Low-Medium | Medium | Varies, often veneered | Hidden parts, shelves |
| Walnut | High | High | Dark, rich color | Showpiece, luxury |
- For a first project, pine or oak are good choices. Pine is easier to cut, while oak is stronger and ages well.
- Plywood is useful for shelves or drawer bottoms. Choose plywood with a smooth surface for a better finish.
Other Materials
You will also need:
- Screws or wood glue for joining parts
- Sandpaper (medium and fine grit)
- Paint, stain, or varnish for finishing
- Drawer slides if adding drawers
- Handles or knobs for drawers or doors
Tools Needed
Basic tools for this project include:
- Measuring tape
- Pencil
- Saw (circular saw, handsaw, or miter saw)
- Drill and bits
- Screwdriver
- Clamps
- Sanding block or electric sander
- Paintbrush or roller
If you don’t own all these tools, consider borrowing or renting. Many hardware stores offer tool rentals.
Step-by-step Guide: Building The Table
Let’s break down the process into clear steps. Each step builds your skills and brings the project closer to completion.
Step 1: Cutting The Wood
Start by cutting all pieces to size. Use your sketches as a guide. Typical measurements for a small bedside table are:
- Top: 18 x 18 inches
- Legs: 4 pieces, 24 inches each
- Shelf: 16 x 16 inches (optional)
- Apron (supports under the top): 4 pieces, each 16 inches
Mark each piece with a pencil before cutting. Double-check measurements—“measure twice, cut once” is a key woodworking rule.
Step 2: Sanding
Smooth all surfaces with medium-grit sandpaper (like 120 grit). Then use fine sandpaper (220 grit) for a soft finish. Sand with the wood grain to avoid scratches.
Sanding is not just for looks. It helps paint or stain stick better and removes splinters.
Step 3: Assembling The Frame
Lay out the tabletop face down. Attach the apron pieces under the edges of the tabletop using wood glue and screws. The apron adds strength and gives the table a clean edge.
Next, attach the legs to each corner of the apron. Use two screws per leg for stability. Clamps help hold everything in place while you work.
If you’re adding a shelf, mark the height for it on the legs. Attach the shelf with screws or shelf supports.
Step 4: Adding Drawers (optional)
Drawers require more skill and patience but add useful storage. Measure carefully so the drawer fits snugly but slides smoothly.
- Build the drawer box from plywood or solid wood.
- Attach the front panel.
- Install metal slides inside the apron.
- Test the drawer to make sure it opens and closes easily.
A common mistake is making the drawer too wide for the space. Leave a small gap (about 1/8 inch on each side) for smooth sliding.
Step 5: Final Assembly
Check that all screws are tight and the table is sturdy. If it wobbles, adjust the legs or add small pads to the bottom.
Fill any holes or gaps with wood filler. Let it dry, then sand smooth.
Step 6: Finishing
Choose a finish that matches your style and protects the wood.
- Paint creates a solid color and modern look.
- Stain highlights the wood grain and adds richness.
- Varnish protects against water and scratches.
Apply the finish with a brush, roller, or cloth. Let it dry completely before using the table.
Step 7: Attaching Hardware
If you added a drawer, screw on the handle or knob. For extra style, choose unique hardware that matches your room decor.
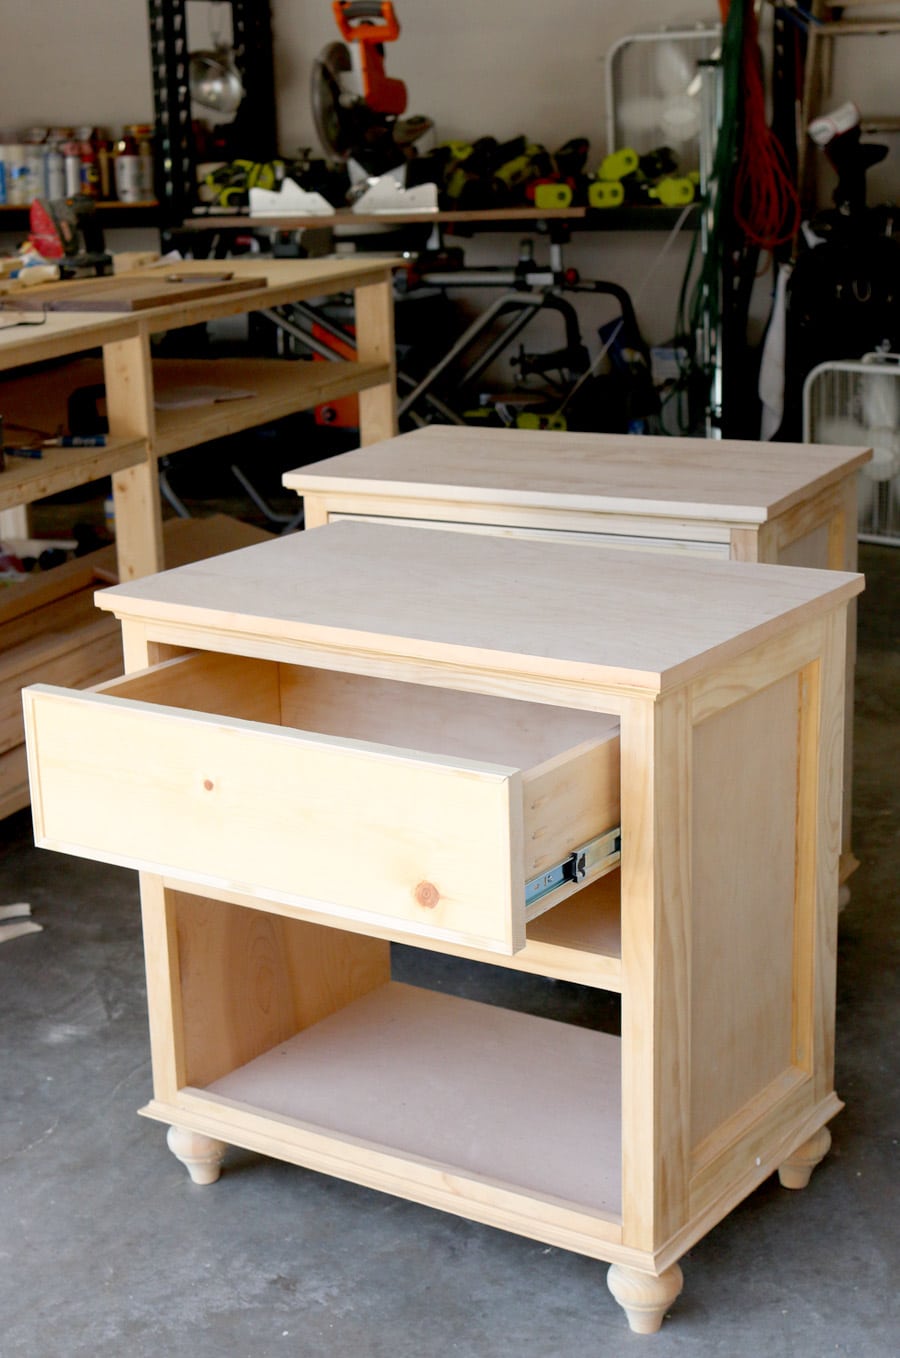
Credit: jenwoodhouse.com
Design Variations And Custom Ideas
Your bedside table does not have to look like everyone else’s. Here are some ways to personalize your design:
- Floating Table: Attach the table to the wall instead of using legs. This saves space and makes cleaning easier.
- Open Shelf: Skip the drawer for a simple shelf under the tabletop. Great for books or baskets.
- Two-Tone Finish: Paint the legs one color and stain the top another.
- Built-in Charger: Drill a hole in the back for charging cables or add a USB port.
- Decorative Edge: Use a router to shape the edge of the tabletop.
Adding small touches like these makes your table unique and practical.
Common Mistakes And How To Avoid Them
Many beginners run into problems when building furniture. Here are common mistakes and how to avoid them:
- Poor measuring: Always double-check measurements before cutting. Even small errors can cause big problems.
- Weak joints: Use enough screws or glue for strength. Test each joint before moving on.
- Skipping sanding: Rough wood is hard to paint and can cause splinters.
- Wrong hardware: Make sure screws are not too long or short. Too long can poke through; too short can be weak.
- Rushing the finish: Let paint or stain dry completely between coats for the best result.
By slowing down and following each step, you reduce errors and get a better result.
Maintenance Tips For Your Bedside Table
A homemade bedside table can last many years with simple care.
- Clean regularly with a soft cloth. Avoid harsh chemicals.
- Wipe spills quickly to prevent stains.
- Check screws and hardware every few months. Tighten if needed.
- Refinish every few years to keep it looking new. Light sanding and a fresh coat of finish can restore shine.
If you used solid wood, expect some movement as it adjusts to temperature and humidity. Small cracks are normal and add character.
Real-life Example: Building A Simple Bedside Table
Let’s look at a real example to make the process clearer.
Emily, a college student, wanted a small table for her dorm. She used pine wood, a basic saw, and a drill. Her table measured 16 x 16 inches on top and 24 inches high.
Emily cut the pieces at a local hardware store. She sanded all surfaces, attached the legs with screws, and added a lower shelf for books. She painted the table white to match her bedding.
The whole project took about six hours over a weekend. Emily spent $35 on materials and used borrowed tools. The table is sturdy, and she is proud of her work.
This example shows you don’t need a big budget or special skills to succeed.
Comparing Diy Vs Store-bought Bedside Tables
Some people wonder if building a bedside table is worth the effort. Here is a comparison between DIY and store-bought options:
| Feature | DIY Bedside Table | Store-Bought Bedside Table |
|---|---|---|
| Customization | Full control over size, style, and features | Limited to available models |
| Cost | Often lower (no brand markup) | Can be high for quality pieces |
| Time Required | Several hours to a weekend | Ready to use after purchase |
| Skill Level | Beginner to advanced | No skill needed |
| Satisfaction | High – personal achievement | Low to medium |
For those with some free time and interest in learning, building your own is often the better choice.
Cost Breakdown: What To Expect
Understanding the costs helps you plan and avoid surprises. Here is a sample breakdown for a simple pine bedside table:
| Item | Estimated Cost (USD) |
|---|---|
| Wood (Pine) | $15 |
| Screws | $2 |
| Sandpaper | $3 |
| Paint or Stain | $8 |
| Handle/Knob | $2 |
| Total | $30 |
If you need to buy or rent tools, add those costs. Borrowing from friends or family can save money.
Buying a similar table in a store usually costs $50 to $200, depending on quality and brand.
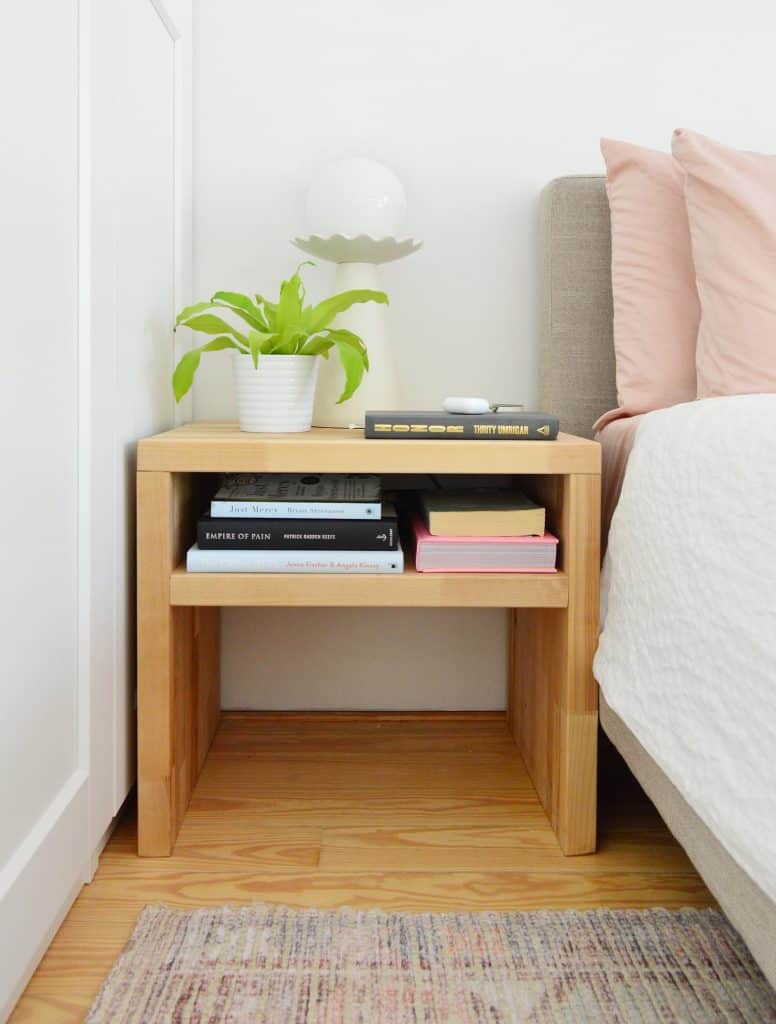
Credit: www.younghouselove.com
Advanced Tips For Better Results
If you want your bedside table to look even more professional, consider these tips:
- Use pocket hole joinery for hidden, strong joints. Special jigs are available for this method.
- Apply wood conditioner before staining. This helps soft woods like pine absorb stain evenly.
- Add felt pads under the legs to protect your floor.
- Mix finishes for a custom look. For example, use oil on the tabletop and paint on the legs.
- Try edge banding on plywood edges for a polished appearance.
These details make your table stand out and last longer.
Safety Tips For Diy Furniture Projects
Safety is important, even for small projects. Here are some basic rules:
- Wear safety glasses when cutting or drilling wood.
- Use hearing protection if using power tools.
- Work in a well-ventilated area when sanding or applying finish.
- Clamp wood before cutting to prevent slipping.
- Keep your workspace tidy to avoid accidents.
Taking your time and staying alert keeps the project fun and safe.

Credit: www.youtube.com
Where To Find Plans And Inspiration
If you want more ideas or detailed plans, many resources are available online and in books. Websites like Family Handyman offer free plans with step-by-step photos. Social media sites like Pinterest and Instagram also have creative examples.
Visiting furniture stores can inspire your design. Take pictures or notes, and think about how to adapt what you like to your skills and budget.
Frequently Asked Questions
How Long Does It Take To Build A Bedside Table?
For most people, building a simple bedside table takes 6 to 10 hours. This includes cutting, sanding, assembly, and finishing. If you add drawers or detailed features, allow extra time.
What Tools Do I Absolutely Need?
The essential tools are a saw, drill, screwdriver, measuring tape, and sandpaper. More advanced tools like a miter saw or pocket hole jig can make the process easier but are not required for basic tables.
Can I Build A Bedside Table Without Power Tools?
Yes, it’s possible to use hand tools only, such as a handsaw and manual screwdriver. It will take more time and effort, but the results can still be excellent.
Which Wood Finish Is Best For A Bedside Table?
Water-based polyurethane is a good choice because it dries quickly and resists water stains. For a natural look, consider oil finishes like Danish oil. Always test the finish on a scrap piece before applying it to the table.
How Do I Make Sure My Table Is Sturdy?
Use good joinery techniques—like screws and wood glue—for all connections. Make sure the legs are even and the joints are tight. Test the table by pressing on each corner before finishing.
Building your own bedside table is more than just a weekend project—it’s a way to create something personal and lasting. With these steps, tips, and insights, you are ready to start. The process will teach you new skills and give you a unique piece of furniture you can be proud of for years.