Open concept living has become a top choice in modern homes, but arranging furniture in these large, shared spaces can feel overwhelming. There are no walls to guide you, so where do you begin? The good news: open concept layouts offer endless possibilities for comfort, style, and function—if you know how to approach them. With a little planning and the right techniques, you can create a harmonious flow between your living, dining, and kitchen areas, while making each zone feel distinct and inviting.
Whether you live in a city loft, a new build with open space, or you’ve knocked down walls in an older home, you’ll find that the key to success is understanding how furniture choices, placement, and room layout work together.
This guide will show you practical steps, pro tips, and clever insights to help you master furniture arrangement in open concept homes—no matter your style or square footage.
Understanding Open Concept Spaces
Before moving the first chair, it’s important to know what makes open concept layouts unique. These spaces combine two or more traditional rooms—like the living room, dining area, and kitchen—into one large, flowing area without walls or doors between them. This design creates a feeling of spaciousness and light, but also brings challenges:
- Lack of natural boundaries means you must define each zone yourself.
- Visual clutter can happen if furniture and décor don’t connect.
- Noise and activity from one area can easily spread to another.
But with the right arrangement, you can enjoy an open, airy home that feels both unified and purposeful.
Why Open Concept Design Is Popular
Recent real estate data shows that more than 60% of new homes in the US feature some form of open concept living. Homeowners love the increased natural light, flexibility for entertaining, and the sense of togetherness—especially for families who want to keep an eye on kids or guests while cooking.
However, many people struggle with making the space feel cozy rather than cavernous. The following sections will break down exactly how to overcome these hurdles.
Step 1: Analyze Your Space And Needs
Start by taking a good look at your open area. Every home is different, so there is no “one-size-fits-all” rule. Ask yourself:
- Where are the windows, doors, and main walkways?
- How does the light move through the space during the day?
- What are your main activities? (e.g., watching TV, family meals, working from home)
- How many people use each area daily?
Draw a simple floor plan or take a few photos. Measure the entire space as well as any architectural features (fireplaces, stairs, columns). This will help you avoid buying furniture that’s too large or small.
Non-obvious insight: Don’t forget to consider the view from every angle. In an open concept home, you’ll see your furniture from multiple sides, not just the front.
Step 2: Define Distinct Zones
One of the biggest mistakes in open concept design is letting everything blend together. Instead, create clear “zones” for each main activity. The most common zones are:
- Living area: For relaxing, conversation, or watching TV
- Dining area: For meals, homework, or games
- Kitchen zone: For cooking and gathering
You might also need a home office area, a play space, or a reading nook.
How To Define Zones
- Use rugs: A large area rug anchors each zone and instantly creates a “room within a room.”
- Arrange furniture in groups: Place sofas, chairs, and coffee tables together to form a cozy gathering spot.
- Try open shelving or low cabinets: These act as gentle dividers without blocking light or views.
- Lighting: Hang a pendant over the dining table, use floor lamps near the sofa, and install under-cabinet lighting in the kitchen. Lighting helps signal the purpose of each area.
Non-obvious insight: Leave at least 36 inches of open space for walkways between zones. This keeps traffic flowing and prevents bottlenecks.
Step 3: Plan Your Layout With Function In Mind
Once you’ve marked out your zones, think about how people will move through the space. The best open concept layouts feel intuitive and natural.
Traffic Flow
- Main paths should be direct and unobstructed. For example, you should be able to walk from the kitchen to the living area without weaving around chairs.
- Arrange sofas and chairs so they face each other for conversation, but don’t block sightlines to other zones.
Furniture Placement Basics
- Anchor the living area with the largest piece (usually the sofa) facing the main focal point—like a TV, fireplace, or window.
- Dining tables should be close to the kitchen, but not block the main walkway.
- Accent chairs or benches can fill awkward corners or create a transition between areas.
Example Layout
Here’s a simple example of a functional open concept layout:
| Zone | Key Furniture | Placement Tips |
|---|---|---|
| Living Area | Sofa, coffee table, two chairs | Anchor with rug, position sofa facing TV/fireplace |
| Dining Area | Table, 4-6 chairs | Near kitchen, allow 36″ around for chairs |
| Kitchen | Island, stools | Island as divider, stools on living room side |
Pro tip: If you entertain often, leave extra space for guests to move between zones.
Step 4: Choose The Right Furniture
Not all furniture works well in open concept spaces. Look for pieces that are attractive from all sides and versatile in function.
What To Look For
- Low-back sofas and chairs keep sightlines open.
- Modular sectionals can be rearranged for parties or movie nights.
- Round dining tables make it easier to walk around and fit more guests.
- Storage ottomans and benches add seating and hide clutter.
What To Avoid
- Oversized, bulky pieces can make the space feel crowded.
- Tall bookcases or solid screens block light and create “dead zones.”
- Matching sets often look too formal for open layouts—mix materials and shapes for a relaxed feel.
Non-obvious insight: Floating furniture (not pushed against the walls) works best. This lets you define zones and makes cleaning easier.
Step 5: Use Visual Cues For Unity
While you want each zone to feel separate, the whole space should also feel connected. Use visual tricks to tie everything together.
Color Palette
Choose a main color and two or three accent colors for the entire open space. For example, use soft grays, navy, and wood tones throughout. This creates harmony and prevents clashing.
- Paint all walls the same neutral color for a seamless look.
- Add pops of color with pillows, art, or rugs in each zone.
Materials And Textures
Mix wood, metal, glass, and textiles for depth, but repeat similar finishes across zones. For example, if your dining chairs are oak, add a wood coffee table in the living area.
Repeat Patterns
Use similar shapes or patterns in different zones. For example, geometric cushions in the living area and a geometric runner in the kitchen.
Pro tip: If your kitchen has stainless steel appliances, echo the finish with metal lamp bases or curtain rods in other zones.
Step 6: Focus On Focal Points
Every zone should have one main focal point—something that draws the eye and defines the area.
Living Area
- Fireplace, TV, or large window
- Statement artwork or a gallery wall
Dining Area
- Dining table with a bold centerpiece
- Pendant light or chandelier above the table
Kitchen
- Island with pendant lights
- Open shelving with attractive dishes
Arrange your furniture to face the focal point in each area. If you have an awkward layout, create a “faux” focal point with art or a decorative screen.
Non-obvious insight: Don’t let focal points compete. If your TV and fireplace are side by side, choose one as the main anchor and style the other as secondary.
Step 7: Balance Openness And Privacy
Open concept homes are great for gatherings, but sometimes you need a bit of privacy. Smart furniture arrangement can help.
Strategies For Semi-private Zones
- Use a tall plant or open shelving as a soft divider.
- Place a console table behind the sofa to create a boundary.
- Add curtains or sliding panels for temporary separation (especially useful for a home office or guest area).
When To Use Screens
Screens can be helpful, but use them sparingly. Too many solid dividers defeat the purpose of open concept living. Try folding screens in light colors or with cut-out patterns for a stylish look.
Step 8: Make The Most Of Lighting
Lighting is one of the most powerful tools for defining zones and setting the mood.
Layered Lighting
Use a mix of:
- Ceiling fixtures: Chandeliers, pendants, or recessed lighting for overall brightness.
- Task lighting: Under-cabinet lights, reading lamps, or desk lamps for work zones.
- Accent lighting: Wall sconces, picture lights, or LED strips to highlight art or architectural features.
Dimmers And Smart Controls
Install dimmer switches or smart bulbs so you can adjust the lighting for movie nights, dinner parties, or quiet evenings.
Example Lighting Plan
| Zone | Main Light | Accent Light |
|---|---|---|
| Living Area | Floor lamp | Wall sconces, table lamps |
| Dining Area | Pendant light | Candles, dimmable fixture |
| Kitchen | Recessed lights | Under-cabinet lights |
Pro tip: Lighting can help balance natural light. If one area is darker than others, use extra lamps to even out the feel.
Step 9: Solve Common Open Concept Challenges
Even the best plans can run into trouble. Here’s how to handle the top problems people face:
Echo And Noise
Open spaces can be noisy. Add plenty of soft materials—rugs, curtains, upholstered chairs—to absorb sound.
Clutter
Without walls, clutter can quickly spread. Use baskets, cabinets, and ottomans with storage to keep things tidy.
Awkward Corners
Fill empty corners with plants, a reading chair, or a small desk. Avoid leaving them empty, as they can make the space feel unfinished.
Cold Or Uninviting Feel
Layer throws, pillows, and area rugs for warmth. Use warm metals (brass, gold) and wood tones to soften the look.
Step 10: Personalize Each Zone
The beauty of open concept living is the chance to show your style. Make each zone reflect your personality while keeping the overall space harmonious.
Living Area Ideas
- Family photos in matching frames
- Your favorite books or art pieces
Dining Area Tips
- Seasonal centerpieces (flowers, candles, fruit bowls)
- Unique chairs or a bench for a casual vibe
Kitchen Touches
- Display pretty dishes or cookbooks
- Use colorful barstools or pendant lights
Step 11: Combine Flexibility With Stability
Your open concept space should adapt to your life. Choose a few anchor pieces (sofa, dining table) that don’t move, but use lighter pieces (stools, chairs, ottomans) that can be rearranged as needed.
Pro tip: Keep extra stools or folding chairs nearby for parties, but store them out of sight when not in use.
Step 12: Don’t Forget Scale And Proportion
It’s easy to misjudge size when shopping for open concept furniture. Measure carefully and use painter’s tape on the floor to visualize the footprint of each piece before buying.
Quick Scale Guide
- Sofa: 84″ is a common length for open spaces
- Area rug: At least 8′ x 10′ for living zones, all front legs of furniture on the rug
- Dining table: Leave 36″ around all sides for chairs to move
Pro tip: If your ceilings are high, choose taller bookcases or artwork to balance the space.
Step 13: Use Plants And Greenery
Plants bring life and color to open concept homes. They can also serve as subtle dividers or focal points.
- Use a tall fiddle leaf fig or palm to separate zones
- Group smaller plants on shelves or tables
- Try hanging planters to add interest without taking up floor space
Non-obvious insight: Plants also improve air quality and reduce noise.
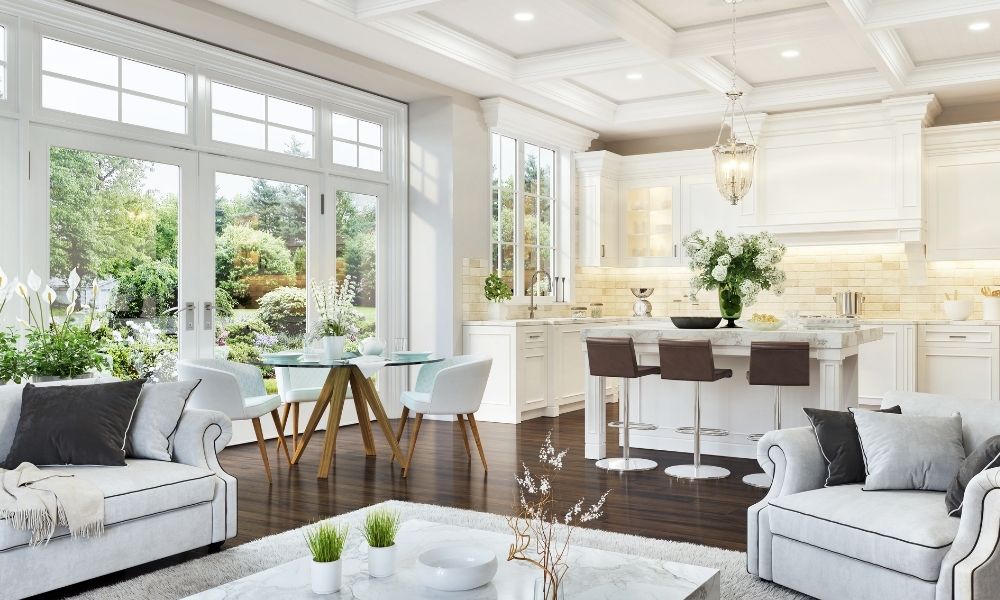
Credit: www.supernovafurniture.com
Step 14: Make Room For Special Activities
If you have hobbies, kids, or special needs, carve out space for them:
- Reading nook with a comfy chair and lamp
- Kids’ play area with washable rug and baskets for toys
- Home office zone with a small desk and shelves
Use portable dividers, bookcases, or even a curtain to set off these areas when needed.
Step 15: Refresh And Rearrange Seasonally
Don’t be afraid to change things up! Swap out throw pillows, move chairs, or try a new rug. Open concept layouts are meant to be flexible. Small changes can make the space feel new and exciting.
Pro tip: Take a photo of your arrangement and look at it on your phone. Sometimes, things you miss in person stand out in pictures.
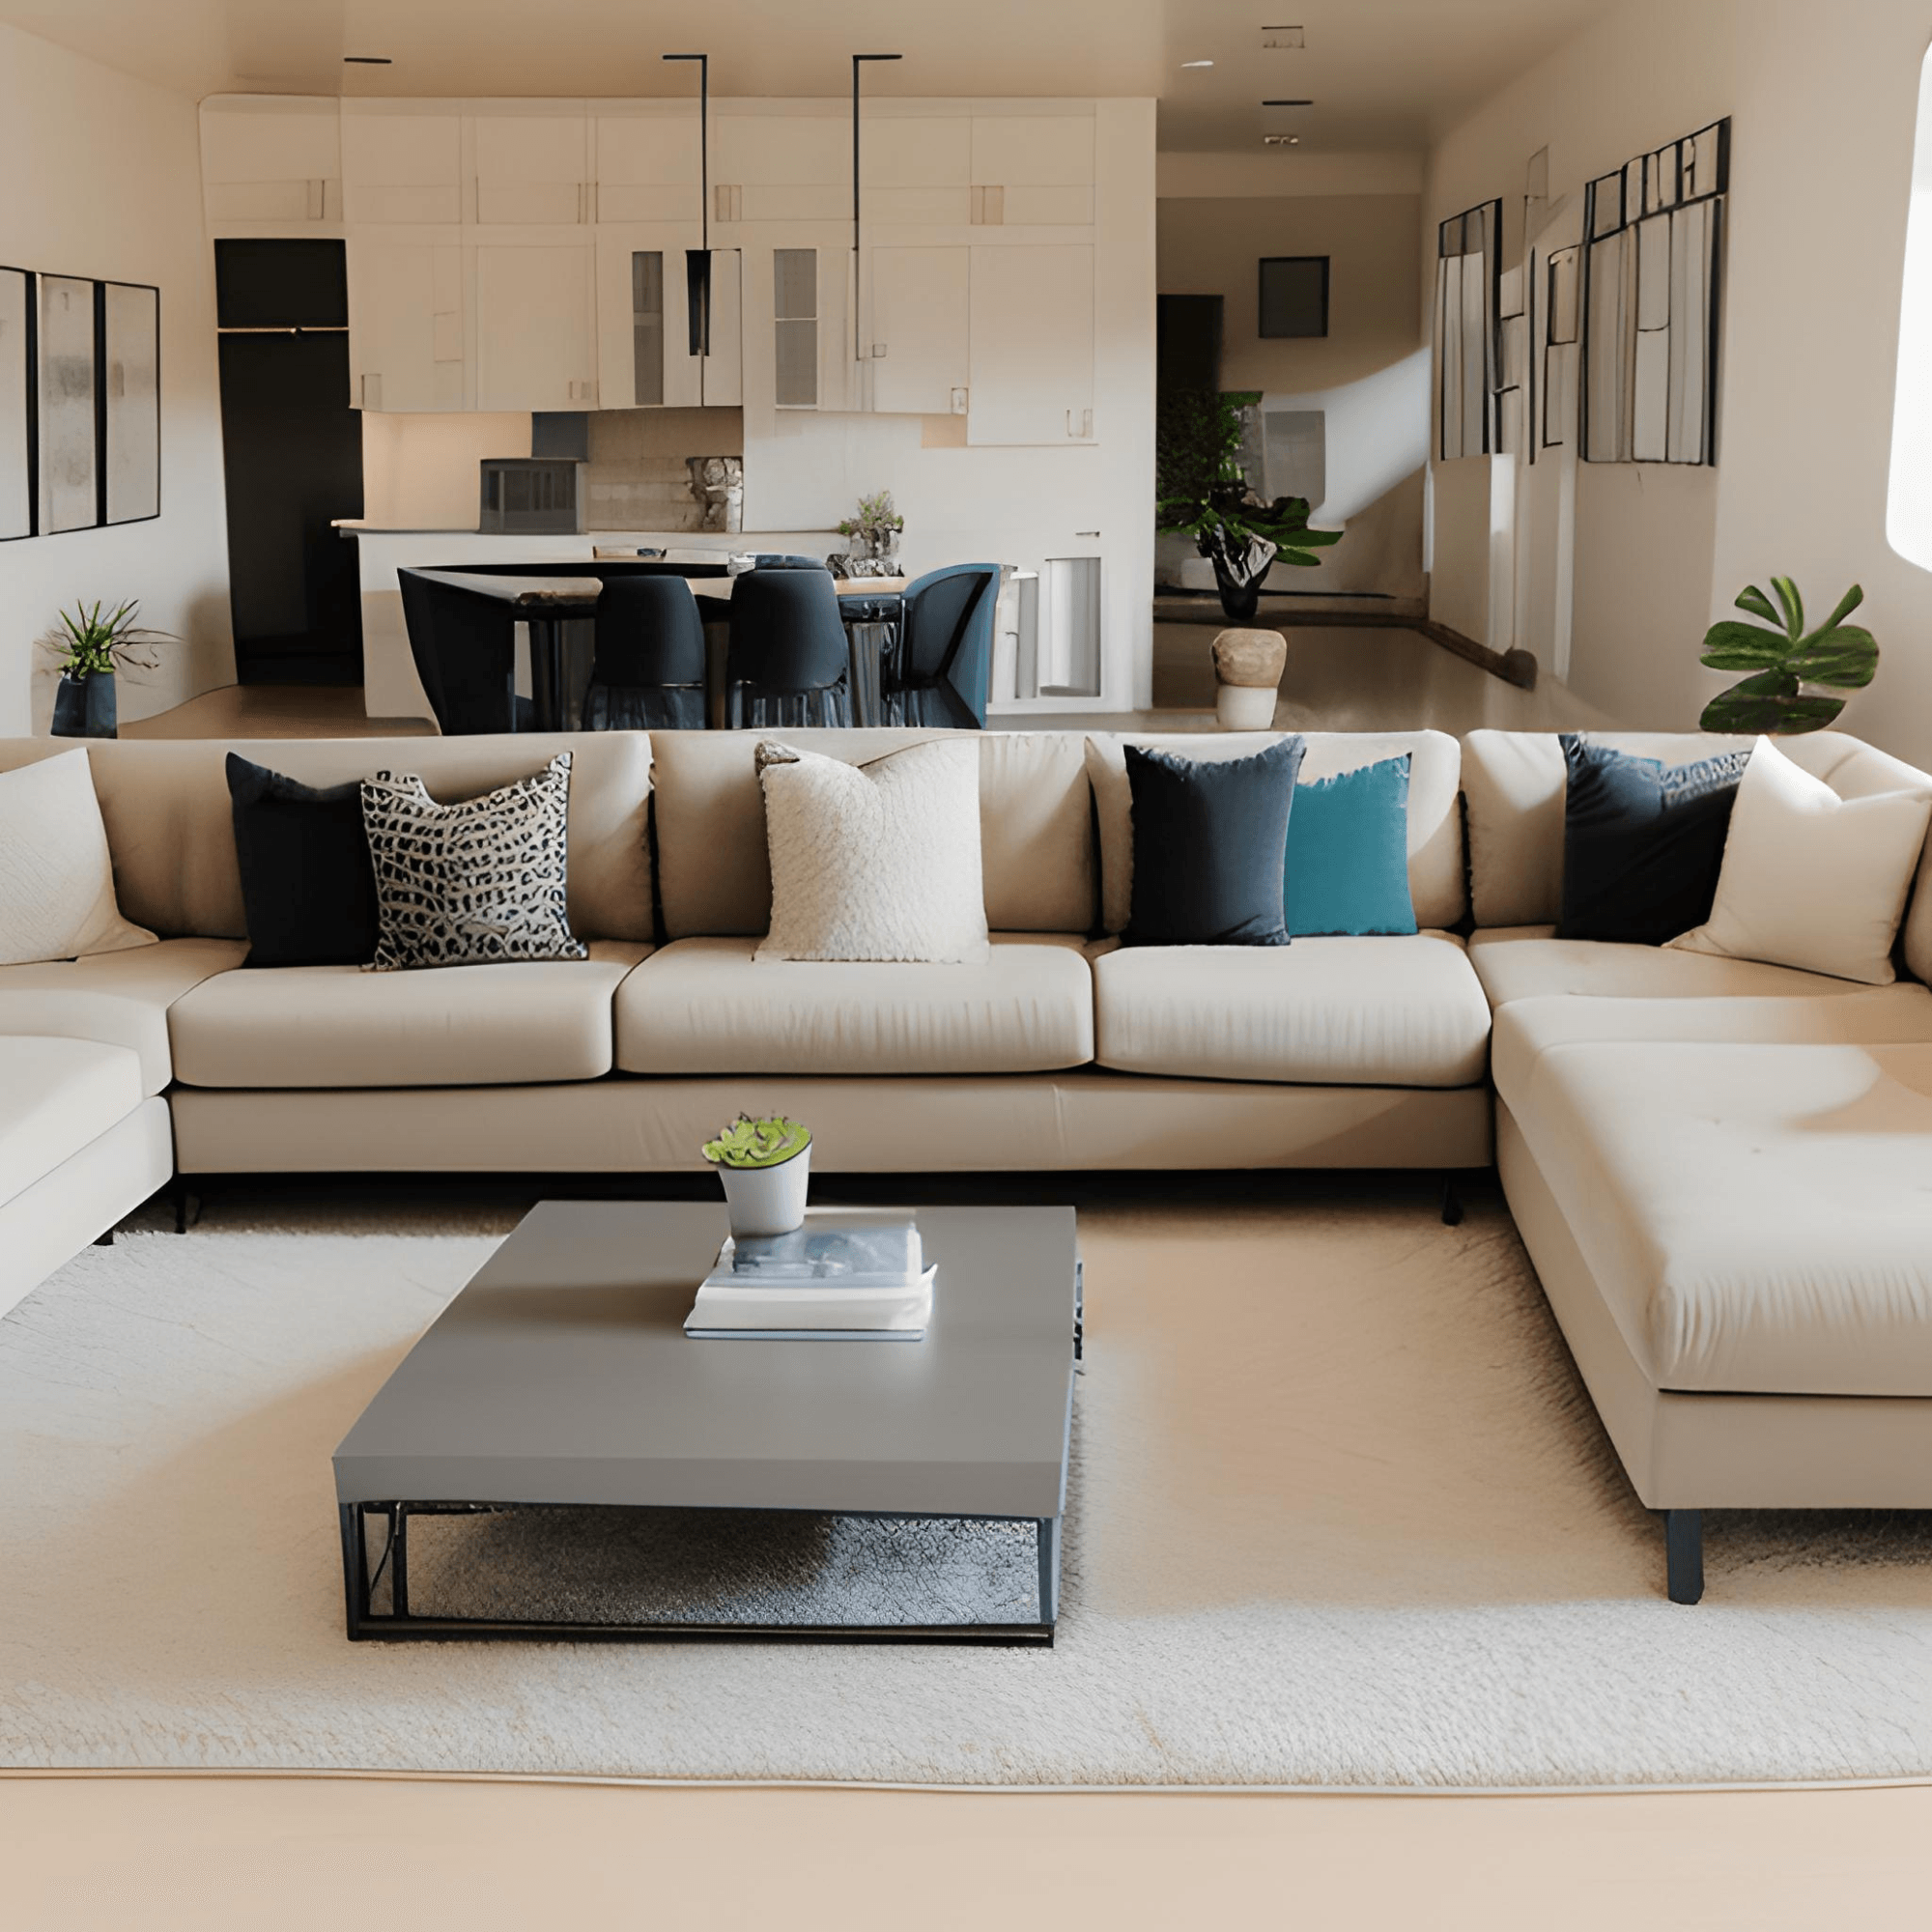
:strip_icc()/open-plan-living-room-kitchen-dd958c4b-28b16c0c13e34b1f8af712759eba92d7.jpg)
Credit: www.bhg.com
Step 16: Integrate Technology Seamlessly
With fewer walls, it’s important to hide wires and devices:
- Use cordless lamps and smart plugs
- Mount the TV on the wall or use a low console for media equipment
- Choose furniture with built-in charging stations
Non-obvious insight: Smart home hubs (lights, speakers) can control multiple zones at once, making life easier.
Step 17: Get Inspired By Real-life Examples
Look for inspiration in design magazines, blogs, or open houses in your area. Notice how furniture arrangement affects the feel of the space.
For more in-depth examples and open concept design ideas, visit Houzz.
Step 18: Common Mistakes To Avoid
Even with the best intentions, it’s easy to make mistakes. Here are some to watch out for:
- Ignoring walkways: Make sure people can move easily between zones.
- Forgetting about lighting: Don’t rely on one ceiling fixture—layer your lights.
- Too much matching: Mix materials and colors for a welcoming look.
- Not measuring: Oversized furniture can ruin flow; always check dimensions.
- Over-accessorizing: Too many decorations can look cluttered.
Step 19: Sample Open Concept Layouts
To help you picture the possibilities, here are two sample layouts:
Small Open Concept (under 700 Sq Ft)
- Small sofa and one armchair centered on a rug
- Round dining table for four
- Compact kitchen island with two stools
- Use a bookshelf as a divider between living and dining
Large Open Concept (over 1500 Sq Ft)
- Sectional sofa facing the fireplace, two accent chairs
- Long dining table for eight with sideboard
- Large kitchen island with four stools, pendant lights
- Reading nook by the window, home office behind a folding screen
Step 20: When To Call A Professional
If you’re stuck or want a truly custom look, consider hiring an interior designer. They can create a 3D plan, recommend furniture, and help with tricky lighting or wiring.
Non-obvious insight: Many furniture stores offer free or low-cost design help if you buy from them—ask before you shop.
Frequently Asked Questions
How Do I Choose The Right Rug Size For Open Concept Spaces?
Pick a rug large enough so that at least the front legs of all major furniture pieces are on it. For living areas, an 8′ x 10′ or larger rug works well. In dining zones, the rug should extend at least 24 inches beyond all sides of the table to allow chairs to slide out easily.
Can I Use Different Color Schemes In Each Zone?
It’s best to keep the main color consistent and use accent colors to give each zone its own personality. For example, use a neutral base throughout, but try blue accents in the living area and green in the dining area.
This keeps the space unified but not boring.
What If My Open Concept Space Feels Too Empty?
Add layers with area rugs, curtains, and plenty of pillows. Use bookcases, plants, or a console table to fill large gaps. Don’t be afraid to group furniture in the center of the room—floating arrangements often look better than lining everything up along the walls.
How Can I Make My Kitchen Blend With The Living And Dining Areas?
Repeat materials and colors from the kitchen in your furniture and décor. For example, if you have stainless steel appliances, use metal lamp bases or a silver-framed mirror in the living area. Open shelving with pretty dishes can also create a visual link.
Is It Okay To Have The Tv Visible From The Kitchen And Dining Zones?
Yes, as long as it doesn’t dominate the whole space. Mount the TV on a swivel bracket so it can face different directions, or use a low console to make it less noticeable. Balance technology with art, books, or plants for a more relaxed look.
Creating a beautiful, functional open concept home is all about balance—between unity and variety, openness and privacy, style and comfort. Use these strategies, trust your instincts, and don’t be afraid to rearrange until your space feels just right. With a little creativity, your open concept layout can become your favorite part of your home.
Credit: thea2zfurniture.com