Applying polyurethane to wood floors can make them look beautiful and last longer. However, many homeowners and even professionals struggle with one big problem: bubbles. These small air pockets can ruin a smooth finish and make your hard work look unprofessional. If you want to achieve a glass-like surface without bubbles, you need to understand what causes bubbles and how to prevent them. This guide will show you every step, from preparation to application and drying, so you can confidently apply polyurethane to wood floors without bubbles—even if it’s your first time.
Why Polyurethane Is Used On Wood Floors
Polyurethane is popular for wood floors because it forms a hard, protective layer. This coating helps protect the wood from scratches, water, and stains. There are two main types: oil-based polyurethane and water-based polyurethane. Oil-based types add a warm, amber color and are more durable, but they take longer to dry. Water-based types dry faster and have less odor, but may need more coats for full protection. Both can look great if applied correctly.
People choose polyurethane for more than just looks. It creates a seal that blocks out moisture, which is important in kitchens or entryways where water spills are common. Polyurethane also makes cleaning easier—dirt and dust sit on top and can be swept away, instead of soaking into the wood grain.
Another big reason people use polyurethane is for long-term savings. Replacing or repairing damaged wood floors is expensive. A good polyurethane finish can delay the need for sanding or refinishing by several years. Some new formulas even offer extra resistance to chemicals or UV rays, which is useful in sunny rooms.
Non-obvious insight: Polyurethane is not just for new floors. It can also refresh old, dull floors. Many older homes have floors that look worn, but a few coats of polyurethane can bring back the shine and protect the wood underneath.
Understanding What Causes Bubbles
Before you start, it’s important to know why bubbles happen. They usually appear because air gets trapped in the polyurethane film while it’s wet. Here are some common reasons:
- Shaking the can – This adds air to the liquid.
- Using the wrong brush or roller – Foam or rough rollers trap air.
- Applying too quickly – Fast strokes make turbulence.
- High humidity or heat – These conditions speed up drying, trapping air.
- Dirty or oily floors – Contaminants make bubbles more likely.
Beginners often overlook how much preparation and environment affect the finish. Even the best polyurethane can bubble if your tools or wood aren’t clean.
Sometimes, bubbles can also come from invisible problems in the wood. For example, old floors may have tiny cracks where moisture is trapped. When polyurethane goes on, the water or air escapes as bubbles. Also, if you step on the floor during drying, even lightly, you might force air up through the finish.
Extra tip: If you live in a new house, the wood may still be releasing moisture. This can make bubbling more likely, especially in humid climates.
Credit: www.oldworldtimber.com
Gathering The Right Tools And Materials
Having the right tools makes a big difference. Here’s what you’ll need:
- Polyurethane (oil- or water-based, depending on your preference)
- High-quality bristle brush (natural bristles for oil-based, synthetic for water-based)
- Lambswool applicator (for large areas)
- Lint-free rags
- Mineral spirits (for cleaning oil-based polyurethane)
- Vacuum and tack cloth
- Sandpaper (120, 150, and 220 grit)
- Stir sticks (never shake the can)
- Protective gloves and mask
- Painter’s tape
Pro tip: Do not use foam rollers or cheap brushes. They can introduce bubbles and leave marks.
It’s also smart to have extra light—like a portable work light or headlamp. Good lighting helps you spot bubbles or missed spots while the finish is still wet and easy to fix. Some people use knee pads or shoe covers to avoid dust from socks or skin.
Non-obvious insight: Use a clean, dedicated vacuum for dusting floors. Vacuums used for other jobs may blow out old dust, contaminating your clean surface.
Preparing The Floor: The Most Important Step
A smooth finish always starts with preparation. This step takes time, but skipping it almost guarantees bubbles or other problems.
Cleaning The Floor
First, remove all furniture and rugs. Sweep and vacuum the floor thoroughly. Even small dust particles can cause bubbles or rough spots. After vacuuming, wipe the floor with a damp, lint-free cloth and let it dry completely.
If your floor has sticky spots or old spills, use a little dish soap and water to clean, but do not soak the wood. Too much water can damage the floor and lengthen drying time. Once clean, let the floor air-dry at least an hour.
Sanding The Surface
Next, sand the floor. Start with 120-grit sandpaper for old finishes or 150-grit for new wood. Sand with the grain, not against it. After sanding, vacuum again and wipe with a tack cloth to remove all dust.
For large rooms, a pole sander or buffer with sanding screens works faster and keeps pressure even. Edges may need hand sanding.
Non-obvious insight: Many people use household rags for cleaning. These can leave lint, which becomes trapped in the finish. Always use a tack cloth made for woodworking.
If your floor had carpet before, check for nails or staples—they must be removed to avoid scratches or bubbles later.
Checking For Moisture And Contaminants
The floor must be dry and free from oils or wax. If you see shiny spots, clean with mineral spirits and let dry. Moisture meters can help you check if the wood is dry enough (usually below 12% moisture content).
If you’re not sure about wax, drop a little water on the floor. If it beads up, there may be wax or oil. Remove it with a special wood floor cleaner or mineral spirits.
Setting Up The Room For Application
Your environment matters as much as your technique.
- Keep windows closed to avoid dust but make sure there is enough airflow for drying.
- Turn off fans and vents; moving air can blow dust onto wet polyurethane.
- Control temperature between 65°F and 75°F and humidity below 60%. High heat or humidity causes bubbles and slows drying.
If you have a central heating or cooling system, turn it off for a few hours during application. If needed, use a dehumidifier to keep the humidity steady.
Overlooked tip: If you have pets, keep them out. Hair and dander stick to wet finishes.
For best results, avoid working on windy or rainy days. Changes in weather can affect drying and increase the risk of bubbles.
Choosing The Right Polyurethane
Both oil- and water-based polyurethanes can produce a bubble-free finish. Your choice depends on your needs:
| Type | Dry Time | Durability | Color Change | Odor |
|---|---|---|---|---|
| Oil-based | 8-12 hours between coats | Very high | Amber tint | Strong |
| Water-based | 2-4 hours between coats | High | Clear | Low |
Common mistake: Switching between types without testing. Some water-based finishes do not bond well over oil-based stains.
If you want a natural look, water-based is best. For a traditional, warm glow, oil-based is better. For busy homes, water-based lets you finish faster since it dries quickly. Some brands also offer fast-drying oil-based formulas, but these can be harder for beginners since they give less time to fix mistakes.
Preparing The Polyurethane
Proper handling of the can is critical.
- Do not shake the can. Shaking adds air that creates bubbles. Instead, open the can and stir gently with a clean stir stick. Scrape the bottom and mix slowly.
- Pour polyurethane into a paint tray or wide container. This makes it easier to load your brush or applicator evenly.
If you need to use part of a can and save the rest, pour out only what you need and seal the can tightly. Leaving the can open allows moisture and dust inside, which can affect the next coat.
Non-obvious insight: If you see bubbles after stirring, let the polyurethane sit for 5–10 minutes before starting.
If your polyurethane is old or has lumps, filter it through a paint strainer or clean nylon stocking to remove clumps. This prevents both bubbles and rough spots.
Using The Correct Applicator
The applicator you choose affects the final look.
- Natural bristle brushes are best for oil-based polyurethane.
- Synthetic brushes work well with water-based types.
- Lambswool applicators are ideal for large, open areas.
Avoid foam brushes and rollers—they push air into the finish.
For edges or corners, use a small brush for control. For large rooms, a lambswool or microfiber pad helps spread the finish evenly. Always clean new applicators before first use to remove loose fibers.
Extra insight: Some pros use a spray gun for big jobs, but this requires skill and safety gear. Beginners get better results with a brush or lambswool.
Application: Step-by-step For Bubble-free Results
Applying polyurethane is not difficult, but the right method is key.
1. Start In A Small Area
Always begin in a corner or along the edge of the room. Work in sections about 2–3 feet wide. This lets you keep a wet edge, which helps blend each area smoothly.
If you’re right-handed, work left to right so you don’t step over finished areas. Plan your path so you don’t get trapped in a corner.
2. Dip And Tap, Don’t Overload
Dip your brush or applicator into the polyurethane, then gently tap off excess on the side of the container. Don’t wipe or press down hard. Overloading the brush causes drips and bubbles.
Reload your brush often rather than squeezing out every drop. This keeps your strokes smooth and prevents drag marks.
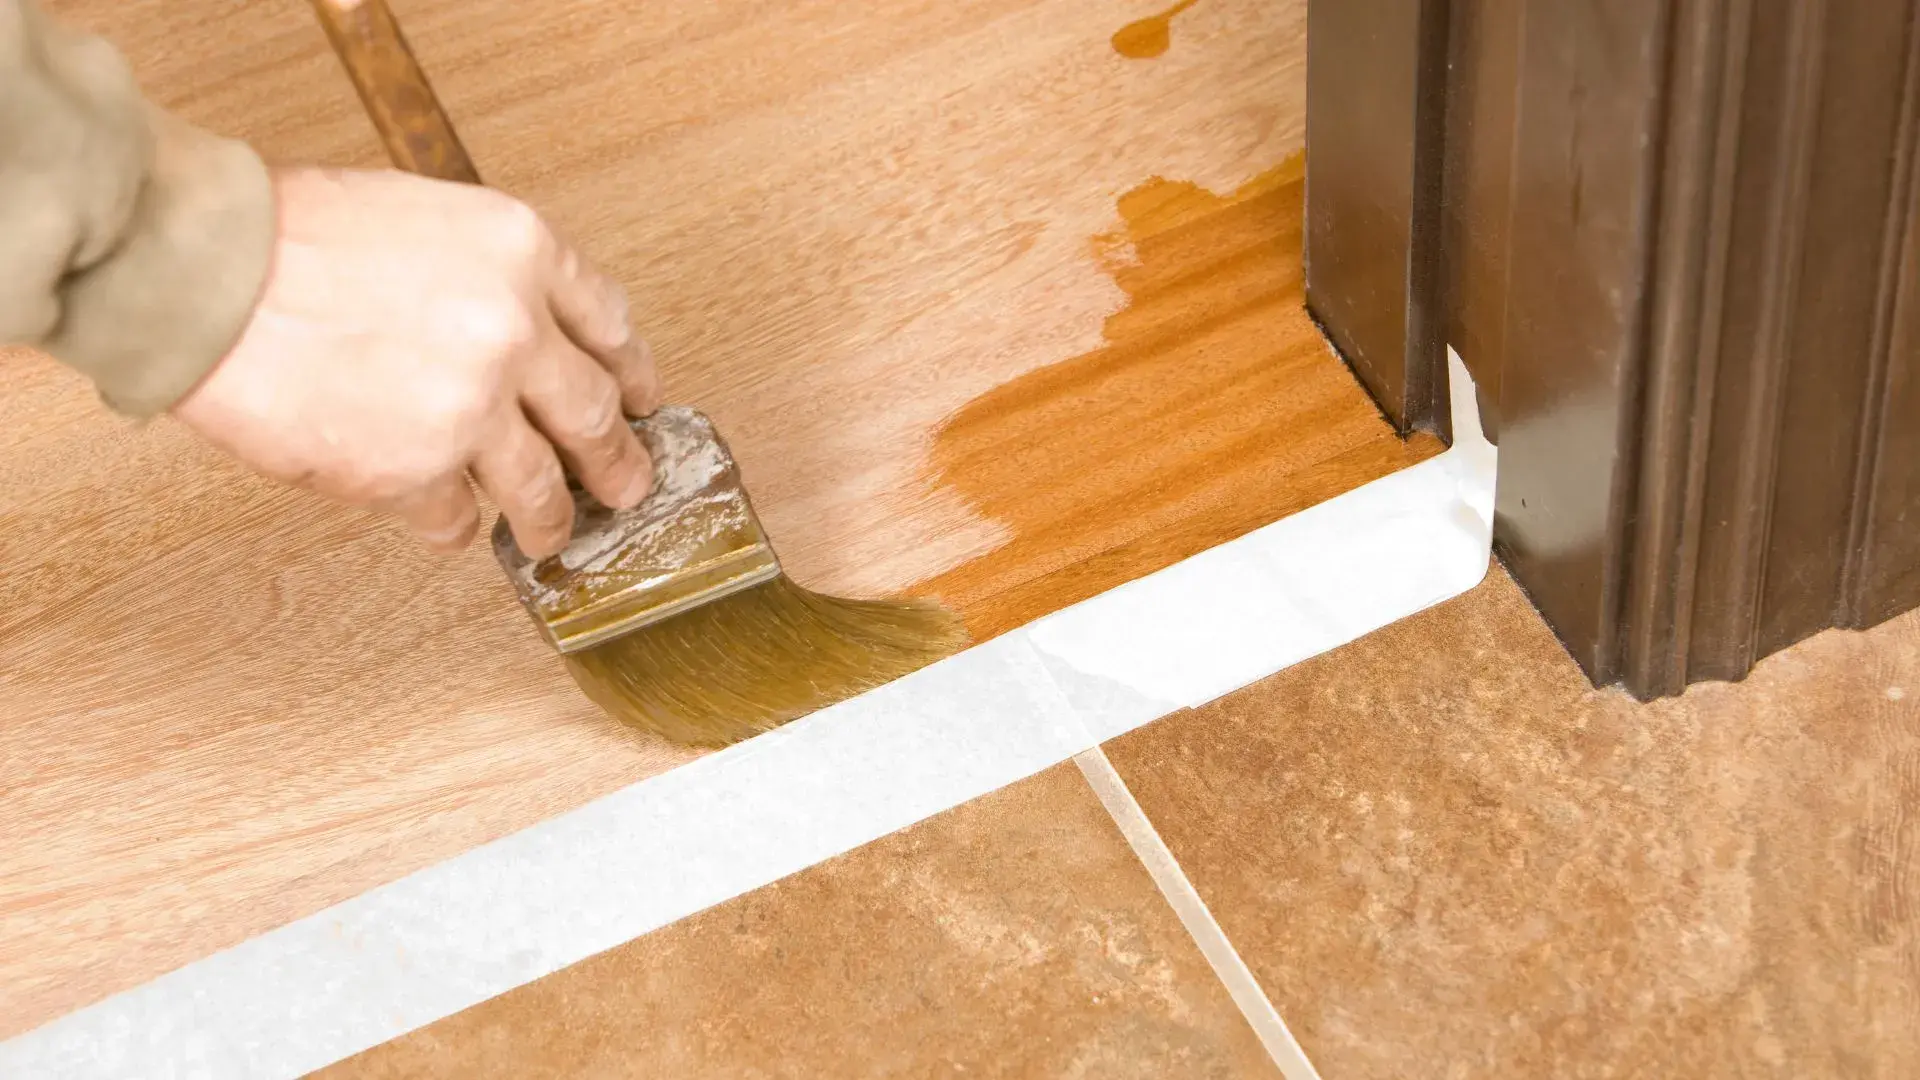
3. Apply With The Grain
Brush or drag the applicator with the wood grain. Use long, gentle strokes. Try not to go back and forth over the same spot. Each time you do, you risk trapping air.
If you see a missed spot, wait for the first layer to dry, then touch up. Over-brushing wet polyurethane is a common cause of bubbles.
4. Maintain A Wet Edge
Work quickly enough that each new stroke blends into the last before it dries. This is called “keeping a wet edge. ” It prevents marks and bubbles.
If you have to stop for a break, end at a natural break in the floor, like a doorway or seam.
5. Inspect As You Go
Look at the floor from different angles. If you see bubbles, lightly pass the tip of your brush over them to pop them. Do this gently—pressing too hard can make it worse.
Pro tip: If you see stubborn bubbles, stop and let the floor dry. Sand lightly and apply another coat. Trying to fix wet polyurethane often makes more bubbles.
For the cleanest results, check your shoes and clothes for dust before you start. Even a tiny bit can fall into the finish.
Drying And Sanding Between Coats
Most floors need at least two or three coats. Here’s how to handle drying and sanding:
- Wait for full drying time (see the table above).
- Sand lightly between coats with 220-grit sandpaper. This smooths out any minor bubbles or dust.
- Clean thoroughly with a vacuum and tack cloth before each new coat.
If you notice rough spots or raised grain, don’t press harder when sanding. Instead, use gentle, even pressure and let the sandpaper do the work.
Mistake to avoid: Skipping sanding between coats. It helps the next layer stick and removes flaws.
If you want a high-gloss finish, add an extra coat and sand carefully before the final layer. This helps create a mirror-like surface.

Credit: www.atlaswoodfloors.net
Troubleshooting: If You Get Bubbles Anyway
Even with care, bubbles sometimes appear. Here’s how to fix them:
- Small bubbles: Let the coat dry fully, then sand the area with 220-grit sandpaper. Wipe clean and apply another coat.
- Large or many bubbles: You may need to sand more deeply, clean well, and reapply.
If bubbles appear in the same spot every time, check for a hidden problem like moisture or old wax.
Important: Do not try to wipe away bubbles while the finish is wet. This usually makes them worse.
If the whole floor is covered in bubbles, it may be faster to let it dry, sand down the whole surface, and start again with thinner coats.
Polyurethane Application Methods Compared
Different tools and methods can affect your results. Here’s how they compare:
| Method | Bubble Risk | Best For | Ease of Use |
|---|---|---|---|
| Bristle brush | Low (if used correctly) | Edges, small rooms | Easy |
| Lambswool applicator | Low | Large floors | Moderate |
| Foam roller | High | Not recommended | Easy, but bubbly |
Real-life example: Many DIYers use foam rollers for speed, but almost always get bubbles. Professionals stick with lambswool or quality brushes.
Another option is a microfiber pad. These can be good for water-based polyurethane, but must be cleaned before use. If the pad sheds fibers, they can get stuck in the finish.
Advanced Tips For A Flawless Finish
- Strain polyurethane through a fine mesh or paint strainer if you see particles. This removes dust that can cause bubbles.
- Don’t rush. Rushing leads to thick coats and air pockets.
- Work at the right time of day. Mornings or evenings are better than midday when the room is hottest.
- Apply thin coats. Thick layers trap more air and take longer to dry.
- Use a pole sander for large floors to keep pressure even.
- Watch out for overlapping. When starting a new section, overlap slightly into the previous wet area.
Overlooked detail: Always check the manufacturer’s instructions. Some newer polyurethanes have special requirements.
Some people add a few drops of mineral spirits to oil-based polyurethane to help it flow better and reduce bubbles. Do this only if recommended by the manufacturer.
If you want a super-smooth finish, consider wet-sanding the final coat with very fine sandpaper (400 grit or higher) after it dries, then buff with a soft cloth.
Common Mistakes Beginners Make
- Shaking the can—Always stir, never shake.
- Skipping prep—Clean and sand thoroughly.
- Using foam rollers—Stick to brushes and lambswool.
- Applying too much at once—Thin coats are best.
- Not sanding between coats—This step is essential for smoothness.
- Ignoring temperature and humidity—Both can create bubbles if too high or low.
- Walking on the finish too soon—Wait at least 24 hours before walking, and longer before placing furniture.
Another common mistake is applying polyurethane in direct sunlight. Sunlight can heat the floor, making the finish dry too quickly and trapping bubbles.
Beginners sometimes forget to mask off baseboards or adjacent rooms. Use painter’s tape and plastic sheeting to avoid splatters.
Safety And Clean-up
Polyurethane fumes can be strong, especially oil-based types. Always wear a mask and gloves. Open windows for a short time after finishing, but avoid dust and debris. Clean brushes with mineral spirits (oil-based) or soap and water (water-based).
Dispose of rags and applicators safely, as they can catch fire if left in a pile (spontaneous combustion risk).
Always wash your hands and arms after working, especially before eating or touching your face.
If you spill polyurethane, wipe it up immediately with a rag and cleaner. Dried drips are difficult to remove without sanding.
Final Inspection And Curing
After your last coat, let the floor cure. Polyurethane may feel dry to the touch in a few hours, but it takes days to harden fully. Avoid heavy traffic and moving furniture for at least 72 hours. For best results, wait a week before placing rugs.
Pro tip: Place felt pads under furniture legs to avoid scratches.
Walk the entire floor in good light. Look for missed spots, bubbles, or drips. If you find problems, lightly sand and touch up only the affected area. The finish will blend as it cures.
If you want a high-gloss look, buff the cured floor with a soft pad after a week.

Credit: g3flooring.com
When To Hire A Professional
If your floor is very old, damaged, or valuable, consider hiring a pro. They have tools (like commercial buffers and vacuum systems) that produce flawless results faster. However, with patience and the right steps, most people can achieve a high-quality finish themselves.
A professional may also be better if you have allergies or need to finish a large area quickly. They can apply specialized finishes that dry in hours, using equipment most homeowners do not have.
Frequently Asked Questions
How Many Coats Of Polyurethane Should I Apply To Wood Floors?
Most floors need at least two to three coats of polyurethane. High-traffic areas may need four coats for extra durability. Always sand lightly and clean between each coat for the best finish.
Can I Apply Water-based Polyurethane Over Oil-based Stain?
Yes, but the oil-based stain must be fully dry (at least 48 hours) and lightly sanded. Some water-based polyurethanes need a special primer when going over oil-based stain. Check the manufacturer’s instructions.
How Long Does Polyurethane Take To Cure Completely?
Polyurethane dries to the touch in a few hours, but full curing takes 7–14 days. Avoid heavy furniture and rugs during this time. Water-based types cure faster than oil-based.
What Should I Do If I Notice Bubbles After The Polyurethane Has Dried?
Sand the affected area lightly with 220-grit sandpaper, clean the dust, and apply a thin new coat. Do not try to pop or scrape bubbles while the finish is wet.
Is There A Way To Avoid Strong Odors When Using Polyurethane?
Choose water-based polyurethane if you are sensitive to smells. Open windows briefly after application, but keep dust out. Always wear a mask for safety.
If you want more details on polyurethane types and their chemistry, see this Wikipedia article.
Applying polyurethane to wood floors without bubbles is all about preparation, patience, and proper technique. By understanding what causes bubbles and following the right steps, you can achieve a finish that looks professional and lasts for years. Take your time and enjoy the transformation of your wood floors.