No, you don’t need to charge your Nest Thermostat before installing it. The Nest Thermostat draws power directly from your HVAC system.
It gets charged through the wires connected to your heating and cooling system. Installing a smart thermostat like the Nest can improve home comfort and save energy. But many wonder if they need to charge it before setting it up.
The answer is simple: the Nest Thermostat uses the power from your HVAC system. This means no pre-charging is required. Understanding this can ease your installation process. Plus, it ensures your thermostat is ready to go as soon as it’s connected. So, you can focus on setting up your new device without worrying about charging first.

Credit: www.youtube.com
Nest Thermostat Basics
The Nest Thermostat is a popular smart device. It helps manage your home’s temperature. Many wonder if they need to charge it before installing. Let’s explore the basics of the Nest Thermostat.
What Is Nest Thermostat?
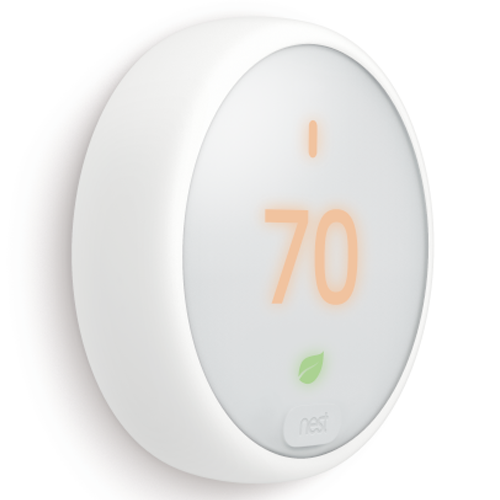
The Nest Thermostat is a smart home device. It learns your schedule and preferences. This helps it adjust the temperature automatically. It connects to your Wi-Fi network. You can control it using your smartphone or voice commands.
Key Features
The Nest Thermostat offers several key features:
- Auto-Schedule: It learns your routine and sets a schedule.
- Remote Control: Control it from anywhere with the Nest app.
- Energy History: See how much energy you’ve used.
- Home/Away Assist: It adjusts the temperature when you leave.
- Eco Temperature: Save energy when you’re away.
- Farsight: Lights up to show you the temperature, weather, or time.
These features make the Nest Thermostat a convenient choice. It not only saves energy but also improves comfort. Understanding these basics can help you decide if it’s right for your home.

Credit: www.amazon.com
Installation Process Overview
Installing a Nest Thermostat in your home can seem daunting. But with a clear understanding of the steps involved, the process becomes straightforward. This guide will walk you through the essential steps to install your Nest Thermostat, ensuring a smooth installation experience.
Tools Required
- Phillips screwdriver
- Flathead screwdriver
- Drill (if needed)
- Level (optional)
- Smartphone or tablet
Step-by-step Guide
- Turn off power: Switch off the power to your HVAC system at the breaker box.
- Remove old thermostat: Carefully detach your old thermostat from the wall. Label the wires for easy identification.
- Install the Nest base: Mount the Nest base plate on the wall. Use a level to ensure it is straight. Secure it with the provided screws.
- Connect the wires: Insert the labeled wires into the corresponding connectors on the Nest base. The connectors will click when the wires are secure.
- Attach the Nest display: Snap the Nest display onto the base. It should fit snugly.
- Turn the power back on: Go back to the breaker box and restore power to the HVAC system.
- Set up your Nest Thermostat: Follow the on-screen instructions on the Nest display. Use your smartphone or tablet to connect the thermostat to your Wi-Fi network.
Following these steps ensures your Nest Thermostat is installed correctly. The device is designed to be user-friendly, making the installation process smooth and hassle-free.
Power Requirements
Understanding the power requirements of your Nest Thermostat is crucial before installation. Ensuring that the device receives proper power will help it function optimally. This section will cover the essential aspects of the power supply.
Battery Vs. Wired Power
There are two main ways to power your Nest Thermostat: battery and wired power. The device comes with an internal battery that provides temporary power. This battery can keep the thermostat running for a short period. However, for long-term use, connecting it to your home’s wiring is better.
Wired power ensures the thermostat operates continuously without interruptions. It connects to your HVAC system and draws power directly from it. This method is more reliable than depending solely on the internal battery.
Charging The Thermostat
Before installing the Nest Thermostat, it is a good idea to charge it. Use the provided USB cable to charge the device. Plug one end into the thermostat and the other into a power source. Allow it to charge for at least an hour.
This initial charge ensures the device is ready for setup. While it will eventually draw power from your home wiring, starting with a fully charged battery helps prevent any setup issues. Keep an eye on the battery indicator to know when it is fully charged.
Credit: support.google.com
When Charging Is Necessary
Charging your Nest Thermostat before installing it can be necessary. This ensures it works correctly right from the start. But, how do you know if your Nest Thermostat needs charging? Let’s explore the signs and how you can charge it.
Signs Your Thermostat Needs Charging
Pay attention to a few key signs. The screen may be blank or unresponsive. This often indicates a low battery. Another sign is if the thermostat frequently restarts. This can be frustrating and is a clear indicator of low power. Lastly, check if there is an error message about the battery. These signs mean your thermostat needs charging before you install it.
How To Charge
Charging your Nest Thermostat is simple. First, remove it from the base. Then, use a USB cable. Plug one end into the thermostat and the other into a power source. A computer USB port or a wall adapter works well. Allow it to charge for at least an hour. Once charged, you can proceed with the installation. The thermostat will now have enough power to operate smoothly.
Common Issues
Installing a Nest Thermostat can enhance your home’s energy efficiency. Yet, many face issues during installation. Understanding these common issues can make the process smoother and less stressful.
Installation Errors
One of the most frequent problems is incorrect wiring. The Nest Thermostat requires precise wiring to function well. Incorrect wiring can cause the thermostat to not power up or function improperly.
Another common error is not turning off the power at the circuit breaker. This can be dangerous and may damage the thermostat. Always ensure the power is off before starting the installation.
In some cases, the Nest Thermostat may not sit properly on the wall plate. This can lead to poor connectivity and erratic behavior. Ensure the device is firmly attached and properly aligned.
Troubleshooting Tips
If you encounter issues, try these troubleshooting tips:
- Check the wiring. Make sure each wire is in the correct terminal.
- Ensure the power is turned back on after installation.
- Verify your Wi-Fi connection. A weak connection can affect performance.
- Update the Nest Thermostat software. This can resolve many bugs.
If the thermostat still does not work, a quick reset might help. Press and hold the thermostat ring for 10 seconds, then release. This often solves minor issues.
Benefits Of Proper Installation
Proper installation of your Nest Thermostat can offer many benefits. Charging your device before installing helps ensure smooth operation. This minor step can lead to significant advantages in energy efficiency and home comfort.
Energy Efficiency
When you install your Nest Thermostat correctly, it optimizes energy use. This smart device learns your schedule. It adjusts heating and cooling to save energy. You will notice lower energy bills. It can even suggest ways to save more. Proper installation ensures these features work as intended.
Enhanced Home Comfort
A well-installed Nest Thermostat improves home comfort. It maintains a consistent temperature. No more hot or cold spots. The device adjusts to your preferences. It keeps your home just the way you like it. This consistent comfort makes your living space more enjoyable.
Frequently Asked Questions
Do I Need To Charge My Nest Thermostat Before Installation?
No, Nest Thermostats come pre-charged. You can install it right away.
How Long Does The Nest Thermostat Battery Last?
The battery lasts a few hours. It charges from your HVAC system.
Can I Install Nest Thermostat Without Charging It?
Yes, you can install it directly. It charges while connected.
What If My Nest Thermostat Battery Is Low?
Connect it to a USB charger for a quick boost before installation.
Will Nest Thermostat Charge Itself After Installation?
Yes, it charges itself using your HVAC system during normal operation.
Conclusion
Charging your Nest Thermostat before installing is not necessary. It comes pre-charged. This ensures a smooth and quick setup. Just follow the instructions in the manual. Installation is simple and hassle-free. Enjoy energy savings and enhanced comfort. Your home will thank you.
Remember, a well-installed thermostat works efficiently. Happy installing!