Laminate flooring is popular because it is affordable, stylish, and easy to install. But there’s a catch: laminate flooring is not naturally waterproof. If water seeps into the seams or underneath, it can cause swelling, warping, or even mold. For homes with kids, pets, or kitchens and bathrooms, this is a real worry.
Many people search for ways to make their laminate flooring more water-resistant. The good news is, with the right products and techniques, you can help protect your floors from water damage. However, it’s important to understand that even the best methods won’t make standard laminate completely waterproof like tile or vinyl.
But you can greatly improve its ability to handle spills and moisture.
This guide will walk you through everything you need to know about making laminate flooring waterproof. You’ll learn about the risks, the science behind water damage, and step-by-step instructions for different waterproofing methods. We’ll also cover practical tips, mistakes to avoid, and real-life examples. Whether you’re installing new laminate or want to protect your current floors, you’ll find all the answers here.
Why Laminate Flooring Needs Waterproofing
Many people think their floors are safe because laminate looks solid and strong. But looks can be deceiving. Laminate flooring has several layers:
- A protective wear layer on top
- A printed design layer (that gives the wood look)
- A core (usually made from high-density fiberboard, or HDF)
- A backing layer for stability
The weak point is the core layer. Made mostly from wood fibers, it soaks up water like a sponge. Even a small spill that sits for too long can cause the edges to swell. Wet floors can buckle, separate, or even grow mold underneath.
Bathrooms, kitchens, laundry rooms, and basements are especially risky. But pets, kids, or even high humidity can also cause problems anywhere in the home.
Common Water Damage Problems
- Swelling at the seams – Boards push up and create uneven, bumpy floors.
- Warping or cupping – Boards curve or lift at the edges.
- Mold growth – Moisture trapped underneath can lead to health risks.
- Staining – Water can discolor the design layer.
Once this damage happens, it’s almost impossible to repair without replacing the boards.
Understanding Water Resistance Vs. Waterproof
It’s important to know the difference between “water-resistant” and “waterproof.” Many laminate floors are sold as water-resistant, but this only means they can handle small spills for a short time. Waterproof means water can sit for hours or days without causing damage—something standard laminate can’t guarantee.
Here’s a quick comparison:
| Feature | Water-Resistant Laminate | Waterproof Laminate |
|---|---|---|
| Spill Protection | Short-term (30 min – 1 hour) | Long-term (up to 24-72 hours) |
| Core Material | HDF or MDF (wood-based) | Special waterproof core (PVC or resin) |
| Installation Areas | Living rooms, bedrooms | Kitchens, bathrooms, basements |
| Cost | Lower | Higher |
Most homes have standard (water-resistant) laminate, not fully waterproof. This means you need extra steps if you want to protect your floors.

Credit: www.powerdekorgroup.com
Preparing To Waterproof Laminate Flooring
Before you start, it’s important to get ready. Skipping preparation is the number one mistake homeowners make.
Gather Your Tools And Materials
Depending on the method, you’ll need some or all of these:
- Silicone caulk (clear or matching color)
- Waterproof sealant or polyurethane coating (made for laminate)
- Foam or waterproof underlayment
- Waterproof tape (for seams and edges)
- Moisture barrier sheets (plastic sheeting or rolls)
- Applicator tools (brush, roller, caulk gun)
- Clean cloths and mild cleaning solution
Clean And Inspect
- Sweep and mop the floors. Dirt and dust can prevent sealants from sticking.
- Dry the floors completely. Sealant won’t work on damp or wet surfaces.
- Check for gaps or damage. Replace any swollen, warped, or loose boards before starting.
Choose The Right Waterproofing Method
Not all methods are equal. Some protect the surface, others target the seams or the subfloor. The best results often come from using more than one technique.
Waterproofing Methods For Laminate Flooring
Let’s look at the main ways to make your laminate flooring more waterproof. Each method has pros and cons, so choose the ones that fit your needs.
1. Sealing The Surface
Applying a surface sealant is one of the simplest ways to add water resistance. This creates a barrier that helps block spills from soaking into the boards.
What to use: Water-based polyurethane made for laminate (never use wax or oil-based, which can make the floor slippery or damage the finish).
How to apply:
- Clean the floor thoroughly.
- Use a soft brush or roller to apply a thin, even coat.
- Let it dry (usually 2-4 hours).
- Apply a second coat if needed.
Pros: Easy, affordable, and can be repeated every 1-2 years.
Cons: Only protects the top layer. Water can still get through the seams.
Pro tip: Test in a small hidden area first, as some coatings can slightly change the floor’s appearance.
2. Sealing The Seams
Laminate floors lock together, but the seams are the weak spots where water can enter. Sealing the seams is critical.
What to use: Waterproof seam sealer or clear silicone caulk.
How to apply:
- Run a thin bead of sealer along each seam, especially in high-risk areas (kitchen, entryways).
- Smooth with a damp finger or tool.
- Wipe away excess before it dries.
Pros: Blocks water from getting between boards.
Cons: Takes time, but worth the effort for kitchens and bathrooms.
Non-obvious insight: Many people forget to seal under the baseboards—this is where mop water and spills often sneak in!
3. Waterproof Underlayment
If you’re installing new laminate, starting with a waterproof underlayment is one of the best defenses. It creates a barrier between the subfloor and the laminate.
Types of underlayment:
- Foam with moisture barrier: Good for most rooms.
- Rubber or cork underlayment: Adds soundproofing and water protection.
- Plastic vapor barrier sheets: For basements or concrete slabs.
Installation steps:
- Lay the underlayment flat, covering the entire subfloor.
- Overlap seams by 6–8 inches.
- Tape seams with waterproof tape.
- Run up the edges 2–3 inches against the wall.
Pros: Stops moisture from rising up from below.
Cons: Only works if installed before the laminate.
4. Caulking Edges And Gaps
Water often seeps in where the floor meets walls, cabinets, or pipes. Sealing these edges with silicone caulk is simple and effective.
Where to caulk:
- Along baseboards and quarter-round trim
- Around kitchen islands and bathroom fixtures
- At door thresholds
How to do it:
- Use a caulk gun to apply a thin, steady bead.
- Smooth with a finger or caulk tool.
- Wipe away excess with a damp cloth.
Pros: Quick and inexpensive. Helps stop mop water and spills from getting under the floor.
Cons: May need touch-ups every year or two.
Beginner tip: Choose a color that matches your floor or use clear caulk for a seamless look.
5. Using Waterproof Tape On Seams
Some people add an extra layer of security by applying waterproof tape to the underside of the seams during installation.
How to do it:
- Before clicking boards together, stick tape along the tongue side of each plank.
- Press firmly to seal.
- Install as normal.
Pros: Blocks water at the most vulnerable point.
Cons: Best for new installations, not existing floors.
6. Applying A Moisture Barrier
A moisture barrier is a plastic sheet that sits between the subfloor and the underlayment. It’s especially important for concrete slabs or in basements.
How to install:
- Roll out the sheet to cover the entire floor area.
- Overlap seams by at least 6 inches.
- Seal seams with waterproof tape.
- Extend the sheet a few inches up the wall before adding underlayment.
Pros: Stops ground moisture from ever reaching the laminate.
Cons: Not a substitute for other waterproofing methods, but an important foundation.
7. Special Waterproofing Products
Some companies sell waterproofing kits made for laminate. These often include sealant, foam backing, and waterproof tape.
How to use:
- Follow the manufacturer’s instructions step by step.
- Usually applied to seams, edges, and sometimes the surface.
Pros: Designed specifically for laminate flooring.
Cons: Can be more expensive than DIY solutions.
8. Installing Water-resistant Or Waterproof Laminate
If you are starting from scratch, consider buying waterproof laminate. These products use new technology, like PVC cores or special coatings. They can handle standing water for longer without damage.
How do they compare?
| Type | Water Resistance | Durability | Price Range (per sq ft) |
|---|---|---|---|
| Standard Laminate | Low | Medium | $1.00–$3.00 |
| Water-Resistant Laminate | Medium | Medium–High | $2.00–$4.00 |
| Waterproof Laminate | High | High | $3.50–$6.00 |
Pro insight: Even “waterproof” laminate isn’t 100% safe if water sits for days. Always clean up spills quickly.
Step-by-step Guide: Waterproofing Existing Laminate Floors
If you already have laminate flooring, here’s how to boost its water resistance.
Step 1: Deep Clean The Floor
Remove all dust, dirt, and sticky spots. Any residue can stop sealants from sticking well.
- Use a soft broom, then a slightly damp mop.
- Dry the floor with a towel.
Step 2: Inspect For Damage
Check for swollen, warped, or cracked boards. Replace any damaged planks before you start waterproofing.
Step 3: Seal The Surface
- Choose a water-based polyurethane or laminate sealant.
- Apply with a foam roller in thin, even coats.
- Allow to dry for 2–4 hours between coats.
- Two coats offer better protection.
Step 4: Seal The Seams
- Run a bead of waterproof seam sealer or clear silicone caulk along each seam.
- Smooth and remove excess.
- Let it cure completely (usually 24 hours).
Step 5: Caulk The Perimeter
- Apply silicone caulk where the floor meets walls, cabinets, or plumbing fixtures.
- Smooth and wipe clean.
Step 6: Maintain Regularly
- Reapply surface sealant every 1–2 years.
- Check seams and edges for gaps and touch up as needed.
Bonus Tip: Use Floor Mats And Rugs
Place water-absorbent mats at entrances, sinks, and under pet bowls. This catches most water before it gets to the floor.
Step-by-step Guide: Waterproofing During New Installation
If you’re installing new laminate, you have more options. Here’s how to set up for maximum water protection.
Step 1: Prepare The Subfloor
- Make sure the subfloor is flat, clean, and dry.
- Fix any cracks or uneven spots.
Step 2: Lay A Moisture Barrier
- Roll out plastic sheeting, overlapping seams by 6 inches.
- Tape seams and run edges up the walls.
Step 3: Install Waterproof Underlayment
- Place underlayment over the moisture barrier.
- Tape seams with waterproof tape.
Step 4: Tape The Seams
- Before clicking boards together, apply waterproof tape to the tongue side of each plank.
Step 5: Install The Laminate
- Click planks together as normal.
- Stagger boards for strength.
Step 6: Seal The Seams And Edges
- Use waterproof seam sealer on top seams.
- Caulk the edges at walls, cabinets, and transitions.
Step 7: Add Floor Mats
- Place mats in high-risk areas as extra insurance.
Maintenance Tips For Waterproofed Laminate Floors
Even after waterproofing, good habits make a difference.
- Wipe up spills immediately. Don’t let water sit.
- Use a damp mop, not a wet one. Too much water can still get in.
- Clean under mats and rugs. Trapped moisture can build up.
- Check caulk and sealant regularly. Touch up any cracks or gaps.
- Avoid steam mops. The heat and moisture can break down the sealant.
Two Beginner Mistakes To Avoid
- Ignoring the edges: Most water gets under the floor at walls, not the center. Always seal the perimeter.
- Using the wrong sealant: Only use products safe for laminate. Some “wood” sealers can damage the top layer or make it slippery.
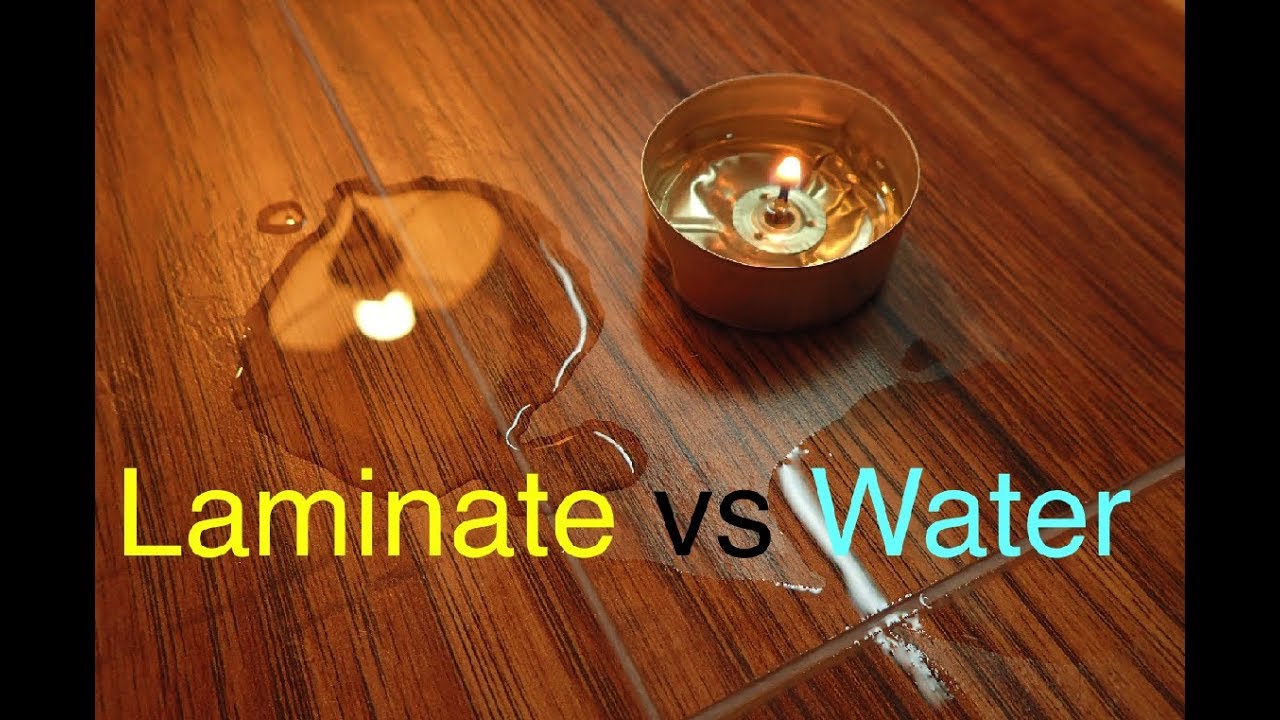
Credit: www.youtube.com
How Long Does Waterproofing Last?
Most surface sealants last 1–2 years before needing a touch-up. Caulked seams and edges can last longer but should be checked yearly. Underlayment and moisture barriers last the life of the floor if installed correctly.
When To Replace Instead Of Repair
Sometimes, the damage is too much. If you notice:
- Boards that are swollen or warped across large areas
- Black spots (mold) under the floor
- Musty smells that don’t go away
…it’s better to replace the affected boards or even the whole floor. Waterproofing only works for prevention, not for fixing major water damage.
Real-life Example
Jessica installed laminate in her kitchen but didn’t seal the seams. A dishwasher leak caused the boards to swell in less than a day. After replacing the damaged planks, she sealed all the seams and edges. A year later, another small leak happened—but this time, the water sat for an hour with no damage.
Sealing made all the difference.
Environmental And Health Considerations
Some sealants have strong odors or release chemicals (VOCs). Always choose low-VOC products and ventilate well during application. For the safest results, look for products with “Greenguard” or “FloorScore” certification.
Moisture under floors can lead to mold growth, which can affect indoor air quality. Waterproofing helps protect not just your floors, but your family’s health.
Cost Comparison: Waterproofing Vs. Replacement
Here’s a quick look at how costs compare:
| Method | Approximate Cost (per 100 sq ft) | Frequency |
|---|---|---|
| Surface Sealant | $30–$70 | Every 1–2 years |
| Seam Sealer/Caulk | $15–$40 | Every 2 years |
| Waterproof Underlayment | $50–$150 | Once (installation) |
| Replacing Damaged Planks | $200–$500 | As needed |
| Full Floor Replacement | $800–$2000 | As needed |
Waterproofing is much cheaper than repairing or replacing floors after water damage.
Should You Waterproof Laminate Yourself Or Hire A Pro?
Most waterproofing steps are DIY-friendly. With patience and care, you can save money and get great results. However, if you have a large area, tricky corners, or no time, a flooring professional can do the job faster and may offer a warranty.
If you’re unsure about products, application, or your floor’s condition, consult a pro. Mistakes can void your floor’s warranty.
Key Takeaways
- Laminate flooring is not naturally waterproof. Water can damage the core and cause expensive problems.
- Use multiple waterproofing methods for best results: Surface sealant, seam sealer, caulk, underlayment, and moisture barrier.
- Preparation is critical. Always start with clean, dry floors and inspect for damage.
- Regular maintenance extends protection and keeps your floors looking new.
- For wet areas, consider waterproof laminate at installation.
For more in-depth information, the National Wood Flooring Association offers excellent resources: NWFA Consumer Resources.
Frequently Asked Questions
How Long Does Waterproofing Laminate Flooring Last?
Most surface sealants last 1–2 years with regular cleaning. Seam caulks can last longer but should be checked yearly. Underlayment and moisture barriers last as long as the flooring, but damaged areas should always be fixed promptly.
Can I Make Old, Damaged Laminate Waterproof?
No. Waterproofing only works on undamaged floors. If boards are swollen, warped, or moldy, replace them before sealing. Waterproofing is a preventive step, not a cure.
Is Waterproof Laminate Flooring Really Waterproof?
Waterproof laminate can handle standing water for 24–72 hours, depending on the brand. But it’s not as waterproof as tile or vinyl. Always clean spills quickly for best results.
What Should I Do If Water Gets Under My Laminate Flooring?
Act fast. Remove surface water, take up any wet boards, and dry the subfloor completely. Replace any damaged planks. Make sure to check for mold. After drying and repairs, reapply waterproofing.
Can I Use A Steam Mop On Waterproofed Laminate?
No. Steam mops inject water and heat into the floor, which can break down the sealant and damage the boards. Use only a damp mop for cleaning.
Waterproofing your laminate flooring is one of the smartest ways to protect your investment. With the steps and tips in this guide, you can enjoy stylish, worry-free floors in every room of your home.

Credit: www.bestlaminate.com