Keeping your electric coil stove top clean is more than just about appearance—it directly affects how well your stove works, its lifespan, and even the taste and safety of your food. Many people wipe their stove tops quickly and believe that’s enough.
In reality, proper cleaning goes much deeper, especially for electric coil stoves. Grease and burnt-on spills can hide beneath the coils and in tricky corners, causing uneven heating or even smoke and odors when you cook. A truly clean stove top also means less risk of fire, fewer pests, and a healthier kitchen.
If you’ve ever wondered how to clean an electric coil stove top thoroughly and safely, this guide walks you through every detail, step by step.
Understanding Electric Coil Stove Tops
Before you start cleaning, it helps to know the structure of your stove. Electric coil stoves have metal coils that sit on top of the stove surface. These coils heat up when you turn the dial, cooking your food. Beneath each coil, there’s a drip pan—this catches food, grease, and spills. Under the drip pans is usually a metal or porcelain base.
Unlike glass cooktops, electric coil stoves let you remove and clean the coils and pans separately. This design makes deep cleaning possible, but also means spills can hide below. Neglecting cleaning for too long can cause rust, burnt smells, and even reduce your stove’s heating efficiency.
Why Regular Cleaning Matters
It’s tempting to delay stove cleaning, but dirt and grease build up quickly. Here’s why cleaning regularly is important:
- Better heating: Clean coils distribute heat evenly, so your food cooks properly.
- Longer stove life: Food acids and moisture can rust parts if left too long.
- Fewer bad smells: Old spills burn and smell unpleasant.
- Lower fire risk: Grease or food can ignite if not cleaned.
- Improved kitchen hygiene: A dirty stove can attract bugs or bacteria.
A 2022 study from the National Fire Protection Association found that cooking equipment, including stoves, was involved in nearly 50% of all reported home fires. Regular cleaning is one of the simplest ways to prevent these risks.
Safety First: Preparing To Clean
Electric coil stoves involve heat and electricity, so safety comes first. Always:
- Turn off all burners and make sure the stove is unplugged or the circuit breaker is off.
- Wait until the coils are completely cool before touching anything.
- Wear gloves if you have sensitive skin or will use strong cleaners.
- Keep a sponge, old towel, or bowl nearby to handle spills or drips.
Avoid using too much water directly on the coils to prevent electrical damage. Never soak the electric plug ends.
What You’ll Need: Essential Cleaning Supplies
Gather these items for a thorough and safe cleaning:
- Soft sponge or cleaning cloth
- Non-abrasive scrub pad
- Dish soap (degreasing works best)
- Baking soda
- White vinegar
- Old toothbrush or small cleaning brush
- Paper towels or microfiber cloth
- Large bowl or sink for soaking
- Gloves (optional)
- Mild all-purpose cleaner (optional)
- Toothpick or cotton swab for corners
Some people use commercial stove cleaners, but simple items like baking soda and vinegar are usually enough and much safer for your stove and health.

Credit: cosmoappliances.com
Step-by-step: How To Clean An Electric Coil Stove Top
Cleaning your electric coil stove isn’t complicated, but following the right steps makes a big difference. Let’s break it down.
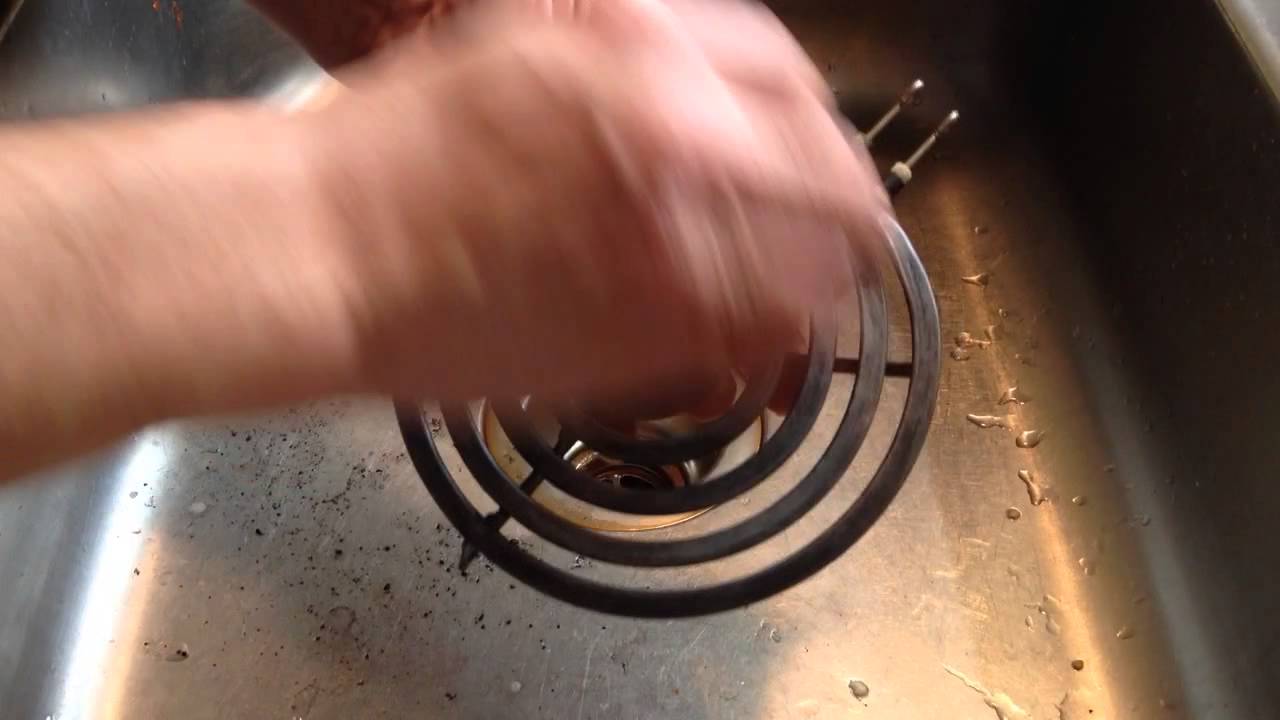
1. Remove The Coils
Electric coils are usually plug-in types. Gently lift each coil—find the point where it connects to the stove, and pull straight out. Never twist or force them. Some older models have a latch or screw; check your manual if unsure.
Non-obvious tip: Take a photo before removing coils, so you remember how to put them back.
2. Take Out The Drip Pans
Lift out the drip pans under the coils. These catch most spills. If they’re stuck, wiggle gently. Don’t use sharp tools or you might scratch the surface.
3. Soak And Scrub Drip Pans
Drip pans get the dirtiest and need extra attention.
- Fill your sink or a large bowl with hot, soapy water.
- Add the pans and let them soak at least 15–20 minutes.
- If stains are tough, sprinkle baking soda on them and spray with vinegar. Let the fizzing action loosen grime for 10 more minutes.
- Scrub gently with a non-abrasive pad or brush. For tiny corners, use a toothbrush.
- Rinse and dry well.
If your drip pans are very rusty or stained, it might be time to replace them. Most are affordable and easy to find.
4. Clean The Coils Properly
Electric coils need careful cleaning. Here’s how:
- Wipe with a damp cloth to remove loose crumbs or grease.
- For sticky spots, use a sponge dampened with dish soap.
- Never submerge the plug end or the entire coil in water.
- For burnt-on food, make a paste of baking soda and water. Rub gently with a cloth.
- Dry the coils fully with a towel before reinstalling.
Beginner mistake: Never use a steel wool pad or abrasive cleaner on the coils—they can damage the surface and reduce heating efficiency.
5. Clean Under The Stove Top
Many electric stoves have a hinged top—like a car hood. Check your model; you may be able to lift it gently. If so:
- Prop it open carefully.
- Use a damp cloth or vacuum to remove crumbs and dust.
- Wipe with soapy water, then rinse and dry.
If your stove top doesn’t lift, use a thin brush or vacuum attachment to reach under the drip pans.
6. Scrub The Surface
Now, focus on the main stove top surface:
- Wipe away loose crumbs.
- Use a soft sponge with mild soap to clean grease and stains.
- For tough spots, sprinkle baking soda, then spray with vinegar. Let it bubble for a few minutes before wiping.
- Dry with a microfiber cloth for a shiny finish.
Avoid harsh scrubbers—they can scratch the enamel or paint.
7. Clean The Knobs And Controls
Grease often builds up on knobs and dials.
- If your knobs pull off easily, remove and soak them in warm soapy water.
- Wipe the control panel with a damp cloth. Use a cotton swab for small spaces.
- Dry everything well before reattaching.
Non-obvious tip: Never spray cleaner directly onto the control panel. Spray onto a cloth first to avoid liquid getting into the electronics.
8. Reassemble The Stove Top
Once every part is dry, put the drip pans back in their slots. Gently push the coils back into place—make sure the plug ends fit securely. Double-check that everything sits flat and secure.
Comparing Cleaning Methods
People often ask about different cleaning methods and how they compare. Here’s a quick look at three popular approaches for cleaning drip pans:
| Method | Effectiveness | Cost | Time Needed | Safety |
|---|---|---|---|---|
| Soaking with Dish Soap | Good for light grease | Low | 20-30 mins | Very safe |
| Baking Soda & Vinegar | Excellent for tough stains | Low | 30-40 mins | Very safe |
| Commercial Cleaner | Very strong | Medium-High | 10-20 mins | Some fumes |
Most people find baking soda and vinegar the best balance of safety and effectiveness.
How Often Should You Clean?
How often you clean depends on how much you cook:
- Daily: Wipe up spills as soon as they happen.
- Weekly: Remove coils and pans for a light scrub.
- Monthly: Deep clean with soaking and full disassembly.
- After big spills: Clean right away to avoid burnt-on mess.
If you notice smoke, smells, or uneven heating, it’s a sign your stove needs attention.
Cleaning Stubborn Burnt-on Stains
Some messes just won’t budge with regular soap and water. For these:
- Sprinkle a thick layer of baking soda over the stain.
- Spray with white vinegar. Let it bubble and sit for 15 minutes.
- Scrub gently with a non-abrasive pad or old toothbrush.
- Repeat as needed.
For really tough stains on drip pans, you can try soaking overnight in a mix of one part vinegar to two parts water.
Caution: Never use oven cleaner on the coils or painted surfaces. It’s too harsh and can damage your stove.
What About Rust?
Rust is common if water or food sits too long. Here’s how to deal with it:
- Mix baking soda with a few drops of water to make a paste.
- Rub gently onto the rusty spot with a soft cloth.
- Let it sit 10 minutes, then wipe away and dry.
- For drip pans with heavy rust, it’s often easier to replace them.
Pro tip: Always dry drip pans and coils completely before putting them back. This stops new rust from forming.
Natural Cleaning Solutions Vs. Chemical Cleaners
Many people want to avoid harsh chemicals in the kitchen. Here’s how common solutions compare:
| Cleaner | Main Ingredients | Advantages | Disadvantages |
|---|---|---|---|
| Baking Soda & Vinegar | Baking soda, vinegar | Non-toxic, cheap, effective | Needs more scrubbing |
| Commercial Degreaser | Varies (often chemicals) | Very fast, strong | Fumes, can damage surfaces |
| Dish Soap | Soap, surfactants | Safe, easy to find | Not strong enough for heavy grime |
For most homes, baking soda and vinegar is the safest and most reliable choice.
Credit: www.reddit.com
Avoiding Common Mistakes
Many stove owners make errors that can cause damage or make cleaning harder next time. Here’s what to watch out for:
- Soaking coils in water: This can ruin the electrical parts.
- Using harsh abrasives: Steel wool or rough pads scratch surfaces and can cause rust.
- Forgetting to dry parts: Moisture left behind can cause rust or electrical shorts.
- Using oven cleaner everywhere: Oven cleaners are too strong for most stove parts.
- Not cleaning up spills right away: Waiting makes stains harder to remove.
Always read your stove’s manual if you’re unsure about cleaning methods.
Extra Tips For A Shiny, Spotless Stove
If you want your stove to look like new, try these expert tips:
- Wipe up spills while they’re still warm (but not hot) for easier cleaning.
- Use a microfiber cloth for a streak-free shine.
- Place foil liners or heat-safe covers in drip pans to catch future mess.
- Add a few drops of lemon juice to your cleaning mix for a fresh scent.
- Clean the wall and counter edges near the stove—grease splatters often reach these spots.
Non-obvious insight: Sometimes stove tops look dull because of tiny scratches. Rubbing gently with a bit of baking soda and a damp cloth can help restore some shine.
When To Replace Parts
No matter how well you clean, some parts wear out:
- Drip pans: If they are rusted through or stained black, it’s time to replace.
- Coils: If you see cracks, blisters, or uneven heating, replace the coil.
- Knobs: If cracked or sticky and can’t be cleaned, buy new ones.
Replacement parts for most electric stoves are affordable and easy to install. Check your stove’s model number before buying.
Cleaning Troubleshooting Guide
Sometimes you’ll run into stubborn problems. Here’s how to handle the most common ones:
| Problem | Possible Cause | Solution |
|---|---|---|
| Coil doesn’t heat after cleaning | Not plugged in fully, coil wet | Dry completely, reseat coil firmly |
| Burning smell when using stove | Cleaner residue or missed crumbs | Wipe again with damp cloth, check under pans |
| Streaks or spots on surface | Not rinsed fully, hard water | Polish with vinegar, dry with microfiber |
| Sticky knobs or dials | Grease build-up | Remove and soak in soapy water, scrub gently |
| Rust returns quickly | Not drying parts, old pans | Always dry completely, consider replacement |
Credit: www.youtube.com
Safe Disposal Of Old Parts
When it’s time to throw out old drip pans or coils, check your local recycling rules. Most metal pans can be recycled, but electrical parts usually go in regular trash. Never put old coils in the recycling bin unless your city accepts them.
Cleaning And Maintenance Schedule
To keep your stove top in top shape, make a simple cleaning schedule:
- After each use: Wipe the surface while warm.
- Weekly: Remove and wash drip pans, clean coils.
- Monthly: Deep clean, check for rust, polish surface.
- Yearly: Inspect all parts for wear, replace as needed.
Set a calendar reminder if you tend to forget—cleaning regularly takes much less time and effort than letting grime build up.
Eco-friendly And Cost-saving Cleaning
Cleaning your stove top doesn’t have to be expensive or bad for the planet. Baking soda and vinegar are both cheap, safe for the environment, and available in any grocery store. Avoiding harsh chemicals also means your kitchen air stays cleaner and safer, especially for kids and pets.
You can save money by:
- Using old t-shirts as cleaning rags
- Reusing spray bottles for homemade cleaners
- Buying drip pan liners in bulk
For more tips on eco-friendly cleaning, check resources like the EPA Safer Choice program.
Frequently Asked Questions
How Do I Know If My Coils Need To Be Replaced?
If your coils have cracks, blisters, or uneven heating, it’s time to replace them. Also, if food continues to burn in one spot even after cleaning, this can mean the coil is damaged inside.
Can I Clean Electric Coils In The Dishwasher?
No, you should never put electric coils in the dishwasher. The water can get into the electrical connectors and ruin them. Always clean coils by hand and keep the plug ends dry.
What Should I Do If Something Spills Inside The Stove?
If food or liquid spills inside the stove, unplug it and let it cool. Remove the coils and pans, then use a damp cloth to wipe up the spill. For sticky messes, use a bit of dish soap, then rinse with a clean damp cloth.
Dry everything thoroughly before using again.
Are There Any Parts Of The Stove I Shouldn’t Clean?
Avoid using water or cleaner directly on electrical connectors or inside the control panel. Also, never spray cleaner into the open plug ends of the coils. Always spray onto a cloth first, then wipe carefully.
What’s The Safest Cleaner For Homes With Pets And Kids?
Baking soda and vinegar are the safest options. They clean well, leave no dangerous residue, and are safe if accidentally touched by kids or pets.
Keeping your electric coil stove top clean doesn’t just make your kitchen look better—it keeps your food safe, your stove working longer, and your home healthier. With the right supplies and regular attention, you’ll find the job is easier than you think, and your stove will reward you with years of reliable service.