Anycubic Photon is one of the best resin 3D printers in the market right now. Because with this 3D printer, you will get amazing accuracy over FDM and print quality, which may shock you. Also, this DLP 3D Printer is the most cost-effective option when it comes to value.
If you are one of those people who has never used a DLP or SLA 3D printer before, then it’s hard to find information about this kind of 3D printer. But don’t worry, you can overcome any issue with our reliable troubleshooting.
Are you using an Anycubic Photon DLP 3D printer? If yes, then I have to tell you that you have picked the best one. Anycubic 3D printer earned its position by creating a solid and easy-to-use 3D printer for users, like the Anycubic i3 Mega FDM 3D printer.
But here I have to say that since it is an electronic device, you might face some problems. But don’t worry, we will discuss some common Anycubic photon troubleshooting through this article, which will help you a lot.
Anycubic Photon Troubleshooting

Anycubic Photon 3D printer unable to recognize or print “.photon” files
Indications:[su_list icon=”icon: arrow-circle-right” icon_color=”#f62000″]
- Anycubic/Chitu slicer v1.3.6 or Chitubox “.Photon” cut documents cannot be recognized or are unable to print on a specific Anycubic Photon printer.
[/su_list]
Solution:[su_list icon=”icon: check” icon_color=”#006203″]
- First of all, find out the printer’s firmware version. Is it displaying v3.4.x? If yes, then there might be more Anycubic Photon printers available, which are known as Fauxton. These are brand-new printers with a distinct “Photon” look. Then you should speak with the seller or showroom if your printer is not a Fauxton printer. But before that, carefully check the mainboard and firmware. Only through the process, you can verify that you have the right printer.
- Reslice the model to try and collect *.pws return records. which are the only records that will print on a Fauxton.
- Are you confused about these new printers? Then contact the salesperson as soon as possible.
[/su_list]
Problems with USB Read, Memory Issues, and Frequent Resets
Indications:[su_list icon=”icon: arrow-circle-right” icon_color=”#f62000″]
- Printing stops focusing randomly and resets the home screen.
- Freezing with errors on a frequent basis.
- No models are displayed by the recording program.
- While connected, the USB key light pointer is off. (It should be on all the time.)
[/su_list]
Solution:[su_list icon=”icon: check” icon_color=”#006203″]
- In the rare scenario where you twist the USB key, you can read the documents once again.
- Replace the standard USB key with a better-branded, FAT32-formatted one.
- On the USB drive, only store one file with a small name and no spaces or non-English characters.
- Most likely, the problem is caused by a problem with your mainboard or USB enhancement link.
- Try a different USB extension link as just a test. Without a doubt, removing the four screws securing the rear vent board will give you access to this.
[/su_list]
Plate Too High or Free Build Plate
Indications:[su_list icon=”icon: arrow-circle-right” icon_color=”#f62000″]
- When the grub/mount screw is adjusted, the fabrication plate practically slopes side to side.
- The construct plate cannot be reduced any further because it is too high from the FEP.
[/su_list]
Solution:[su_list icon=”icon: check” icon_color=”#006203″]
- Disassemble the fabrication plate assembly, clean it, and reset the rotating joint.
- Examine your plate mounting screws.
- Take the grub screw out.
- The plate is secured by four screws, which must be removed.
- Install the three extra screws that support the rotating assembly within.
- Ensure that you thoroughly remove any resin with IPA or other solvents.
- There should be no loose screws.
- Adjust and replace the manufactured plate.
- Make sure there aren’t two tightens there if you can’t secure the construct plate with the grub screw.
[/su_list]
Z Wobble and Non-Random Layer Artifacts
Indications:[su_list icon=”icon: arrow-circle-right” icon_color=”#f62000″]
- Regardless of the print direction, you will notice surfaces displayed for non-irregular layer antiquities.
- expected banding lines that are positioned about 2 mm apart.
- Predictable prints with distortion
[/su_list]
Solution:[su_list icon=”icon: check” icon_color=”#006203″]
- Start by trying to clean the lead screw (Z pole) and then reapply thick, high-quality oil.
- Fix the FEP; otherwise, the FEP film could be sloppy.
- Change out the FEP film.
[/su_list]
Layer Shifting/Shearing During Printing On LCD
Indications:[su_list icon=”icon: arrow-circle-right” icon_color=”#f62000″]
- This only occurs on specific prints, depending on calculation and arrangement.
- Prints appear to have been cut and transferred to another component of the assembly plate.
- Layer photos on an LCD screen look cut off and don’t look as good as layer photos on a touchscreen.
- The Photon document checks out without any problems.
[/su_list]
Solution:[su_list icon=”icon: check” icon_color=”#006203″]
- Except v4.0.11, all firmware versions are affected by this bug (fixed in 4.2.18+)
- With a timelapse camera, capture a “dry run” to see if the LCD images shift or tear while being printed.
- The suggested solution is to upgrade the firmware to version 4.2.18+.
[/su_list]
STL Is Not Displayed by Anycubic Photon Slicer
Indications:[su_list icon=”icon: arrow-circle-right” icon_color=”#f62000″]
- The Anycubic Photon Slicer is not operational.
- Displays on LCD screens are only half-screen.
- LCD displays just a sizable area of the screen, whereas touchscreen displays efficiently display. This is unrelated to the shimmering LCD problem.
[/su_list]
Solution:[su_list icon=”icon: check” icon_color=”#006203″]
- Update the show driver.
- Reinstall the slicer program.
- Reinstall the C++ conveyance library.
- Verify that all link relationships are placed correctly.
- Call the Anycubic Support Line.
- Reflash or update any firmware you have downloaded from the Anycubic website.
[/su_list]
Circles Are Skewed, and Squares Print Rhomboid
Indications:[su_list icon=”icon: arrow-circle-right” icon_color=”#f62000″]
- When a shape is printed, it is not perfectly square. chambers slant slightly.
[/su_list]
Solution:[su_list icon=”icon: check” icon_color=”#006203″]
- Pay attention to which side of the rail portion faces the red base plate. It may very well be a fraction of a degree off and inclined either forward, to the sides, or a combination of both.
- To check exactly, use a small specialist’s square. If the segment is inclined, the prints will also be inclined.
- Replace the section’s four mounting jolts; you might need to release and tighten them so the segment is totally vertical. To get things done, some effort is required. Otherwise, you need to shimm the segment base.
[/su_list]
Model Won’t Display/Slicer Isn’t Working
At the moment, the Anycubic Photon Slicer doesn’t work with graphics drivers that are built-in or resolutions that are higher than 2K.
Indications:[su_list icon=”icon: arrow-circle-right” icon_color=”#f62000″]
- The Z carriage is unresponsive upon boot, and the touchscreen Z controls are slow. Fans are dead, and an LCD test reveals nothing on the screen.
[/su_list]
Solutions:[su_list icon=”icon: check” icon_color=”#006203″]
- The EEPROM can be damaged by too tight of a fit or interference with force, no matter how small.
- Download the default code record for the manufacturing line, then reflash the EEPROM.
- Update the firmware.
[/su_list]
Fabrication Plate Doesn’t Reach Z0 Bottom
Indications:[su_list icon=”icon: arrow-circle-right” icon_color=”#f62000″]
- Prints truly get flat after thoroughly leveling and setting Z=0.
[/su_list]
Solutions:[su_list icon=”icon: check” icon_color=”#006203″]
- Check that the tank divider’s lowest position can’t be reached at Z0 because the carriage arm is touching it at its highest point.
- Adding 4 washers as spacers to the 4 screws that hold the construction plate to the rotating assembly is a simple way to fix the problem.
- Dead fans, an inactive LCD, and a sluggish Z carriage
[/su_list]
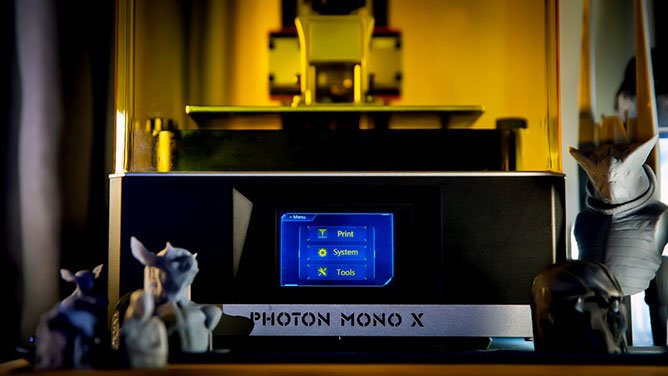
Anycubic Photon Mono X Not Printing
If you’re a 3D printing enthusiast, you’ve probably heard of the Photon Mono X. It’s a popular choice for those looking for a reliable and affordable printer. But what if your Photon Mono X isn’t printing? There are a few possible reasons why your Photon Mono X might not be printing.
The first thing to check is whether or not the printer is properly calibrated. If it’s not, the prints will likely be of poor quality. You can find instructions on how to calibrate your Photon Mono X here.
Another possible reason why your printer isn’t working could be because the build plate isn’t level. An uneven build plate can cause prints to come out poorly or even fail altogether. You can level the building plate by following these instructions.
If neither of those solutions solves the problem, it’s possible that there is something wrong with the printer itself. In that case, you may need to contact the company for support or take the printer to a local repair shop.
Anycubic Photon Not Turning On
If your Anycubic Photon isn’t turning on, there are a few things you can try to troubleshoot the issue. First, make sure that the power cord is plugged in securely and that the outlet you’re using is working. Next, check the power switch on the back of the unit to make sure it’s in the ON position.
If everything looks good there, try resetting the machine by unplugging it for 30 seconds and then plugging it back in. If none of those things work, then there could be an issue with the control board or power supply. If you’re comfortable opening up your machine, you can check for any loose connections or damaged components on those parts.
Otherwise, it’s probably best to contact Anycubic support for further assistance.
How to Update Anycubic Photon Firmware
If you own an Anycubic Photon 3D printer, it’s important to keep the firmware up to date. Doing so can help improve the performance of your printer and fix any bugs that may be present. In this article, we’ll show you how to update the firmware on your Anycubic Photon 3D printer.
The first thing you’ll need to do is download the latest firmware from Anycubic’s website. Once you have the file downloaded, open it up and extract the contents to a folder on your computer. Next, connect your Anycubic Photon 3D printer to your computer via USB and turn it on.
Once connected, open up Cura (or another slicing software) and go to the settings menu. Under “Printer,” select “Anycubic Photon” from the drop-down menu. Then click on “Firmware.”
A new window will pop up; click “Browse” and navigate to the folder where you extracted the firmware files earlier. Select the .hex file and click “Open.”
Finally, click “Flash Firmware” and wait for the process to complete. That’s all there is to update the firmware on your Anycubic Photon 3D printer! By keeping it up to date, you can ensure that your printer is always performing at its best.
Manual For Anycubic Photon Mono 4K
The Anycubic Photon Mono 4K is a high-quality resin 3D printer that offers an unbeatable price-performance ratio. It offers an incredible printing resolution of up to 0.025 mm and a large build volume of 145 x 145 x 200 mm. Additionally, it features a dual Z-axis linear rail system for increased stability and precision, as well as a full-color LCD display for easy operation.
If you’re looking for a top-of-the-line resin 3D printer that won’t break the bank, the Anycubic Photon Mono 4K is a perfect choice!
How To Factory Reset Anycubic Photon

If you own an Anycubic Photon 3D printer, you may at some point need to factory reset it. This can be for a variety of reasons, such as if you want to sell the printer or if it’s not working correctly and you want to start from scratch. Whatever the reason, factory resetting your Anycubic Photon is a relatively simple process that only takes a few minutes.
To begin, power off your Anycubic Photon and unplug it from the power source. Then, remove all of the filament from the printer. Next, locate the firmware SD card that came with your printer – this will be inserted into the side of the machine.
On the SD card, locate the file named “config.json” and open it using a text editor such as Notepad++. Within this file, find the line that says “factoryReset” false and change false to true. Save and close the file, then re-insert the SD card into your Anycubic Photon.
Power on the machine – once it starts up again, it will be factory reset!
We hope this post gives you the information you require. We are providing you with advice based on our experience, but we can’t guarantee that it will address all of your problems.
We disclaim all responsibility and risk for any problems you may experience as a result of reading this article. You are responsible for your actions to ensure that you work safely and within the acceptable or suggested adjustments allowed by your printer manufacturer.
If you have an HP Envy 6055 and looking for a troubleshooting guide. Then read: HP Envy 6055 Troubleshooting