Program A Black And Decker Coffee Maker
A fresh cup of coffee is a simple pleasure, but making it exactly when you want can feel tricky if you don’t know how to program your coffee maker. For many, the Black And Decker coffee maker is a reliable kitchen companion, but its programming features can seem confusing at first. Don’t worry. With the right steps, you can wake up to the smell of brewing coffee every day—no guesswork, no stress.
Learning how to program your Black And Decker coffee maker is not just about pushing buttons. It’s about making your morning smoother, saving you time, and even helping you avoid that rushed, bitter cup. In this guide, you’ll discover the step-by-step process for programming your machine, understand each feature, and learn tips to avoid common mistakes.
Whether you just unboxed your coffee maker or have had it for years but never used the timer, this guide will unlock every function in a way that’s easy to follow.
Understanding Your Black And Decker Coffee Maker
Before you start pressing buttons, it’s important to know what your specific model can do. Most Black And Decker coffee makers share common features, but some have advanced options. Understanding your model helps avoid frustration and ensures you get the most from your machine.
Main Features Explained
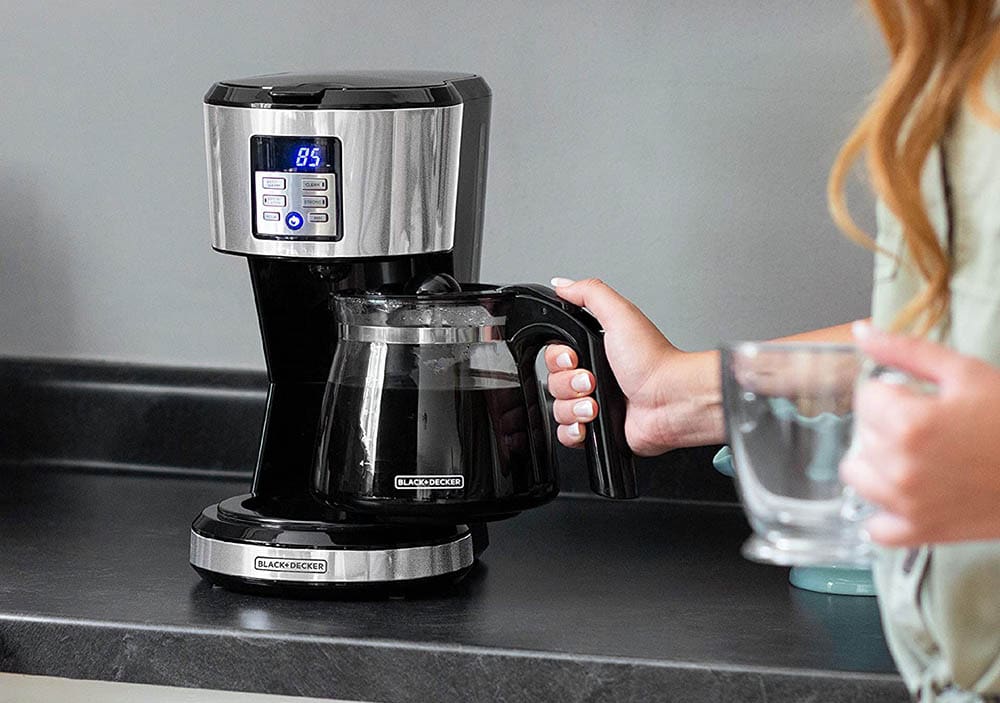
- Programmable Timer: Lets you set a time for brewing to start automatically.
- Brew Strength Selector: Offers options for regular or strong coffee.
- Auto Shut-Off: Turns off the heater after a set time for safety.
- Sneak-A-Cup Feature: Pauses brewing so you can pour a cup mid-cycle.
- Digital Display: Shows time, brewing status, and program settings.
- Water Level Indicator: Helps you fill the reservoir correctly.
- Keep Warm Plate: Keeps coffee hot after brewing.
Model Variations
Most Black And Decker programmable coffee makers use a similar button layout. However, higher-end models may have extra features like a built-in grinder or a larger digital screen. Check your user manual for model-specific details, or look for the label on the bottom or back of your machine.
Essential Buttons
- HR (Hour): Sets the hour for the clock and timer.
- MIN (Minute): Sets the minute for the clock and timer.
- PROG (Program): Allows you to set a delayed brewing time.
- AUTO: Activates the programmed brewing time.
- BREW/STRENGTH: Lets you choose coffee strength.
- ON/OFF: Starts or stops brewing.
Knowing these buttons is key to programming your coffee maker correctly.
Preparing Your Coffee Maker For Programming
A coffee maker can only make good coffee if set up correctly. Start with these steps to ensure a smooth programming process.
Step 1: Clean The Machine
Even new machines need a rinse. Wash the carafe, filter basket, and water reservoir with warm water and mild soap. Run a brew cycle with just water to remove any dust or residue.
Step 2: Place The Machine Properly
Set your coffee maker on a stable, dry counter. Make sure the plug reaches an outlet. Avoid placing it near water or the stove to prevent accidents.
Step 3: Check The Water Reservoir
Open the lid and fill the reservoir to your desired level. Use the water level indicator for accuracy. Never overfill, as this can cause leaks.
Step 4: Add Filter And Coffee Grounds
Place a paper or reusable filter in the basket. Add ground coffee (usually one tablespoon per cup of water, but adjust to taste). Close the lid securely.
Step 5: Plug In And Reset
Plug in the machine. If your model has a reset function, press it to clear previous settings. This helps avoid confusion during programming.

Credit: www.youtube.com
Setting The Clock
Most Black And Decker models require you to set the clock before programming the auto-start feature. Here’s how to do it accurately.
Setting The Time
- Press and hold the HR button until the hour flashes on the display.
- Continue pressing HR until the correct hour shows. Pay attention to AM/PM if your display shows it.
- Press and hold the MIN button until the minutes flash.
- Continue pressing MIN until the right minute shows.
- After a few seconds, the display will stop flashing and the time is set.
Tip: Some models require you to hold both buttons at once. If nothing happens when you press HR or MIN, try holding them together.
Why Setting The Clock Matters
If the clock is not set, your programmed brew time may be incorrect. This is one of the most common mistakes beginners make. Always double-check the time after a power outage.
How To Program The Auto-brew Feature
Now comes the part that makes mornings easier: auto-brewing. This function lets you set a time for brewing to start automatically—so you wake up to fresh coffee.
Step-by-step Guide
- Set the Current Time: Make sure the clock is correct, as explained above.
- Press the PROG Button: The display will flash, showing a default time (often 12:00).
- Set Desired Brew Time:
- Press HR to choose the hour you want brewing to start.
- Press MIN to set the exact minute.
- Watch for AM/PM indicators if your model has them.
- Confirm the Time: Wait a few seconds until the display stops flashing. Your brew time is now saved.
- Activate Auto-Brew: Press the AUTO button. A light or icon will appear, showing auto-brew is enabled.
- Prepare Everything: Make sure water and coffee grounds are ready before bedtime.
- Leave the Carafe in Place: The machine will only brew if the carafe is correctly positioned.
Practical Example
Suppose you want coffee ready at 6:30 AM. Set the clock to the current time, press PROG, use HR and MIN to set 6:30, and press AUTO. The machine will start brewing at 6:30 AM, even if you are still asleep.
Common Programming Mistakes
- Forgetting to press AUTO: The time is set, but brewing won’t start if AUTO is not activated.
- Wrong AM/PM: Double-check if your display uses a 12-hour format.
- No water or coffee: Always check the reservoir and filter before bed.
Credit: cornercoffeestore.com
Adjusting Brew Strength
Coffee drinkers have different tastes. Black And Decker coffee makers offer brew strength options to match your preference.
How To Use Brew Strength
- Prepare the coffee maker as usual.
- After setting the auto-brew time, press the BREW/STRENGTH button.
- Toggle between regular and strong options (shown on the display).
- The machine will use your chosen setting for the next brew.
When To Use Strong Brew
If you prefer bolder, richer coffee, select the strong setting. This feature slows down water flow, allowing coffee grounds to steep longer and release more flavor.
Non-obvious Insight
Some users think strong brew means more caffeine. In reality, it means a stronger taste, not more caffeine, unless you also add more grounds. Experiment with both strength and coffee quantity for your perfect cup.
Using The Sneak-a-cup Feature
Waiting for a full pot to finish brewing can be tough, especially when you need your first sip fast. The Sneak-A-Cup feature lets you pour a cup before brewing is done.
How Sneak-a-cup Works
- When you remove the carafe, a valve automatically pauses the drip.
- Pour your cup, then quickly return the carafe within 20 seconds.
- Brewing resumes with minimal mess.
Practical Tips
- Don’t remove the carafe for too long, or hot water may overflow.
- Use a sturdy mug to avoid spills.
Why This Matters
This feature is great for busy mornings or when you’re sharing coffee with others. It prevents mess and keeps brewing consistent.

Credit: www.blackanddecker.com
Setting The Auto Shut-off Timer
Leaving a coffee maker on for hours is a fire risk and wastes energy. Black And Decker models include an auto shut-off feature for safety.
How Auto Shut-off Works
- The hot plate turns off automatically after a set time (usually 2 hours).
- Some models let you adjust this period.
How To Adjust (if Available)
- With the machine on, press and hold the AUTO or PROG button (check your manual).
- Use HR or MIN to select shut-off time, often in 30-minute increments.
- Save by releasing the button.
Safety Note
Never rely only on auto shut-off. Always turn off the machine if you leave home.
Troubleshooting Programming Issues
Sometimes, things don’t go as planned. Here’s how to fix common problems with programming your Black And Decker coffee maker.
Common Problems And Solutions
- Display Not Working
- Check the power cord and outlet.
- Try plugging another device into the outlet.
- If still dead, the machine may need repair.
- Auto-Brew Does Not Start
- Make sure the clock is set.
- Check that the AUTO light is on.
- Confirm water and coffee are in place.
- Wrong Time or Brew Cycle
- Reset the clock after power outages.
- Double-check AM/PM settings.
- Buttons Not Responding
- Unplug for 1 minute, then plug in again.
- If still unresponsive, the control panel may be faulty.
- Leaking or Overflow
- Do not overfill the reservoir.
- Ensure the carafe and basket are positioned correctly.
Example Troubleshooting Scenario
If your coffee starts brewing at 7 PM instead of 7 AM, it’s likely an AM/PM mix-up. Reset the clock and programmed time, watching for the small PM icon on the display.
Cleaning And Maintenance For Best Results
A well-maintained machine not only lasts longer but also brews better coffee. Regular cleaning is key for consistent programming and taste.
Daily Cleaning
- Empty and rinse the carafe after each use.
- Wash the filter basket with warm, soapy water.
- Wipe the outside with a damp cloth.
Weekly Cleaning
- Remove and clean the water reservoir (if removable).
- Check and clean the spray head and carafe lid.
Monthly Deep Cleaning
- Fill the reservoir with a mix of half vinegar and half water.
- Run a brew cycle without coffee grounds.
- Discard the vinegar water and run two cycles with plain water to rinse.
Why Cleaning Helps Programming
Mineral build-up can cause buttons to stick or the display to glitch. Regular cleaning keeps the electronic parts working smoothly.
Comparing Black And Decker Models
Not all Black And Decker coffee makers are the same. Here’s a side-by-side look at three popular programmable models to help you identify your machine and understand its features.
| Model | Cup Capacity | Brew Strength | Display Type | Auto Shut-Off | Sneak-A-Cup |
|---|---|---|---|---|---|
| DLX1050B | 12 | Yes | Digital | 2 hours | Yes |
| CM1160B | 12 | Yes | Digital | 2 hours | Yes |
| CM2035B | 12 (Thermal Carafe) | Yes | Digital | 2 hours | Yes |
Most programming steps are the same across these models, but the display layout or button names may vary slightly.
Step-by-step Quick Reference Guide
If you need a fast reminder, here’s a summary you can follow in real time.
- Set the clock: Press HR and MIN to adjust.
- Fill reservoir: Add water to the correct level.
- Add filter and coffee: Place filter and desired coffee grounds.
- Set brew time: Press PROG, then HR and MIN for your chosen time.
- Select brew strength: Press BREW/STRENGTH if desired.
- Press AUTO: Activate the programmed brew.
- Leave carafe in place: Required for brewing to start.
Keep this list near your coffee maker for easy reference.
Advanced Programming Tips
Many people use only the basic features of their Black And Decker coffee maker. There are advanced options that can further improve your coffee routine.
Dual Programming (for Some Models)
Some models allow you to program two different brew times (for weekdays and weekends).
- Read your manual to see if this feature is available.
- Set two times, and select the active one before bedtime.
Using Delay Brew For Freshness
If you use pre-ground coffee, setting the delay brew just before bed keeps it fresher than setting it in the morning for the next day. Store your coffee in an airtight container to prevent staleness.
Matching Water And Coffee Amounts
For best results, use the same number of tablespoons of coffee as cups of water. Too much or too little can cause weak or bitter coffee, even if programmed correctly.
Non-obvious Insight
Many people don’t realize that a poorly cleaned hot plate can affect the auto-brew. If the plate is sticky or dirty, the carafe may not sit flat, causing brewing errors or leaks.
Safety And Energy-saving Practices
Programming your coffee maker can also make your kitchen safer and more efficient.
- Unplug when not in use: Reduces risk of electrical issues.
- Check cord and plug regularly: Look for signs of wear.
- Do not use near water: Prevents shocks.
- Use auto shut-off: Saves energy if you forget to turn off.
Comparing Programming Features With Other Brands
How does Black And Decker stack up against other popular brands? Here’s a quick look.
| Brand | Auto-Brew | Brew Strength | Sneak-A-Cup | Price Range |
|---|---|---|---|---|
| Black And Decker | Yes | Yes | Yes | $35-$80 |
| Mr. Coffee | Yes | Some Models | Yes | $30-$85 |
| Keurig | Yes (Some) | Pod Strength | No | $60-$200 |
Black And Decker’s timer and sneak-a-cup features are reliable and easy to use, making them a great value compared to more expensive brands.
Real-world Example: Programming For The Family
Imagine a busy family where everyone leaves at different times. With the programmable feature, you can set the coffee maker to start at 6:30 AM on weekdays. On weekends, you can set it for 8:00 AM. This saves time, prevents morning arguments, and makes sure everyone gets hot coffee.
If someone wakes up early, the sneak-a-cup feature means nobody has to wait for the whole pot. Cleaning up after is easy, so the next day’s programming is simple.
Maximizing Longevity And Performance
A programmable coffee maker is a small investment, but with care, it can last for years.
- Descale every 1-2 months: Use vinegar and water to remove mineral deposits.
- Replace parts as needed: Filters, carafes, and gaskets wear out over time.
- Store properly: Don’t leave water in the reservoir after use to prevent mold.
- Update your manual: Some models have firmware updates on the Black And Decker website.
Eco-friendly Programming Habits
You can program your coffee maker and help the environment at the same time.
- Only brew what you need: Reduces waste.
- Use reusable filters: Cuts down on paper waste.
- Unplug when not needed: Saves energy.
Troubleshooting Table: Quick Fixes
Here’s a summary table to help you diagnose issues quickly.
| Problem | Possible Cause | Solution |
|---|---|---|
| No power | Outlet or cord issue | Test outlet, check cord |
| Not brewing at set time | AUTO not pressed, wrong time | Press AUTO, verify time/AM-PM |
| Weak coffee | Too little grounds, wrong strength | Add grounds, select strong brew |
| Overflow | Overfilled, carafe misaligned | Fill to max line, center carafe |
Frequently Asked Questions
How Do I Reset My Black And Decker Coffee Maker’s Program?
Most models reset by unplugging the machine for 30 seconds, then plugging it back in. After this, you’ll need to set the clock and re-enter your programmed time. Always refer to your user manual for model-specific instructions.
Can I Program My Coffee Maker For Different Times On Weekends?
Some advanced Black And Decker models allow you to set two different auto-brew times. Check your model’s manual for this feature. If not, you can manually change the program before bed each day.
Why Does My Coffee Taste Weak Even With Strong Brew Selected?
Brew strength controls water flow, not the amount of coffee used. For a stronger cup, add more coffee grounds or use a finer grind. Also, ensure your machine is clean, as build-up can affect taste.
What Happens If There’s A Power Outage?
If the power goes out, most Black And Decker coffee makers lose their clock and programming. Set the time and program again when power returns. Some newer models may have a short-term memory backup.
Where Can I Find The Official Manual For My Model?
You can download the manual from the official Black And Decker website or visit Black And Decker’s support page for your specific model.
Starting your day with fresh, hot coffee doesn’t have to be complicated. By programming your Black And Decker coffee maker, you save time, reduce stress, and enjoy better coffee every morning. With the tips and troubleshooting advice in this guide, your coffee routine will be smoother, tastier, and more reliable—just the way it should be.