A cold kitchen floor is more than just an annoyance—it can impact your comfort, energy bills, and even your health. Imagine stepping out of bed on a chilly morning, only to have your feet hit a freezing kitchen floor. This is a common problem, especially in homes with tile, stone, or uninsulated floors.
Many people try quick fixes like rugs or slippers, but these solutions only cover up the real issue. The truth is, proper insulation can make a dramatic difference. It helps keep your kitchen cozy, reduces energy loss, and makes cooking or gathering a pleasure all year round.
Not sure where to start? You’re not alone. Many homeowners don’t realize how much heat escapes through floors or what options exist for insulation. This guide walks you through everything you need to know about insulating a cold kitchen floor. We’ll cover why floors get cold, the best insulation materials, installation methods, costs, and common mistakes. You’ll also get practical tips, real-world examples, and data comparisons so you can make informed choices. By the end, you’ll understand what works, what doesn’t, and how to create a kitchen that feels warm and welcoming every day.
Why Are Kitchen Floors Cold?
A kitchen floor often feels colder than other parts of the house. There are a few main reasons for this:
- Tile and stone are common kitchen floor materials. These conduct heat away from your feet, making them feel colder than wood or carpet.
- Kitchens are usually above unheated spaces like crawl spaces, garages, or basements. Cold air rises from below, cooling the floor.
- Poor insulation under the floor allows heat to escape from your kitchen, while cold air seeps in.
- High humidity and drafts can also make the floor feel colder, especially in winter.
Understanding the cause helps you find the best solution. For example, if your kitchen is above an unheated crawl space, the fix is different than for a kitchen on a concrete slab.
Benefits Of Insulating A Cold Kitchen Floor
Insulating your kitchen floor is not just about comfort. It brings several clear benefits:
- Improved comfort: No more cold feet during winter mornings.
- Lower energy bills: Insulation reduces heat loss, so your heating system works less.
- Healthier home: Cold, damp floors can lead to mold growth or joint pain.
- Noise reduction: Insulation can help keep kitchen noises from spreading to other rooms.
- Increased home value: A well-insulated kitchen is a selling point for buyers.
Investing in insulation pays off every single day, not just during the coldest months.
How Heat Is Lost Through Kitchen Floors
To understand why insulation is so effective, let’s look at how heat escapes:
- Conduction: Heat naturally flows from warm to cold areas. If your kitchen floor is uninsulated, heat from your heating system moves down through the floor and escapes.
- Air leaks: Gaps or cracks around pipes and walls let cold air in and warm air out.
- Radiation: Cold surfaces like tile or stone can absorb heat from the room, making the whole kitchen feel cooler.
Research from the U.S. Department of Energy shows that 10–20% of a home’s heat loss can happen through the floor if it’s not insulated. In kitchens with large tile floors or those above unheated spaces, the number is often higher.
Types Of Kitchen Floors And Their Insulation Needs
Not all kitchen floors are the same. The type of floor you have determines the best way to insulate.
| Floor Type | Insulation Challenge | Best Solution |
|---|---|---|
| Tile or Stone on Concrete Slab | Very cold, hard to insulate from above | Rigid foam boards, underfloor heating |
| Wood on Joists (over crawl space) | Cold air from below, easy access | Fiberglass or spray foam under floor |
| Vinyl/Laminate over Subfloor | Some insulation, but can feel cold | Insulating underlay, floor mats |
| Heated Floors | Efficient, but need insulation below heating | High R-value insulation under heating |
Key Insight
Many homeowners assume tile or stone is always cold, but with proper insulation, even these floors can feel comfortable. The right choice depends on both your floor type and what’s under it.

Credit: www.reddit.com
Choosing The Right Floor Insulation Material
Picking the best insulation material depends on your kitchen’s floor construction, budget, and how much work you’re willing to do. Here are the most effective materials:
1. Rigid Foam Board (extruded Polystyrene Or Polyisocyanurate)
- R-value: 4.5–7 per inch (highly effective)
- Best for: Concrete slabs, underfloor heating, crawl spaces
- Pros: Moisture resistant, strong, easy to cut
- Cons: More expensive than other options
2. Fiberglass Batt Insulation
- R-value: 3.1–4.3 per inch
- Best for: Wood floors over joists (crawl space or basement access)
- Pros: Affordable, widely available, good for DIY
- Cons: Can sag if not properly installed; absorbs moisture
3. Spray Foam Insulation
- R-value: 6–7 per inch (closed-cell)
- Best for: Hard-to-reach spaces, air sealing
- Pros: Fills gaps and cracks, excellent air barrier
- Cons: Expensive, professional installation recommended
4. Insulating Underlayment
- R-value: 0.5–2 per inch (depends on material)
- Best for: Vinyl, laminate, or engineered wood floors
- Pros: Easy to install, adds comfort, reduces noise
- Cons: Lower insulation value, not suitable for very cold floors
5. Mineral Wool
- R-value: 3.7–4.2 per inch
- Best for: Fire-resistant needs, soundproofing
- Pros: Doesn’t absorb water, resists pests, fire safe
- Cons: More expensive than fiberglass
6. Reflective Foil Insulation
- R-value: Varies, best as a supplement
- Best for: Adding under joists in crawl spaces, radiant heat
- Pros: Reflects heat, easy to staple in place
- Cons: Works best when paired with other insulation
Two Insights Beginners Miss
- Many people focus only on R-value (how well insulation resists heat flow), but air sealing is just as important. Even high R-value insulation won’t help if cold air can sneak around it.
- Not all materials are safe for all locations. For example, fiberglass batts can trap moisture under floors, leading to mold or rot if the crawl space isn’t dry and well-ventilated.
Assessing Your Kitchen Floor: What’s Underneath?
Before you can insulate, you need to know what you’re working with. Here’s how to check:
- Find out your floor type: Is it tile on concrete, wood on joists, or something else?
- Look below the floor: If you have a basement or crawl space, look up at the floor from below. You may see joists, pipes, or an unfinished ceiling.
- Check for moisture: Damp or musty smells in crawl spaces or basements mean you need to address water problems before insulating.
- Measure the space: Know the distance between joists (usually 16 or 24 inches apart) to buy the right insulation size.
If your kitchen is on a concrete slab, insulation usually goes above the slab, either as part of a floor replacement or by adding a new layer. For wood floors, insulation is best added below, in the crawl space or basement.
Step-by-step: How To Insulate A Cold Kitchen Floor
Let’s walk through the best methods for each common kitchen floor type. Each method includes key steps, helpful tips, and common mistakes to avoid.
Insulating A Floor Above An Unheated Crawl Space Or Basement
This is the most common setup for cold kitchen floors.
Materials Needed
- Fiberglass batt or mineral wool insulation (R-19 or higher)
- Insulation supports (wires or netting)
- Vapor barrier (plastic sheeting)
- Safety gear: Gloves, goggles, mask
Steps
- Seal air leaks: Use spray foam or caulk to close gaps around pipes, wires, and the rim joist (where the wall meets the floor).
- Install insulation: Fit batts snugly between joists under the kitchen floor. The insulation should touch the subfloor above.
- Support insulation: Use wire supports or netting to hold the insulation in place.
- Add vapor barrier: Staple plastic sheeting to the bottom of the joists to keep moisture out.
- Check vents and moisture: Make sure the crawl space or basement is dry and well-ventilated.
Common Mistakes
- Leaving gaps between insulation and the subfloor—these let cold air through.
- Forgetting to seal air leaks, which reduces insulation effectiveness.
- Skipping the vapor barrier, which can lead to mold and rot.
Insulating A Kitchen On A Concrete Slab
This setup is harder to insulate after construction, but improvements are possible.
Materials Needed
- Rigid foam board insulation (XPS or polyiso, at least 1–2 inches thick)
- Plywood or subfloor panels
- Optional: Electric radiant heating mats
Steps
- Remove existing floor covering: This may include tile, vinyl, or laminate.
- Lay rigid foam board: Cut boards to fit the space and tape seams for a tight fit.
- Install subfloor panels: Plywood or special floating panels go on top of the foam.
- Install new flooring: Finish with your choice of tile, laminate, or engineered wood.
- Optional: Add radiant heating mats between foam and subfloor for extra comfort.
Common Mistakes
- Using soft or loose insulation that compresses under weight.
- Not sealing foam board seams—air leaks reduce effectiveness.
- Skipping a moisture barrier if the concrete is damp.
Adding Insulating Underlayment To Existing Floors
This is a simple way to add comfort if a full remodel isn’t possible.
Materials Needed
- Insulating underlayment rolls or mats
- Utility knife or scissors
- Tape
Steps
- Remove baseboards: Carefully pull up baseboards to allow the new layer to fit.
- Roll out underlayment: Lay the material flat, covering the entire floor.
- Tape seams: Use manufacturer-recommended tape to join pieces.
- Install new flooring: Place laminate, engineered wood, or vinyl planks over the underlayment.
Common Mistakes
- Overlapping seams, which can create bumps.
- Using underlayment with too low R-value for very cold floors.
- Forgetting to check door clearances—added height may block doors.
Spray Foam For Hard-to-reach Spaces
Spray foam is perfect for small spaces or irregular gaps.
Steps
- Prep the area: Clean and dry surfaces.
- Apply spray foam: Fill cracks, rim joists, and areas where pipes enter.
- Let cure: Allow time to dry before covering with other materials.
Safety Tip
Spray foam is powerful but can expand quickly. Wear gloves and goggles and follow all manufacturer instructions.
Comparing Kitchen Floor Insulation Methods
Here’s a quick comparison to help you choose the best method for your situation:
| Method | Best For | Approx. Cost (100 sq ft) | DIY Difficulty | Estimated R-Value Added |
|---|---|---|---|---|
| Fiberglass Batts | Wood floors over crawl space/basement | $75–$120 | Medium | R-19 to R-30 |
| Rigid Foam Board | Concrete slabs, radiant heat | $150–$300 | Medium | R-10 to R-14 |
| Spray Foam | Hard-to-reach, air sealing | $300–$450 | High (Professional) | R-20 to R-30 |
| Insulating Underlayment | Laminate, vinyl floors | $50–$100 | Easy | R-2 to R-4 |

Credit: www.comfenergy.com
Cost And Return On Investment
Insulating a kitchen floor costs anywhere from $1 to $5 per square foot, depending on the method and materials. For a typical kitchen (150 sq ft), expect to spend:
- Fiberglass batts: $150–$300
- Rigid foam board: $300–$600
- Spray foam: $500–$1,000
- Insulating underlayment: $100–$200
How much can you save? The U.S. Department of Energy reports that proper floor insulation can cut heating bills by 10–15% in cold climates. Over a few years, the insulation often pays for itself, not counting the improved comfort.
Special Considerations For Older Homes
If you have an older home, there are unique challenges:
- Irregular joist spacing: Measure carefully, as joists may not be standard distances apart.
- Moisture problems: Older crawl spaces and basements often have water issues. Fix leaks or drainage before adding insulation.
- Lead paint or asbestos: If your home was built before 1980, check for hazardous materials before starting work.
A pro tip: In older homes, it’s often worth hiring a professional for at least an inspection. They can spot issues you might miss, like hidden leaks or damaged wood.
Insulation And Underfloor Heating: Better Together
Many homeowners dream of warm kitchen floors with radiant heating. Insulation is the key to making these systems efficient.
- Electric or hydronic (water-based) heating mats are placed under tile or stone.
- High R-value insulation below the heating system keeps more heat in the room, less in the ground.
- A well-insulated floor can cut heating energy use by 20–30% compared to uninsulated heated floors.
If you’re considering underfloor heating, always include insulation in the project for the best results.
Diy Vs. Professional Installation
Some insulation jobs are easy for handy homeowners. Others are best left to professionals.
- DIY friendly: Adding fiberglass batts or underlayment, sealing small air leaks.
- Professional recommended: Spray foam, rigid foam over concrete, major moisture problems.
Professionals can also help with building codes, especially if your kitchen is above a garage or basement. Codes may require fire barriers or specific insulation types.
Practical Tips For A Warmer Kitchen Floor
Improving your kitchen floor’s warmth doesn’t always mean a full renovation. Here are some quick wins and advanced options:
- Seal drafts: Use caulk or weatherstripping around baseboards, pipes, and doors.
- Add thick rugs or mats: While not true insulation, they make a big difference for comfort.
- Install insulated skirting: For kitchens above crawl spaces, insulated skirting around the foundation helps keep out cold air.
- Check heating vents: Make sure warm air can reach the kitchen floor area.
- Close crawl space vents in winter: This keeps cold air from circulating under the floor (reopen in spring for ventilation).
- Use reflective film: For radiant heat floors, reflective film under the heating mats helps focus heat upward.
Common Mistakes To Avoid
Many insulation projects don’t work as well as they could, often because of preventable errors.
- Ignoring air leaks: Insulation without air sealing is only half a solution.
- Not addressing moisture: Wet insulation loses its R-value and can lead to costly repairs.
- Compressing insulation: Squeezing insulation into tight spaces reduces its effectiveness.
- Choosing the wrong material: Not all insulation works for all floors—research your options before buying.
- Overlooking building codes: Some areas require fire barriers or special materials for kitchen floors.
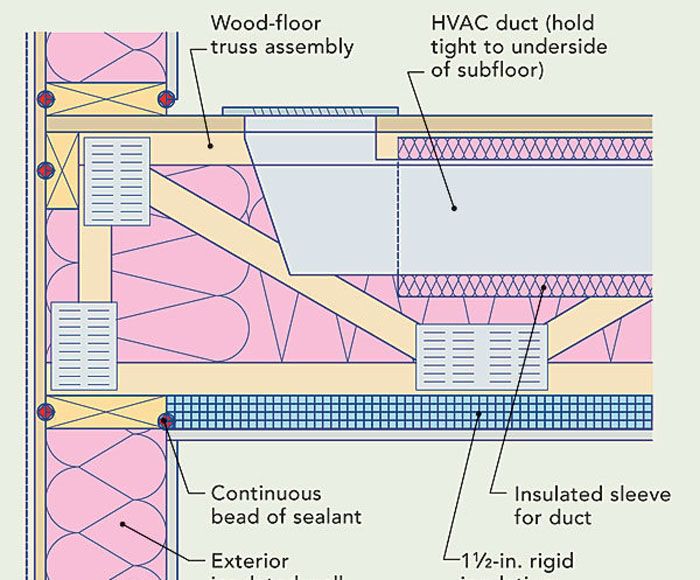
Credit: www.finehomebuilding.com
Real-world Example
Consider a family in Minnesota with a 200 sq ft kitchen above a crawl space. Winters were unbearable, with floor temperatures as low as 50°F. They installed R-30 fiberglass batts with air sealing and a vapor barrier. The project cost about $500 (DIY), and their floor temperature rose to 65°F.
Their heating bills dropped by 12%, and the kitchen became the heart of their home, even in January.
Environmental Impact And Safety
Insulation doesn’t just help your comfort—it’s a win for the environment. Less heat loss means less energy burned, lower greenhouse gas emissions, and a smaller carbon footprint.
- Fiberglass and mineral wool are made from recycled materials.
- Spray foam has a higher environmental impact but excellent efficiency.
- Proper installation prevents mold, pests, and water damage.
Always wear safety gear, especially when handling fiberglass or using spray foam. Follow local codes for fire safety, especially near stoves or heat sources.
Maintenance And Longevity
Good insulation can last for decades, but it needs the right conditions.
- Check for moisture: Wet insulation should be replaced immediately.
- Inspect regularly: Look for sagging, gaps, or animal damage in crawl spaces.
- Replace as needed: Modern materials are more durable—upgrading old insulation pays off.
Getting Started: A Simple Action Plan
Feeling overwhelmed? Here’s a step-by-step plan to make your kitchen floor warmer:
- Identify your floor type and what’s below.
- Inspect for moisture and air leaks. Fix these first.
- Choose the right insulation material for your floor setup.
- Decide if you’ll DIY or hire a pro.
- Plan your budget and timeline.
- Start with small improvements (draft sealing, rugs) if a big project isn’t possible now.
Additional Resources
For more in-depth technical details and building codes, check out the U.S. Department of Energy’s Insulation Guide.
Frequently Asked Questions
What Is The Best Insulation For A Kitchen Floor Over A Crawl Space?
The best choice is fiberglass batts or mineral wool with an R-value of 19 or higher. Install them between the joists, add a vapor barrier, and seal all air leaks. This setup is effective, affordable, and safe for most homes.
Can I Insulate My Kitchen Floor Without Removing The Flooring?
Yes, you can add insulating underlayment if you’re installing new laminate or vinyl flooring. For wood floors over a crawl space or basement, you can insulate from below without touching the kitchen surface.
How Much Money Can I Save By Insulating My Kitchen Floor?
Homeowners typically save 10–15% on heating bills with proper floor insulation, especially in cold climates or homes with uninsulated crawl spaces or basements. The exact amount depends on your heating system and local energy costs.
Will Insulation Help With Kitchen Noise?
Yes, especially if you use mineral wool or fiberglass, which also reduce sound transmission. This is helpful if your kitchen is above a living room or bedroom.
Is It Worth Installing Radiant Heating Under My Kitchen Floor?
Radiant heating can make any kitchen floor warm and comfortable. But it works best with proper insulation underneath. Without insulation, much of the heat escapes downward, wasting energy and money.
—
A cold kitchen floor doesn’t have to be a fact of life. With the right insulation, you can transform your kitchen into a warm, welcoming space—no more chilly mornings or high energy bills. Careful planning, smart material choices, and attention to detail will pay off for years to come.
Whether you do it yourself or call a pro, the comfort you gain is worth every step.