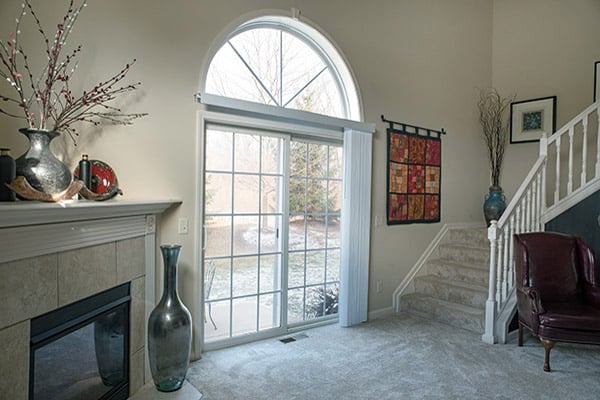
Winter can be beautiful, but for many homeowners, it brings a common problem: cold air sneaking into the house through sliding doors. If you’ve ever noticed your living room feeling chilly, or your heating bill rising during the colder months, your sliding door might be the reason. These large glass doors are great for letting in sunlight and connecting your home to the outdoors, but they also let in drafts if not prepared for winter. The good news? You can winterize a sliding door on your own with a bit of effort, a few tools, and some know-how.
This guide will take you through everything you need to know. You’ll learn why winterizing is important, what materials to use, how to check for air leaks, and what mistakes to avoid. You’ll also find data, practical tips, and clear step-by-step instructions.
Whether you’re a DIY beginner or have some experience, you’ll finish this article knowing exactly how to keep your home warmer, safer, and more energy efficient all winter long.
Why Winterizing A Sliding Door Matters
Sliding doors are a favorite feature in many homes, but they are also one of the weakest points for heat loss. Most sliding doors use large panes of glass and a track system. Over time, seals can wear out, frames can warp, and tiny gaps can appear.
These small problems might not seem like much, but they can have a big impact on your comfort and your wallet.
According to the U.S. Department of Energy, about 30% of a home’s heating energy is lost through windows and doors. Sliding doors, with their large surface area, are a major contributor. Cold air slips in, and warm air escapes, making your heating system work harder. This means higher energy bills and more wear on your heating equipment.
Winterizing does more than just save money. It also helps protect your home from moisture, pests, and even sound. Proper insulation can prevent condensation, which can lead to mold or damage. It also blocks outdoor noise and keeps bugs from finding a way inside during colder months.
Signs Your Sliding Door Needs Winterizing
Before you start, it’s important to check if your sliding door needs attention. Some signs are obvious, but others are easy to miss.
- Drafts: If you feel cold air near the door or see your curtains moving, there’s likely an air leak.
- Condensation: Water droplets inside the glass or on the frame can mean poor insulation.
- Difficulty closing: If the door is hard to open or close, the track or seals might be worn.
- Visible gaps: Check for light coming through edges or cracks in the weatherstripping.
- Rising energy bills: If your heating costs are higher than usual, your doors and windows could be the cause.
Catching these problems early can help you fix them before winter gets worse.
Essential Tools And Materials For Winterizing
Having the right tools and materials will make the job easier and more effective. Here’s a list to get you started:
- Weatherstripping: Foam, rubber, or silicone strips to block gaps around the door.
- Door sweeps: Attach to the bottom of the door to seal the space between the door and the floor.
- Caulk and caulking gun: For sealing cracks around the frame.
- Insulating window film: Thin plastic film to add an extra layer of insulation over the glass.
- Draft stoppers: Fabric tubes or snakes for blocking the bottom track.
- Screwdriver: To remove and adjust parts of the frame or hardware.
- Utility knife: For cutting materials to size.
- Measuring tape: To measure gaps and materials.
- Cleaning supplies: Soap, water, and towels to prepare surfaces.
- Replacement rollers or hardware: If your door doesn’t slide smoothly.
Not all sliding doors need every item. Start by inspecting your door, then choose the materials that fit your needs best.
Step-by-step: How To Winterize A Sliding Door
1. Clean And Inspect The Door
Before adding new materials, clean the door and track. Dirt and debris can stop seals from working well.
- Open the door completely.
- Use a vacuum to remove dirt from the track.
- Wipe the frame, glass, and track with soap and water.
- Check for cracks, worn seals, or broken parts.
Tip: Cleaning lets you spot hidden problems and helps new materials stick better.
2. Check For Air Leaks
Finding leaks is key to a good result. Here’s how you can check:
- On a cold day, hold your hand around the edges of the door. Feel for drafts.
- Use a candle or lighter (carefully) near the frame. If the flame flickers, there’s a leak.
- Shine a flashlight from outside at night. Have someone inside look for light coming through.
Mark any problem spots with tape or a marker. You’ll seal these in the next steps.
3. Replace Or Add Weatherstripping
Weatherstripping is the most effective way to stop drafts. Old weatherstripping can crack or shrink over time.
- Pull off any old weatherstripping gently.
- Clean the area with rubbing alcohol or soap and water. Let it dry.
- Measure the length needed for each side.
- Cut the new weatherstripping to fit.
- Press it firmly into place along the sides and top.
Non-obvious tip: For sliding doors, choose weatherstripping that compresses easily so the door can still open and close smoothly.
4. Seal The Bottom With A Door Sweep Or Draft Stopper
The bottom of a sliding door is often the worst spot for drafts. Two main options can help:
- Door sweep: A flexible strip that attaches to the bottom of the door.
- Draft stopper: A weighted fabric tube placed along the inside track.
To install a sweep:
- Cut it to the right length.
- Screw or stick it to the bottom edge.
Draft stoppers are easy to place and remove, making them great for renters.
5. Caulk Around The Frame
Small gaps between the frame and wall can let in cold air. Caulk is a simple fix.
- Choose an exterior-grade, paintable caulk.
- Cut the tip at a 45-degree angle for better control.
- Run a steady bead along gaps between the frame and wall.
- Smooth it with a wet finger or caulk tool.
Practical insight: Check both inside and outside. Outdoor caulking often matters most.
6. Add Insulating Window Film
Glass loses heat quickly. Insulating film adds an invisible layer that cuts drafts and energy loss.
- Clean the glass fully.
- Cut the film to size, leaving some extra around the edges.
- Use double-sided tape to attach it to the frame.
- Shrink the film with a hair dryer until it’s tight and clear.
Beginners often forget: Window film should be replaced each year for best results.
7. Lubricate And Adjust Rollers
A sticky door can let in air and is harder to lock. Check the rollers:
- Open the access covers at the bottom of the door.
- Use a screwdriver to adjust the roller screws. Raise or lower until the door moves smoothly.
- Spray a silicone-based lubricant on the track (avoid oil, which attracts dirt).
A well-moving door closes tighter, blocking more air.
8. Insulate The Track
The track is a weak spot for heat loss, especially if you rarely open the door in winter.
- Use foam backer rod or flexible weatherstripping to fill the unused track.
- For doors not used until spring, a removable foam strip can block drafts fully.
9. Upgrade Locks And Security
Cold air isn’t the only risk. Weak locks can let in intruders.
- Check the lock for damage or looseness.
- Tighten screws or replace the lock if needed.
- Consider adding a security bar or pin for extra strength.
Non-obvious insight: A tight, secure lock also helps seal the door, reducing air leaks.
10. Cover With Thermal Curtains
Heavy curtains or insulated panels add another layer against cold.
- Hang curtains that fully cover the door and reach the floor.
- Close them at night for best effect.
- Open during sunny days to let in natural warmth.
Insulated curtains can cut heat loss by up to 25%, according to the U.S. Department of Energy.
Comparing Insulation Options
Choosing the right insulation can be confusing. Here’s a simple comparison:
| Product | Average Cost | Ease of Install | Insulation Benefit | Removable? |
|---|---|---|---|---|
| Weatherstripping | $5–$20 | Easy | High | Yes |
| Window Film | $10–$30 | Moderate | Medium | Yes |
| Draft Stopper | $10–$25 | Very Easy | Medium | Yes |
| Thermal Curtains | $30–$100 | Easy | High | Yes |
| Caulk | $4–$12 | Moderate | High | No |
Choose products based on your budget, how often you use the door, and whether you need a permanent or temporary solution.
Common Mistakes To Avoid
Many people try to winterize their sliding doors but don’t get the results they want. Here’s why:
- Ignoring the track: Dust and debris in the track prevent a good seal. Always clean before adding new materials.
- Using wrong materials: Not all weatherstripping works for sliding doors. Choose flexible, low-profile types.
- Skipping outside caulking: Outdoor gaps let in more air than inside ones. Don’t skip the outside.
- Neglecting the glass: Even with sealed edges, single-pane glass loses lots of heat. Use window film or curtains for extra insulation.
- Not testing after finishing: Always check for drafts again when you’re done. Small gaps can remain.
- Forgetting hardware: Worn rollers or loose locks can stop your door from closing tightly.
- Blocking emergency exits: Don’t seal a door you might need to use in an emergency.
Pro tip: Take photos before you start. It helps remember how everything fits if you need to remove materials in spring.

Credit: www.reddit.com
How Winterizing Saves Energy And Money
Winterizing isn’t just about comfort—it’s also about efficiency. The U.S. Energy Information Administration reports that heating accounts for about 42% of home energy use. A well-sealed sliding door can reduce heat loss by as much as 20%.
Let’s look at a sample cost/benefit comparison:
| Action | Estimated Cost | Annual Heating Savings | Payback Time |
|---|---|---|---|
| Weatherstripping & Caulk | $20 | $40 | 6 months |
| Window Film | $25 | $15 | 20 months |
| Thermal Curtains | $60 | $25 | 2.4 years |
You don’t need to do everything at once. Even one or two steps can pay for themselves quickly, especially if you have more than one sliding door.
When To Replace Instead Of Repair
Sometimes, winterizing is only a temporary fix. If your sliding door is very old or damaged, replacing it may be better. Signs you need a new door:
- Broken glass: Cracks or fogging inside double panes.
- Rotted or warped frame: Wood that’s soft, warped, or moldy.
- Stuck or jumping rollers: If the door can’t slide smoothly, even after cleaning.
- Persistent leaks: Air or water leaks that don’t go away after repairs.
Modern sliding doors often use double or triple-pane glass, better weatherstripping, and insulated frames. They cost more, but can cut energy loss by up to 50% compared to older models.
Credit: www.4feldco.com
Professional Help Vs. Diy
Most winterizing tasks are DIY-friendly. However, some jobs are better for a pro:
- Installing new glass or large door units
- Fixing major frame rot or water damage
- Upgrading to high-efficiency doors
Hiring a professional costs more, but can save time and avoid mistakes. If you’re unsure, get estimates from local contractors.
For most people, basic winterizing steps can be done in a few hours with common tools and materials.
Maintenance Tips For Year-round Performance
Winterizing should be part of a regular door maintenance plan. Here’s how to keep your sliding door in top shape all year:
- Clean the track every season to prevent buildup.
- Check weatherstripping twice a year and replace if cracked or loose.
- Lubricate rollers every six months for smooth sliding.
- Inspect the frame for signs of rot, mold, or water damage.
- Open the door briefly during sunny winter days to prevent condensation.
Regular care will keep your winterizing work effective and extend the life of your door.

Credit: vinyllight.ca
Real-world Example
Let’s look at a simple case. Sarah lives in an older house with a large sliding glass door. Every winter, she felt cold air near the door and saw her heating bill jump. Last fall, she decided to winterize:
- She replaced old weatherstripping ($12), added a draft stopper ($14), and applied window film ($18).
- The process took one afternoon and less than $50.
- That winter, her energy bill dropped by about $30/month compared to last year.
- She also noticed less condensation and fewer bugs.
Sarah’s experience shows that simple steps can make a big difference—even for beginners.
Advanced Upgrades For Extra Efficiency
If you want to go further, consider these advanced options:
- Install double or triple-pane glass: Modern glass units provide much better insulation.
- Add low-E film: Special coatings reflect heat back inside.
- Upgrade to insulated frames: Vinyl or fiberglass frames lose less heat than aluminum.
- Install automatic door sweeps: These seal the bottom only when the door is closed.
- Smart sensors: Some smart home systems alert you if a door is left open or not sealed.
These upgrades cost more upfront but can pay off in comfort and long-term savings.
Environmental Benefits
Winterizing your sliding door isn’t just good for your wallet—it helps the planet, too. Cutting energy waste means less fuel burned for heat, which reduces greenhouse gas emissions. According to the U.S. Environmental Protection Agency, improving home insulation can make a noticeable impact on your carbon footprint.
Even small changes, like sealing one drafty door, make a difference when millions of homes take similar steps.
Extra Tips For Renters
If you rent your home, you may not be allowed to make permanent changes. Here’s what you can do:
- Use removable window film—no glue or nails required.
- Place draft stoppers and thermal curtains.
- Choose adhesive-backed weatherstripping that peels off cleanly.
- Ask your landlord before making changes to locks or hardware.
Most landlords appreciate renters who care for the property, especially if it lowers energy bills and prevents damage.
Frequently Asked Questions
How Often Should I Replace Weatherstripping On My Sliding Door?
Most weatherstripping lasts 1-3 years, but it depends on the material and how often you use the door. Check it every fall and spring. If you see cracks, gaps, or it peels away, it’s time to replace.
Can I Winterize A Sliding Door If I Live In An Apartment?
Yes, you can! Use removable products like window film, draft stoppers, and thermal curtains. These don’t damage the door or frame and can be taken with you when you move.
Does Winterizing Also Help With Summer Cooling?
Absolutely. Most steps, like weatherstripping and curtains, also keep cool air in during the summer. This means your sliding door can help lower your air conditioning bills, too.
Will Winterizing Stop All Condensation?
Winterizing reduces drafts and raises the inside temperature of the glass, which cuts down on condensation. But if your home is very humid, you may still see some moisture. Try using a dehumidifier if condensation continues.
Where Can I Find More Information About Energy-efficient Doors?
For more details and the latest research, visit the U.S. Department of Energy website. They offer guides on choosing and maintaining energy-saving windows and doors.
Keeping your home warm in winter doesn’t have to be hard or expensive. With the right steps, a little work, and smart choices, you can enjoy a cozier, more efficient space all season long. Your sliding door can be a source of comfort—not cold—and you’ll see the benefits in every energy bill.