
Removing popcorn ceiling is a big step toward modernizing your home. The old, bumpy texture makes rooms look dated and can even lower property value. Once you scrape it off, though, you’re left with a blank canvas—and a question: how do you texture a ceiling after removing popcorn? Many homeowners stop at a flat, plain ceiling, but adding a new texture brings character, hides imperfections, and makes a room feel finished. This guide walks you through the process, from preparation to the final touches, with practical tips and professional insights you won’t find elsewhere.
Why Texture Your Ceiling After Popcorn Removal?
Popcorn ceilings were popular in the mid-20th century for a reason: they hide flaws, absorb sound, and are easy to spray on. But after removal, the ceiling underneath is often rough, patched, or uneven. Simply painting over it can highlight these imperfections instead of hiding them.
Texturing gives you a chance to:
- Conceal cracks, joints, or patches left from scraping
- Add style or visual interest (from subtle to bold)
- Improve light diffusion, making rooms feel brighter
- Increase property value with a modern look
Most importantly, texturing is more forgiving than a perfectly flat finish. Even if your DIY skills aren’t perfect, the right texture can make your ceiling look professional.
Understanding Different Ceiling Texture Types
The first step is choosing the right texture. Some are classic and understated; others are dramatic and eye-catching. Each has a unique look, application method, and level of difficulty.
| Texture Name | Appearance | Best For | Skill Level |
|---|---|---|---|
| Knockdown | Mottled, flat peaks | Modern homes | Beginner to intermediate |
| Orange Peel | Fine, splattered look | Subtle texture lovers | Beginner |
| Skip Trowel | Random, swirled patterns | Custom, Mediterranean style | Intermediate |
| Slap Brush | Fan-like, sunburst marks | Traditional rooms | Beginner to intermediate |
| Swirl | Elegant, circular designs | Classic decor | Intermediate |
| Sand Texture | Grainy, subtle texture | Low-key, practical rooms | Beginner |
Many people default to knockdown or orange peel because they are easy, forgiving, and suit modern tastes. However, don’t overlook styles like skip trowel or swirl—they can add a unique, custom feel.
Essential Tools And Materials
Before you begin, gather your supplies. Using the right tools makes the job smoother and helps you achieve a professional finish.
Basic Materials
- Joint compound (pre-mixed “mud” or powder)
- Water (for thinning compound)
- Primer (stain-blocking, latex or oil-based)
- Paint (ceiling paint, flat or eggshell finish)
- Drop cloths or plastic sheeting
- Painter’s tape
Tools
- 6- to 12-inch drywall knives
- Hawk or mud pan
- Texture roller (for orange peel or sand)
- Knockdown knife or wide trowel
- Stiff-bristled brush (for slap brush)
- Drill with mixing paddle (for large areas)
- Step ladder or scaffolding
- Respirator and safety goggles
If you’re considering more advanced textures, such as skip trowel or swirl, you may need a trowel, sponge, or specialty brushes.
Cost Comparison
How much will you spend? Here’s a rough estimate:
| Item | Average Cost | Reusable? |
|---|---|---|
| Joint Compound (5 gal.) | $15–$25 | No |
| Texture Roller | $8–$20 | Yes |
| Knockdown Knife | $12–$20 | Yes |
| Primer | $15–$30 | No |
| Ceiling Paint | $18–$40 | No |
| Drop Cloths | $8–$15 | Yes |
On average, expect to spend $70–$150 for a standard 12×12-foot room, depending on texture type and whether you own basic tools.
Preparing Your Ceiling For Texture
A smooth result starts with proper preparation. Many beginners skip or rush this step, leading to a patchy or uneven finish.
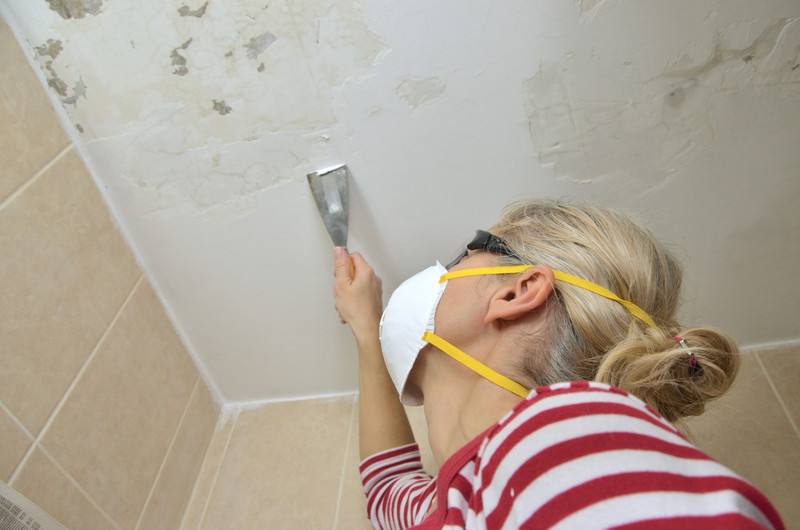
1. Remove All Popcorn Traces
After scraping, small bits often remain. Use a wide drywall knife or sanding pole to gently remove stubborn spots. Be careful not to gouge the drywall.
2. Repair Imperfections
Popcorn removal can expose cracks, dents, or tape seams. Apply joint compound to all rough areas, let it dry, then sand smooth. Repeat if needed. Even minor flaws will show through texture, so take your time.
3. Clean And Dust
Wipe the ceiling with a damp sponge to remove dust. Texture won’t stick to loose particles.
4. Prime The Surface
This is often skipped, but primer is critical. It seals the drywall, prevents stains, and ensures even absorption of the texture. Use a stain-blocking primer for best results—especially if you had water damage or smoke stains.
5. Mask And Protect
Cover walls, floors, and fixtures with plastic or drop cloths. Tape off the edges where the ceiling meets the wall. Texture is messy!
Non-obvious insight: If your ceiling has stains or yellowing, use an oil-based or shellac primer. Water-based primers can reactivate stains and cause them to bleed through the new texture.
Credit: www.dallaspaints.com
How To Mix And Thin Your Texture Compound
Mixing the compound to the right consistency is key. Too thick, and it’s hard to spread. Too thin, and it drips.
- For knockdown, slap brush, or skip trowel: Mix joint compound with water until it’s about the thickness of pancake batter. It should hold a peak but not be stiff.
- For orange peel: Go thinner—like heavy cream. It needs to spray or roll easily.
- For sand texture: Use a pre-mixed sanded paint or add fine silica sand to your joint compound.
Always mix more than you think you’ll need. Consistency can change as the compound sits, so stir often.
Pro tip: Use a drill with a paddle mixer for big batches. Hand mixing is tiring and less consistent.
Step-by-step: Applying Popular Ceiling Textures
Let’s break down the process for the most common types. Each method has its unique workflow, but all start with a well-prepped, primed ceiling.
Knockdown Texture
This style is popular because it hides flaws and looks modern.
Steps:
- Load a roller with thinned joint compound.
- Roll a 5×5-foot area, working quickly.
- Wait 10–15 minutes, until the surface dulls but is still soft.
- Lightly drag a knockdown knife or wide drywall knife across the texture to flatten the peaks.
- Repeat across the ceiling, blending edges as you go.
Tip: Timing is everything. If you start knocking down too soon, you’ll smear the mud. If you wait too long, it won’t flatten smoothly.
Orange Peel Texture
This subtle look is applied with a sprayer or special roller.
Steps:
- Thin joint compound to a sprayable consistency.
- Use a hopper gun (for large areas) or a texture roller (for small rooms).
- Spray or roll on a light, even coat.
- Let dry completely before painting.
Non-obvious insight: Practice your spray or roll technique on a piece of cardboard first. Orange peel requires even pressure and steady movement.
Skip Trowel
This artistic style creates a custom look.
Steps:
- Apply a thin layer of joint compound to a small section.
- Hold a clean trowel or wide knife at a low angle.
- “Skip” the trowel lightly over the wet mud, letting it catch and skip, leaving random patterns.
- Overlap edges for a natural look.
Tip: Skip trowel takes practice. Work in sections, and wipe your trowel often.
Slap Brush Texture
Also called “stomp” texture, this is dramatic and easy for beginners.
Steps:
- Roll on a layer of thick joint compound.
- While still wet, use a stiff-bristled brush (round or fan-shaped) to “slap” the mud, creating a pattern.
- Vary the angle for a more random, natural look.
Swirl Texture
This classic style suits traditional homes.
Steps:
- Apply a thin, even layer of joint compound.
- Use a medium-sized brush or sponge to make overlapping, circular swirls.
- Keep your movements steady and consistent for a neat look.
Pro tip: Mark guiding lines with a pencil to keep swirls even across the ceiling.
Sand Texture
This is the easiest method for subtle texture.
Steps:
- Use pre-mixed sand-texture paint or mix fine sand with primer or joint compound.
- Roll on with a thick-nap roller.
- Let dry and paint as desired.
Non-obvious insight: Sand textures are good for bathrooms or kitchens—they’re less likely to peel from humidity.
Blending And Patching Seams
If you run out of compound or need to take a break, you’ll have “seams” where fresh texture meets dry. Blend these by feathering out the edges with a damp brush or sponge before they harden. Always work in sections that you can finish in 15–30 minutes.
If you spot a missed area after drying, sand lightly, apply a thin coat of compound, and match the texture with your chosen tool.
Drying Time And When To Paint
Most ceiling textures need 24 hours to dry, but humidity and thickness matter. Avoid painting until the texture is fully dry—painting too soon can cause cracks or peeling.
Here’s a drying guideline:
| Texture Type | Average Dry Time | Ready for Paint? |
|---|---|---|
| Knockdown | 12–24 hrs | Yes, after 24 hrs |
| Orange Peel | 8–16 hrs | Yes, after 16 hrs |
| Skip Trowel | 24 hrs | Yes, after 24 hrs |
| Sand Texture | 6–12 hrs | Yes, after 12 hrs |
Painting The Textured Ceiling
Once dry, apply a coat of quality ceiling paint. Use a thick-nap roller for deep textures to reach all crevices. Flat or eggshell finishes work best—they hide flaws better than glossy paint.
- Cut in around edges with a brush first.
- Roll in overlapping sections, keeping a wet edge to avoid lap marks.
- Allow to dry, then inspect for missed spots.
Non-obvious insight: Tint your primer the same color as your topcoat. This improves coverage and reduces the number of paint coats needed.
Common Mistakes And How To Avoid Them
Many DIYers run into trouble with ceiling texturing. Here are common problems and solutions:
- Skipping primer: Texture may peel or look patchy without proper priming.
- Wrong mud consistency: Too thick = hard to spread; too thin = drips and sags.
- Working too slowly: Compound dries fast—work in small sections.
- Not blending sections: Always feather edges when starting/stopping.
- Painting too soon: Wait for full drying to prevent cracks.
- Using the wrong roller: Use a thick-nap roller for rough textures.
- Applying too much pressure: Light touch is key—pressing hard flattens the texture.
Credit: www.beaninloveblog.com
Can You Apply Texture Over Damaged Or Stained Ceilings?
Yes, but only after proper prep. If your ceiling has water damage, smoke stains, or mold, address the cause first. Remove loose material, use a stain-blocking primer, and repair damage with joint compound. Do not texture over active leaks or soft drywall.
Safety Tips And Ventilation
Texturing can be messy and dusty. Always wear:
- Respirator (especially when sanding)
- Safety goggles
- Long sleeves and gloves
Open windows and use fans to ventilate fumes from primer and paint. Keep children and pets out of the area until dry.
Lead warning: If your home was built before 1978, test for lead paint before sanding or scraping. Lead dust is dangerous—consider hiring a pro if you’re unsure.
Should You Diy Or Hire A Professional?
DIY texturing is possible for most homeowners, especially with simple patterns like orange peel or knockdown. However, large or high ceilings, or custom textures, may require a pro.
Pros of DIY:
- Save money
- Choose your own style
- Learn a new skill
Cons:
- Time-consuming (plan for at least a weekend)
- Messy and labor-intensive
- Difficult to match existing textures
Hiring a pro costs $1–$3 per square foot but ensures a flawless finish. For difficult repairs or historic homes, professional help is wise.
When To Use A Spray Texture Vs. Hand Application
Spray textures (orange peel, knockdown) are best for speed and consistent results in large rooms. Hand-applied textures (skip trowel, swirl) offer more control and custom patterns but take longer.
If you don’t own a sprayer, many home improvement stores rent texture hoppers. Practice on scrap before tackling your ceiling.
Advanced Tips For A Flawless Finish
- Keep tools clean: Dried mud on knives causes streaks.
- Work with a helper: One person rolls/spreads, the other textures.
- Control lighting: Use a work light at an angle. Shadows reveal flaws you’d miss in overhead light.
- Edge carefully: Use a small brush or sponge for corners.
- Test your texture: Practice on cardboard or drywall scraps before the ceiling.
Real-world Example: Transforming A 1980s Living Room
After popcorn removal, a homeowner in Dallas, Texas, chose a knockdown texture for their 15×20-foot living room. The prep took one day (scraping, repairing, priming). Applying texture took half a day, and painting was finished the next day. The result? The new ceiling brightened the room, modernized the look, and added $2,000 to the home’s appraised value.
How Long Does It Take? Planning Your Project
Here’s an example timeline for a 12×12-foot room:
- Day 1: Prep (scraping, repairs, priming) — 4–6 hours
- Day 2: Apply texture — 2–4 hours
- Day 3: Drying
- Day 4: Paint — 2–3 hours
Larger rooms or complex textures add time. Always allow for drying between steps.
Eco-friendly And Low-voc Options
Look for low-VOC joint compound, primer, and paint to reduce indoor air pollution. Water-based products are easier to clean and safer for families.
If you want a sustainable approach, choose materials with recycled content, and dispose of leftover mud and paint according to local regulations.

Credit: www.reddit.com
Additional Resources
If you need more guidance or want to see video demonstrations, check out this detailed guide from the Family Handyman.
Frequently Asked Questions
How Long Should I Wait Before Painting My Textured Ceiling?
Most textures need at least 24 hours to dry before painting. Check for cool or damp spots—if any area feels soft or looks darker, wait longer.
Can I Texture Over A Painted Ceiling?
Yes, but clean the surface first and apply a bonding primer. This helps the new texture stick and prevents peeling.
What Is The Easiest Ceiling Texture For Beginners?
Orange peel or sand texture are the easiest. Both use simple rolling or spraying techniques and are forgiving of small mistakes.
How Do I Fix Mistakes In My Ceiling Texture?
For small errors, sand the area lightly, reapply compound, and retexture with your chosen tool. For large areas, skim coat to flatten, then start over.
Is It Safe To Texture A Ceiling Myself If I’m Not Experienced?
Yes, with the right safety gear and patience. Start with a small room or closet to practice. If you have very high ceilings or health concerns, consider hiring a professional.
Transforming your ceiling after popcorn removal is a rewarding project. With the right preparation, tools, and a bit of practice, you can create a beautiful, modern ceiling that adds value and style to your home.