Setting up the Nest Thermostat app is simple and straightforward. First, download the app.
Then, follow the on-screen instructions. The Nest Thermostat app helps you control your home’s temperature from your phone. It offers convenience and energy savings. This introduction will guide you through the setup process. We’ll cover everything you need to start using your new smart thermostat.
From downloading the app to connecting it with your Nest Thermostat, we’ll explain each step clearly. Whether you’re tech-savvy or a beginner, this guide will make the process easy to understand. Ready to make your home smarter? Let’s get started!
Introduction To Nest Thermostat
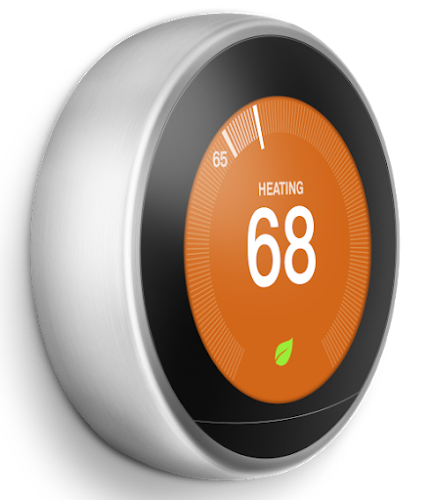
The Nest Thermostat is a smart device designed to help manage your home’s heating and cooling. It is user-friendly and offers several features to make your life easier. This guide will help you set up the Nest Thermostat app.
What Is Nest Thermostat?
Nest Thermostat is a smart home device. It controls your heating and cooling system. It learns your schedule and adjusts the temperature automatically. You can also control it using your smartphone. This makes it easy to adjust the temperature even when you are not home.
Benefits Of Using Nest Thermostat
Using Nest Thermostat has several benefits. It helps save energy by learning your schedule. It can lower your heating and cooling bills. You can control it from your phone. This means you can change the temperature from anywhere. It is also easy to install and use. The device provides reports on your energy use. This helps you understand how you can save more energy.
Credit: support.google.com
Downloading The Nest App
Setting up your Nest Thermostat starts with downloading the Nest app. This app allows you to control your thermostat from your smartphone. Follow these steps to get started.
Where To Download
You can download the Nest app from two main sources:
- Google Play Store: If you have an Android device, open the Google Play Store. Search for “Nest app” and select the app by Nest Labs.
- Apple App Store: For iPhone users, open the Apple App Store. Search for “Nest app” and choose the app developed by Nest Labs.
Installation Process
Once you have found the Nest app in your respective store, follow these steps:
- Tap the Install Button: Click on the install button to start the download.
- Wait for the Download: The app will download and install automatically.
- Open the App: Once installed, open the app. You will see a welcome screen.
- Create an Account: If you do not have a Nest account, create one. Provide your email and set a password.
- Log In: If you already have an account, log in using your credentials.
Once logged in, you can start setting up your Nest Thermostat. The app will guide you through the process step by step. Now you are ready to control your home temperature with ease.
Creating A Nest Account
Setting up your Nest Thermostat starts with creating a Nest account. This step is essential for managing your device. You can control temperature settings, set schedules, and receive notifications. Follow these simple steps to create your account and get started.
Sign-up Steps
To create your Nest account, open the Nest app. Tap “Sign Up.” Enter your email address. Choose a strong password. Make sure your password includes numbers and letters. Click “Next” to proceed. Fill in your name and other details. Confirm your information and tap “Create Account.”
Verifying Your Account
After creating your account, check your email. Nest will send a verification link. Open the email and click the link. This step confirms your account. Once verified, you can access all Nest features. Log in with your email and password. Your Nest Thermostat is now ready for setup and use.

Credit: m.youtube.com
Connecting Your Thermostat
Connecting your Nest Thermostat to the app ensures you can control your home climate from anywhere. This guide will walk you through the steps to set up and link your device to the app.
Setting Up The Device
To begin, you need to install the Nest Thermostat. Follow these steps:
- Unbox your thermostat and find the installation guide.
- Turn off the power to your HVAC system.
- Remove the old thermostat from the wall.
- Mount the Nest Thermostat base on the wall.
- Connect the wires to the Nest Thermostat base.
- Attach the display to the base.
- Turn the power back on.
Once the thermostat is installed, it’s time to configure the device.
Use the on-screen instructions to set up basic settings:
- Select your language.
- Connect to your Wi-Fi network.
- Set your location.
- Calibrate the temperature.
Linking To The App
After setting up the device, you need to link it to the Nest app. Follow these steps:
| Step | Instructions |
|---|---|
| 1 | Download the Nest app from the App Store or Google Play. |
| 2 | Open the app and create a new account or log in. |
| 3 | Tap on the + icon to add a new device. |
| 4 | Select Thermostat from the list of devices. |
| 5 | Follow the on-screen instructions to complete the setup. |
Linking the Nest Thermostat to the app allows you to control the temperature remotely. You can also set schedules, monitor energy usage, and receive alerts.
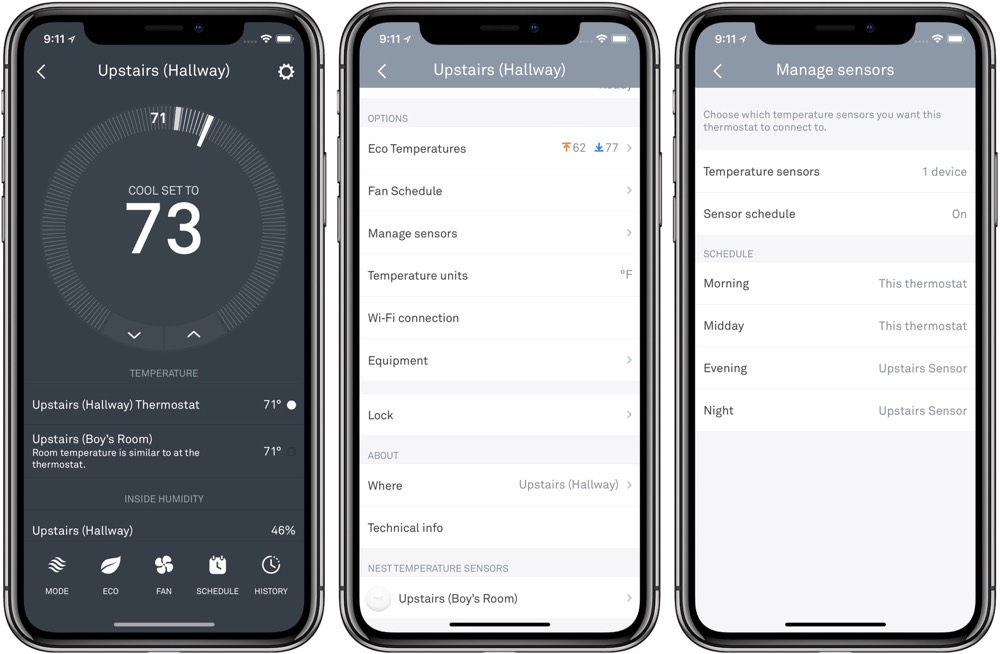
Configuring Basic Settings
Setting up your Nest Thermostat app is easy. Configuring basic settings helps you get the most out of your device. Let’s look at setting temperature preferences and scheduling features.
Temperature Preferences
First, open the Nest Thermostat app. Go to the Settings menu. Under Temperature Preferences, you can set your desired comfort levels. This includes:
- Home temperature: The temperature while you are at home.
- Away temperature: The temperature while you are away.
- Sleep temperature: The temperature while you are sleeping.
Adjust the sliders to set your ideal temperatures. This ensures your home is always comfortable. You can also set a range for each temperature. This helps in saving energy.
Scheduling Features
Next, go to the Schedule menu. Here, you can set a daily or weekly schedule for your thermostat. This helps to automate temperature changes based on your routine. To create a schedule:
- Tap on New Schedule.
- Select the days you want to include.
- Set the time blocks for different temperatures.
- Drag the sliders to set temperatures for each block.
You can add multiple blocks for each day. This allows for different temperatures in the morning, afternoon, and evening. You can also copy and paste schedules to other days. This makes it easy to set up a consistent schedule.
Remember to save your schedule once done. Your thermostat will now adjust automatically based on your settings.
Exploring Advanced Features
Setting up the Nest Thermostat App opens up a world of advanced features. These features help you save energy and make your home more comfortable. Let’s dive into two key features: Energy History and Home/Away Assist.
Energy History
Energy History lets you see how much energy you have used. This feature shows daily and monthly energy usage. You can find patterns and make changes to save energy.
To access Energy History:
- Open the Nest Thermostat App.
- Go to the main menu.
- Select Energy History.
Understanding your energy usage can help you make informed decisions. You can adjust your thermostat settings and save money on your energy bills.
Home/away Assist
Home/Away Assist automatically adjusts the thermostat based on your location. It uses your phone’s GPS to know when you are home or away.
To set up Home/Away Assist:
- Open the Nest Thermostat App.
- Go to Settings.
- Select Home/Away Assist.
- Follow the on-screen instructions.
When you leave home, the thermostat turns down to save energy. When you return, it adjusts to a comfortable temperature. This feature ensures your home is always at the right temperature, saving you energy and money.
These advanced features make the Nest Thermostat more than just a temperature controller. They help you understand and manage your energy usage with ease.
Troubleshooting Common Issues
Setting up your Nest Thermostat app can be a breeze. Yet, sometimes, things don’t go as planned. You might face issues that require troubleshooting. Let’s dive into some common problems and their solutions.
Connection Problems
One frequent issue involves connection problems. Ensure your Wi-Fi network is stable. Weak signals can cause disruptions. Place the router closer to the thermostat if possible. Restarting the router can also help.
Check if other devices connect to the Wi-Fi. If they don’t, the problem may be with the network. Reset the thermostat’s network settings. Reconnect it to the Wi-Fi. This often resolves connection issues.
Temperature Inaccuracies
Another common problem is temperature inaccuracies. Ensure the thermostat is away from heat sources. Direct sunlight or vents can affect readings. Place it in a central location. This gives a more accurate temperature.
Calibrate the thermostat if needed. Compare its reading with a separate thermometer. Adjust the settings to match. Regularly clean the thermostat. Dust can affect its sensors. Keep it clean for accurate readings.
Tips For Optimal Use
Setting up your Nest Thermostat is just the beginning. To get the most out of it, you need to know a few tips. These tips will help you save energy and keep your home comfortable. Let’s dive into the details.
Maximizing Energy Savings
Adjust your schedule settings for when you are home and away. This helps reduce energy use. Use the Eco Temperatures feature to save even more. Set it to kick in when no one is home. Check your Energy History often. This shows you how much energy you use each day. Make changes as needed.
Enable the Home/Away Assist feature. This uses your phone’s location to adjust the temperature. It’s a smart way to save energy without thinking about it. Lastly, set your thermostat to learn your habits. It will adjust the temperature based on your patterns.
Maintaining Your Thermostat
Keep your thermostat clean. Dust and debris can affect its performance. Gently wipe it with a soft, dry cloth. Check the battery level regularly. Low battery can cause issues. Replace them as needed. Update your Nest app and thermostat software. These updates often include new features and bug fixes.
Make sure your thermostat is in a good location. Avoid placing it near drafts, direct sunlight, or heat sources. This helps ensure accurate readings. Finally, review your settings every few months. Make adjustments as your schedule changes.
Credit: thesweetsetup.com
Frequently Asked Questions
How Do I Download The Nest Thermostat App?
Download the Nest Thermostat app from the App Store or Google Play Store.
Is The Nest Thermostat App Free?
Yes, the Nest Thermostat app is free to download and use.
How Do I Set Up My Nest Thermostat?
Connect your thermostat to Wi-Fi, then follow the app’s setup instructions.
Can I Control Multiple Thermostats With The App?
Yes, you can control multiple Nest Thermostats from the same app.
Why Is My Nest Thermostat Not Connecting To Wi-fi?
Check your Wi-Fi password and network settings. Ensure your router is working properly.
Conclusion
Setting up the Nest Thermostat app is simple and straightforward. Follow the steps carefully. Enjoy better control of your home’s temperature. Save energy and reduce costs. The app makes managing your thermostat easy. Download it today for a more comfortable home.
With a few taps, you are set. Experience convenience like never before. Thank you for reading our guide. Happy smart home living!