Corian countertops are a popular choice for kitchens and bathrooms because they look modern, resist stains, and are easy to clean. But sometimes, the color or style you picked years ago no longer fits your taste or your home’s new look. Replacing Corian is expensive and messy. Luckily, painting Corian countertops can give your space a fresh style—without breaking your budget.
Many people don’t know you can paint Corian, or they worry the paint won’t last. In reality, with the right preparation and products, you can transform your countertops and get years of use from your new finish. This guide walks you through every detail, from choosing materials to finishing touches, so you feel confident tackling this project yourself.
What Is Corian And Why Paint It?
Corian is a solid surface material created by DuPont. It’s made from acrylic polymer and minerals, making it nonporous, smooth, and seamless. Unlike laminate or natural stone, Corian doesn’t have a grain or natural texture, so paint adheres differently.
People usually paint Corian countertops because:
- They want to update the color.
- The surface is scratched, stained, or faded.
- Remodeling is too expensive or time-consuming.
Painting is a smart way to extend the life of your countertops, especially if you want a new style but aren’t ready for a full renovation. With care, your painted surface can last several years.
Can You Really Paint Corian Countertops?
Yes—you can paint Corian, but surface preparation is critical. Corian is nonporous and slick, so regular paint will not stick well and will peel quickly. This is why you must follow a specific process.
Some people think all countertop paints work the same, but Corian requires a combination of sanding, priming, and using the right topcoat. Skipping steps will lead to peeling or chipping. Painting Corian is not as simple as painting a wall.
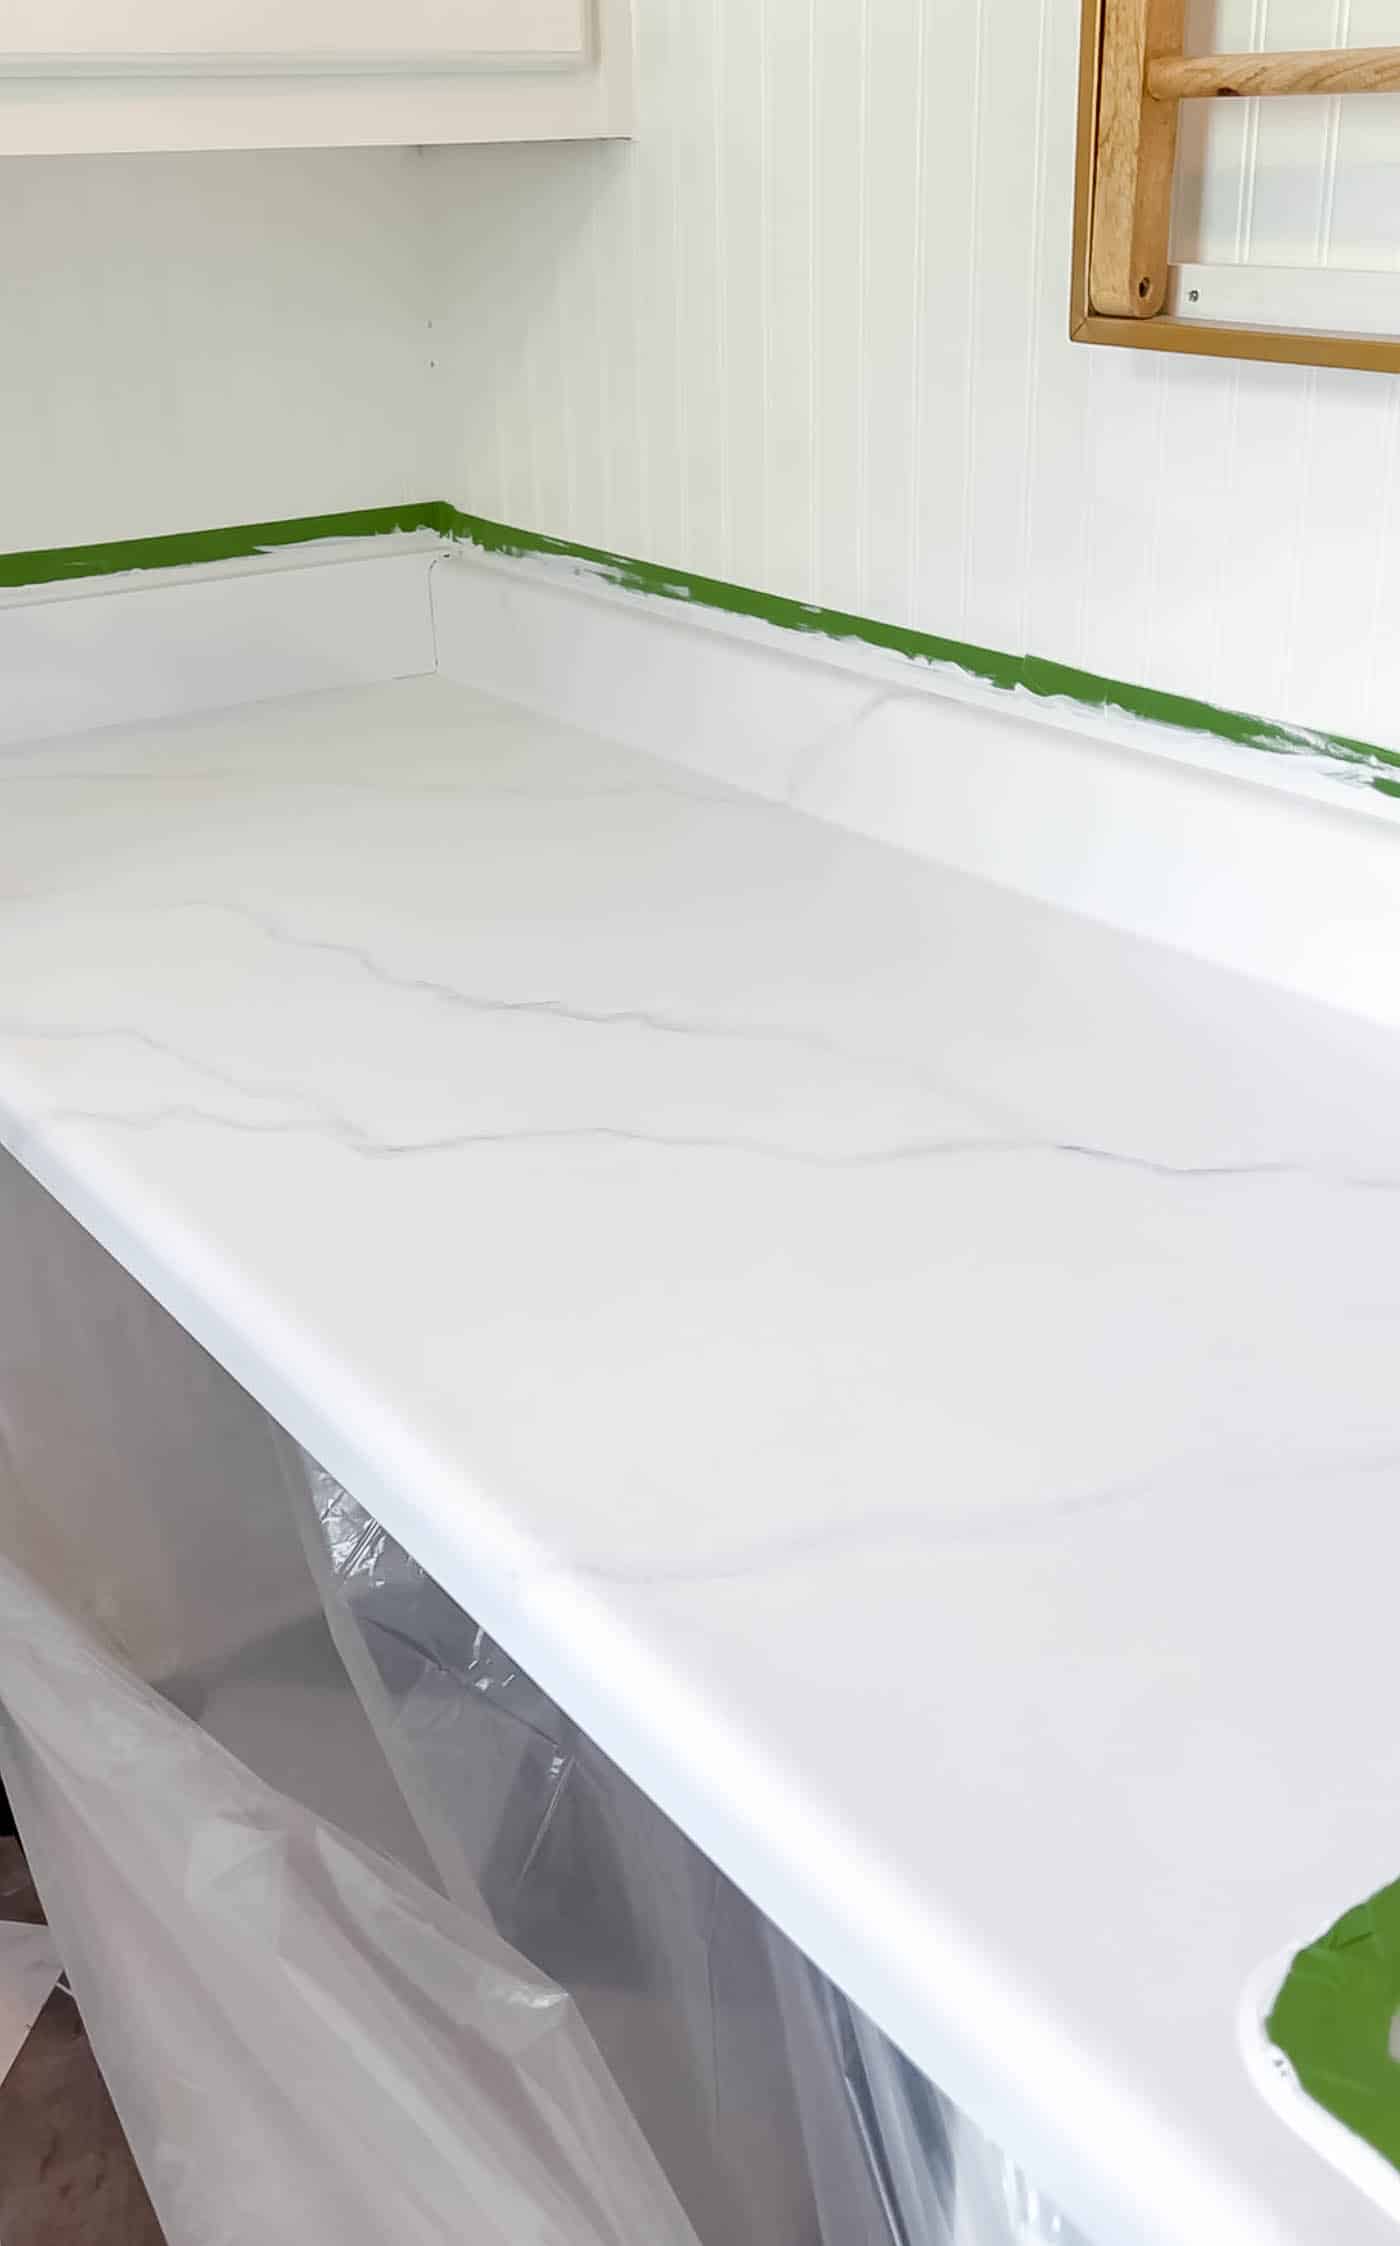
Credit: theturquoisehome.com
Tools And Materials Needed
Before you start, gather everything you need. Having the right supplies makes the process smoother and helps achieve a professional finish.
Essential Tools:
- Orbital sander (or sanding block)
- Vacuum cleaner
- Microfiber cloths
- Painter’s tape
- Plastic sheeting or drop cloths
- High-quality paintbrushes (synthetic bristles)
- Small foam rollers
- Paint tray
- Utility knife
Materials:
- 220-grit and 320-grit sandpaper
- Degreaser or ammonia-based cleaner
- High-adhesion bonding primer (for nonporous surfaces)
- Acrylic urethane or epoxy paint (countertop-specific)
- Clear polyurethane or epoxy topcoat (food-safe)
- Mineral spirits or denatured alcohol (for cleaning)
- Protective gloves and goggles
- Respirator or face mask
Pro Tip: Not all primers and paints are safe for food contact. If your countertop is used for food prep, choose a food-safe topcoat.
Preparing The Area
Proper preparation is the foundation for a long-lasting paint job. Skipping these steps is the most common beginner mistake.
- Clear the Countertops: Remove everything—appliances, soap dispensers, and decorations.
- Clean Thoroughly: Use a degreaser or ammonia-based cleaner. Any oil, wax, or dirt left behind can stop paint from bonding.
- Protect Surroundings: Tape off sinks, walls, and cabinets with painter’s tape. Cover the floor and lower cabinets with plastic sheeting.
- Ventilate: Open windows and use fans. Painting and sanding create dust and fumes.
- Inspect for Damage: Fill deep scratches or chips with a solid surface repair compound. Let it dry fully before sanding.
Many people overlook the cleaning step. Even small traces of oil or soap can cause paint to bubble or peel later.
Sanding Corian Countertops
Sanding is the most important step for painting Corian. The goal is to roughen the surface, so the primer can grip tightly.
- Start with 220-grit sandpaper and sand the entire surface in small circles.
- Follow with 320-grit for a smoother finish.
- Use a vacuum to remove dust, then wipe with a damp microfiber cloth.
- Let the surface dry completely.
Tip: Pay special attention to edges and corners. These areas are easy to miss, and paint often peels here first if not sanded well.
Never try to paint over a glossy or slick surface—your paint will not last.
Priming The Surface
Corian is nonporous, so you need a high-adhesion bonding primer designed for glossy or plastic surfaces. Regular wall primer will not work.
- Stir the primer well.
- Use a brush for edges and a foam roller for flat areas.
- Apply a thin, even coat. Avoid drips.
- Allow the primer to dry fully (usually 4–6 hours).
Some primers suggest a second coat—follow the manufacturer’s instructions. Sand lightly with 320-grit sandpaper between coats for extra smoothness.
A common mistake is using too much primer. Thick layers can crack or peel. Thin coats bond better.
Choosing The Right Paint
Not all paints are suitable for Corian. You need a formula that bonds to nonporous surfaces and resists scratches and stains.
Best options:
- Acrylic urethane paint: Durable, flexible, and comes in many colors. Suitable for kitchens and bathrooms.
- Epoxy paint: Extremely tough and chemical-resistant. Best for high-traffic counters, but harder to apply and more expensive.
- Countertop refinishing kits: These often include primer, paint, and topcoat designed to work together.
Avoid latex or standard wall paint. These will peel or bubble after a few weeks of use.
Comparing Paint Types For Corian
Here’s a quick comparison of common paint options:
| Type | Durability | Ease of Application | Finish Options |
|---|---|---|---|
| Acrylic Urethane | High | Easy | Matte, Satin, Gloss |
| Epoxy | Very High | Moderate | Glossy |
| Countertop Kits | High | Easy | Varies |
| Latex | Low | Easy | Matte, Satin, Gloss |
Non-obvious insight: Epoxy paint can yellow in direct sunlight. If your kitchen gets lots of sun, consider a UV-stable topcoat.
How To Paint Corian Countertops: Step-by-step
1. Final Surface Prep
After priming, check for drips or rough spots. Sand lightly if needed. Wipe with a tack cloth to remove dust.
2. First Coat Of Paint
- Stir paint thoroughly.
- Use a new, clean brush for edges and corners.
- Roll the paint on in thin, even coats. Overlap slightly to avoid lines.
- Let the first coat dry as directed (usually 6–8 hours).
Tip: Don’t rush. Painting thick coats to finish faster will cause drips and uneven drying.
3. Second Coat
- Lightly sand the first coat with 320-grit sandpaper for smoothness.
- Remove all dust.
- Apply a second thin coat. For most colors, two coats are enough. Dark colors may need a third coat.
Always follow drying times. Humidity and temperature can affect how fast paint cures.
4. Check For Flaws
Inspect in bright light for missed spots, streaks, or bubbles. Touch up as needed before sealing.
Beginner’s mistake: Missing the underside of overhanging edges. These are visible when you sit at a kitchen island.
Sealing And Protecting The Surface
Paint alone is not enough for countertops. You need a clear topcoat to protect against spills, stains, and scratches.
- Use a food-safe polyurethane or epoxy topcoat if you prepare food on the counter.
- Apply with a clean foam roller or brush.
- Follow the manufacturer’s directions for drying times and number of coats (usually 2–3).
- Lightly sand between coats for a glass-smooth finish.
Allow the topcoat to cure fully before using the counter. Some products need up to 7 days for full hardness, even if they feel dry after 24 hours.
Non-obvious insight: Skipping the topcoat is the fastest way to ruin your paint job. Even if the surface looks perfect, it won’t last without protection.
How Long Does Painted Corian Last?
A well-painted and sealed Corian countertop can last 3–5 years before needing touch-ups. Some users report even longer life with careful cleaning and gentle use.
Durability depends on:
- The quality of prep work
- Using the right primer and paint
- How well the topcoat is maintained
- How heavily the counter is used
High-traffic kitchens may see more wear at corners and near sinks. Gentle cleaning and using cutting boards will extend the finish.
Cleaning And Maintaining Painted Corian
To keep your painted countertop looking good:
- Wipe spills quickly.
- Use mild soap and water for daily cleaning.
- Avoid harsh scrubbers, bleach, or abrasive cleaners.
- Never cut directly on the surface; always use a cutting board.
- Place hot pans on trivets, not directly on the counter.
- Reseal the topcoat every 2–3 years for best results.
Painted Corian is strong but not indestructible. Treat it gently for the best long-term appearance.
Common Mistakes To Avoid
Painting Corian is simple but requires careful attention to detail. Here are mistakes to avoid:
- Skipping sanding: Paint won’t stick to a smooth, glossy surface.
- Using regular wall paint: It will peel and chip quickly.
- Applying thick coats: These don’t dry evenly and are prone to cracking.
- Neglecting the topcoat: This step protects your hard work.
- Not allowing enough drying time: Using the surface too soon can ruin the finish.
- Not cleaning thoroughly: Any residue stops paint from bonding.
- Ignoring edges and corners: These areas wear out fastest.
- Painting in high humidity: Moisture can cause the paint to bubble.
Pro Tip: Read all product instructions. Each brand’s drying and curing times can vary.
Should You Paint Or Replace Corian Countertops?
Painting is a great way to update Corian at a low cost, but it’s not the right choice for everyone.
| Painting | Replacing |
|---|---|
| Low cost ($50–$150 in supplies) | High cost ($2,000+ for new Corian) |
| DIY-friendly | Requires professional installation |
| Custom color options | Limited to manufacturer’s colors |
| Finish lasts 3–5 years | Finish lasts 10–20 years |
| Not suitable for heavy abuse | Handles heavy use |
If your countertop is cracked, warped, or badly damaged, painting won’t solve these issues. Replacement may be the better choice.
Advanced Techniques: Creating Stone Or Faux Granite Effects
If you want a more dramatic change, you can mimic the look of granite or stone.
- Use a countertop painting kit with multiple colors.
- After priming, dab on different colors with a natural sponge to create a stone look.
- Seal with a clear, glossy topcoat for shine.
This technique takes more time but can give stunning results—often fooling guests into thinking it’s real stone.
Environmental And Health Considerations
Painting indoors creates fumes and dust. Always:
- Work in a well-ventilated area.
- Wear a mask and gloves.
- Keep children and pets away until all surfaces are fully cured.
Dispose of leftover paint and chemicals responsibly. Many cities have hazardous waste collection sites.
When To Hire A Professional
Some projects are better left to the pros:
- Large or complex counters with many seams or edges
- Homes with sensitive residents (allergies, asthma)
- If you lack time or confidence
A professional can deliver a flawless, durable finish in less time. Expect to pay $300–$700 for a full kitchen, depending on region and complexity.
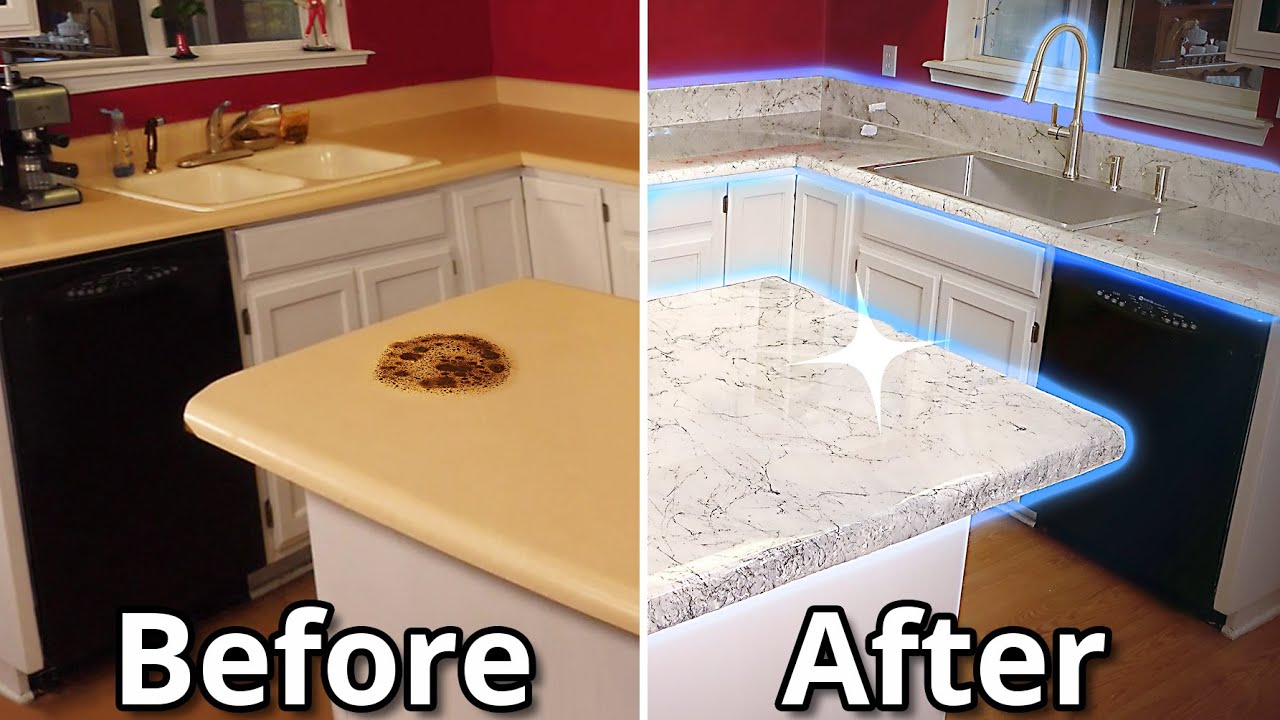
Credit: www.youtube.com
How Painting Corian Compares To Painting Other Countertop Materials
Corian is unique because it has no pores or texture. Here’s how painting Corian compares to other common surfaces:
| Material | Preparation Needed | Paint Types | Durability |
|---|---|---|---|
| Corian | Sanding, bonding primer | Acrylic urethane, epoxy | High (with topcoat) |
| Laminate | Sanding, degreasing | Countertop kits, epoxy | Moderate |
| Granite | Degreasing, etching | Epoxy, stone paint | Moderate-High |
| Tile | Cleaning, scuff sanding | Epoxy, tile paint | Moderate |
Corian’s smoothness means you must be extra careful with prep, but you get a seamless, modern look.
Real-life Example: Diy Corian Countertop Transformation
Let’s look at an example:
Sarah’s Story: Sarah had a 15-year-old white Corian countertop that was stained and dull. She wanted a darker look to match new cabinets but didn’t want to pay $2,500 for replacement. She used a high-adhesion primer, two coats of charcoal gray acrylic urethane paint, and two coats of water-based polyurethane. The project took a weekend, cost about $90, and after two years, the finish still looks great with only minor touch-ups.
Sarah’s tip: “Take your time with sanding and use the best topcoat you can afford. It makes a big difference.”
Cost Breakdown: Painting Corian Vs. Replacement
Here’s a typical cost comparison:
- Painting supplies: $50–$150 (primer, paint, topcoat, brushes, sandpaper)
- Replacement: $2,000–$4,000 (materials, removal, installation)
Painting saves over 90% compared to new countertops. The main investment is time and patience.
Where To Learn More
If you want to see more examples or read about product choices, check out the official Corian website for inspiration and care tips.
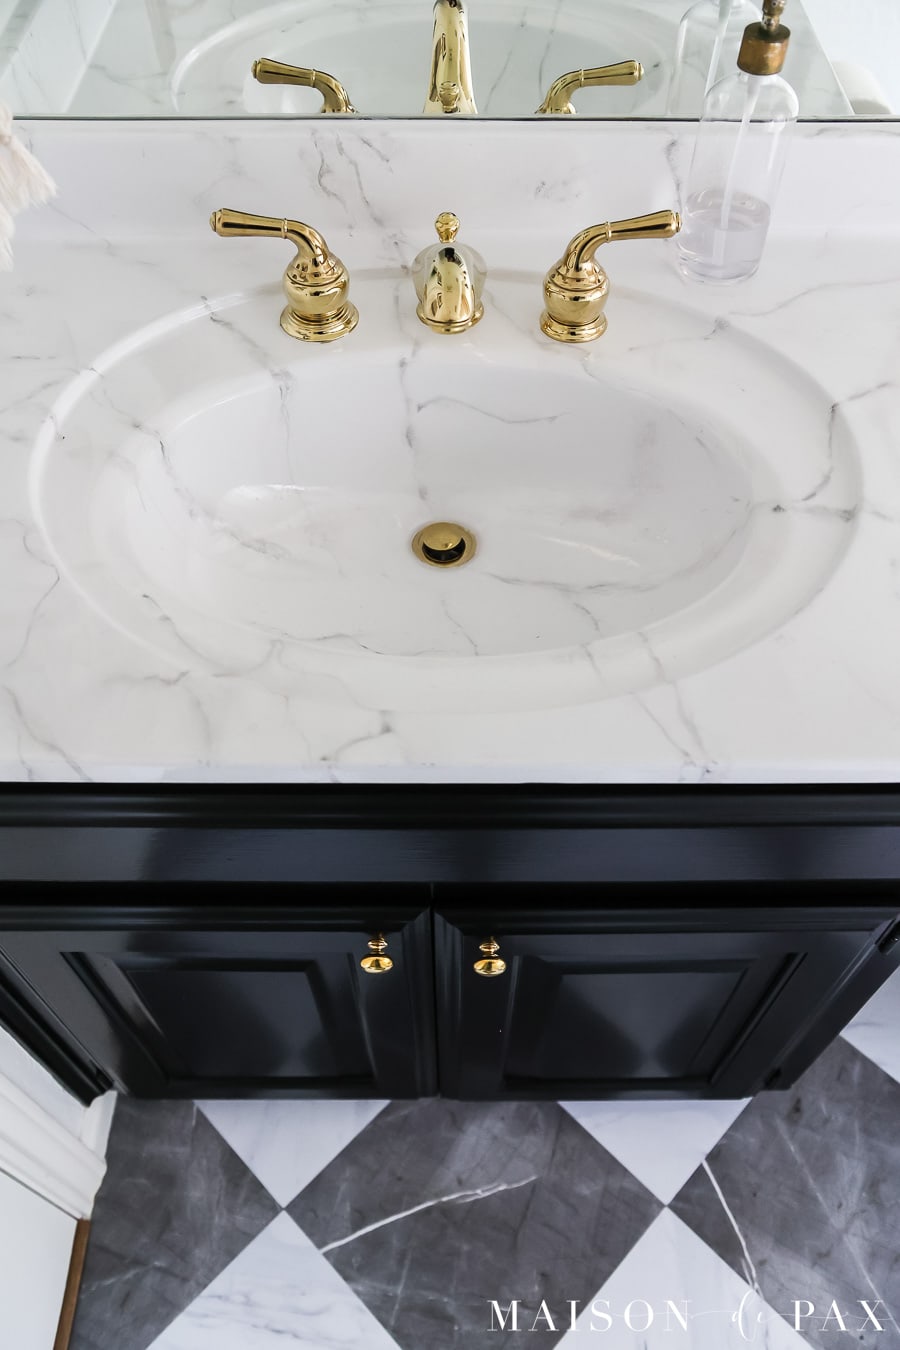
Credit: www.maisondepax.com
Frequently Asked Questions
Can You Use Regular Wall Paint On Corian Countertops?
No, regular wall paint is not designed for nonporous surfaces like Corian. It will not bond well and will peel or chip quickly. Always use acrylic urethane or epoxy paint designed for countertops.
How Long Does It Take To Paint And Cure Corian Countertops?
Painting usually takes 2–3 days:
- 1 day for prep and priming
- 1–2 days for painting (allowing each coat to dry)
- 1–7 days for the topcoat to fully cure
Drying times depend on humidity, temperature, and the specific products you use.
Is Painted Corian Safe For Food Contact?
Only if you use a food-safe topcoat. Many clear epoxies and polyurethanes are not certified for direct food contact. Read labels and choose products marked as food-safe if you prepare food directly on the surface.
Can You Paint Corian To Look Like Granite Or Marble?
Yes, you can create a faux stone look using countertop painting kits or by sponging on multiple colors. The process takes more time but can produce a high-end look for a fraction of the cost.
What Is The Biggest Mistake Beginners Make When Painting Corian?
The most common mistake is skipping or rushing the sanding and cleaning steps. If the surface isn’t perfectly clean and rough, the paint and primer will not stick, leading to peeling and wasted effort.
—
Painting Corian countertops is a practical way to refresh your kitchen or bathroom without spending thousands on new surfaces. With careful preparation, the right products, and attention to detail, you can achieve a beautiful, durable finish that transforms your space for years to come.
Take your time, follow each step, and enjoy the satisfaction of a DIY upgrade that truly makes a difference.