
Plastic storage bins are everywhere in modern homes, garages, and offices. They’re practical and affordable, but there’s one big problem: most plastic bins look boring or downright ugly. Whether you’re using them in the living room, bedroom, kitchen, or closet, these containers rarely match your style. The good news? You can transform plain plastic bins into stylish, attractive pieces with a few smart ideas and tools. Making your storage bins look nice isn’t just about hiding clutter—it can also enhance your decor, add personality to a room, and create a sense of calm in your space.
In this guide, you’ll discover creative ways to upgrade your plastic storage bins, from quick DIY solutions to more advanced projects. You’ll learn which materials work best, how to pick the right colors and finishes, and what mistakes to avoid.
Along the way, you’ll see real examples, data, and clever tricks that many people overlook. If you want your storage bins to look nice and fit your home’s style, this article will give you everything you need.
Understanding Your Plastic Storage Bins
Before you start decorating, it’s important to know what kind of plastic bin you’re working with. Not all bins are the same, and the material, shape, and size can affect your options.
Plastic bins are usually made from polypropylene (PP) or polyethylene (PE). These plastics are durable but can be a bit slippery for paints or adhesives. Some bins have smooth surfaces; others have patterns or textures.
Size matters, too. Small bins are easier to cover or paint, while large bins may need extra materials. Transparent bins let you see inside, which is useful, but sometimes you want to hide the contents. Opaque bins are easier to turn into “furniture” pieces or accent decor.
If your bins have lids, handles, or wheels, consider these features when planning your design. For example, you don’t want handles to get blocked by decorations, or lids to stop fitting.
Non-obvious insight: Not all paints, stickers, or adhesives work well on plastic. Test a small area first to avoid peeling or messy results.
Planning Your Design: Matching Style And Function
It’s easy to get excited and start decorating, but planning is crucial. Ask yourself:
- Where will the bin be used? (Living room, bedroom, garage, etc.)
- What style do you want? (Modern, rustic, playful, minimal, etc.)
- How much time and money do you want to spend?
Choosing a color palette is a good place to start. Matching your bins to your room’s main colors makes everything look intentional. If your space is mostly neutral, a pop of color can be fun. For kids’ rooms, bright or patterned bins add energy.
Functionality shouldn’t be forgotten. If you need to label bins, leave space for tags or chalkboard labels. If you need to move them often, don’t cover the handles.
Pro tip: Take a photo of your space and use a photo editing app to test different bin colors and styles before you start.

Credit: www.youtube.com
Quick Upgrades: Fast Ways To Make Bins Look Nice
You don’t need to be an artist or spend much money to improve your plastic bins. Here are some easy methods that can make a big difference in less than an hour.
1. Add Decorative Labels
Labels do more than organize—they can be stylish, too. Use chalkboard labels, pre-made vinyl stickers, or custom-printed tags. Choose fonts and colors that match your space.
2. Wrap With Contact Paper Or Wallpaper
Self-adhesive contact paper comes in many patterns, including wood grain, marble, and geometric designs. Carefully wrap the sides of your bin. Smooth out bubbles with a credit card.
Example: A plain white bin wrapped in wood-look contact paper can blend in with real wood furniture.
3. Use Washi Tape For Patterns
Washi tape is easy to apply and remove. Try stripes, chevrons, or borders. Mix and match colors for a unique look.
4. Add Fabric Liners Or Covers
Line the inside or outside with fabric for a soft, cozy feel. Use hot glue or double-sided tape. For a removable cover, sew a simple slipcover with elastic edges.
Insight: Removable fabric covers are washable, so they’re great for kids’ bins or craft supplies.
5. Paint With Spray Paint Made For Plastic
Look for spray paint labeled “for plastic.” Clean your bin first, spray in light coats, and let it dry completely. Metallics, pastels, or matte finishes look modern.
Pro tip: Use painter’s tape to create color blocks or patterns before spraying.
Creative Diy Projects For Stylish Bins
If you want to go beyond quick fixes, try these creative projects. They take more time but can turn your bins into statement pieces.
1. Stencil Designs
Buy or make a stencil and use acrylic paint or spray paint. Tape the stencil to the bin, dab paint with a sponge, then remove carefully. Try floral, geometric, or monogram designs.
2. Add Rope Or Twine
Wrap the outside of the bin with rope or jute twine for a rustic or coastal vibe. Use hot glue to secure each layer as you go. Cover the whole bin or just the bottom third for a color-blocked look.
3. Attach Decorative Hardware
Glue on faux leather handles, metal pulls, or decorative buttons. These small touches can make a bin look like a designer basket.
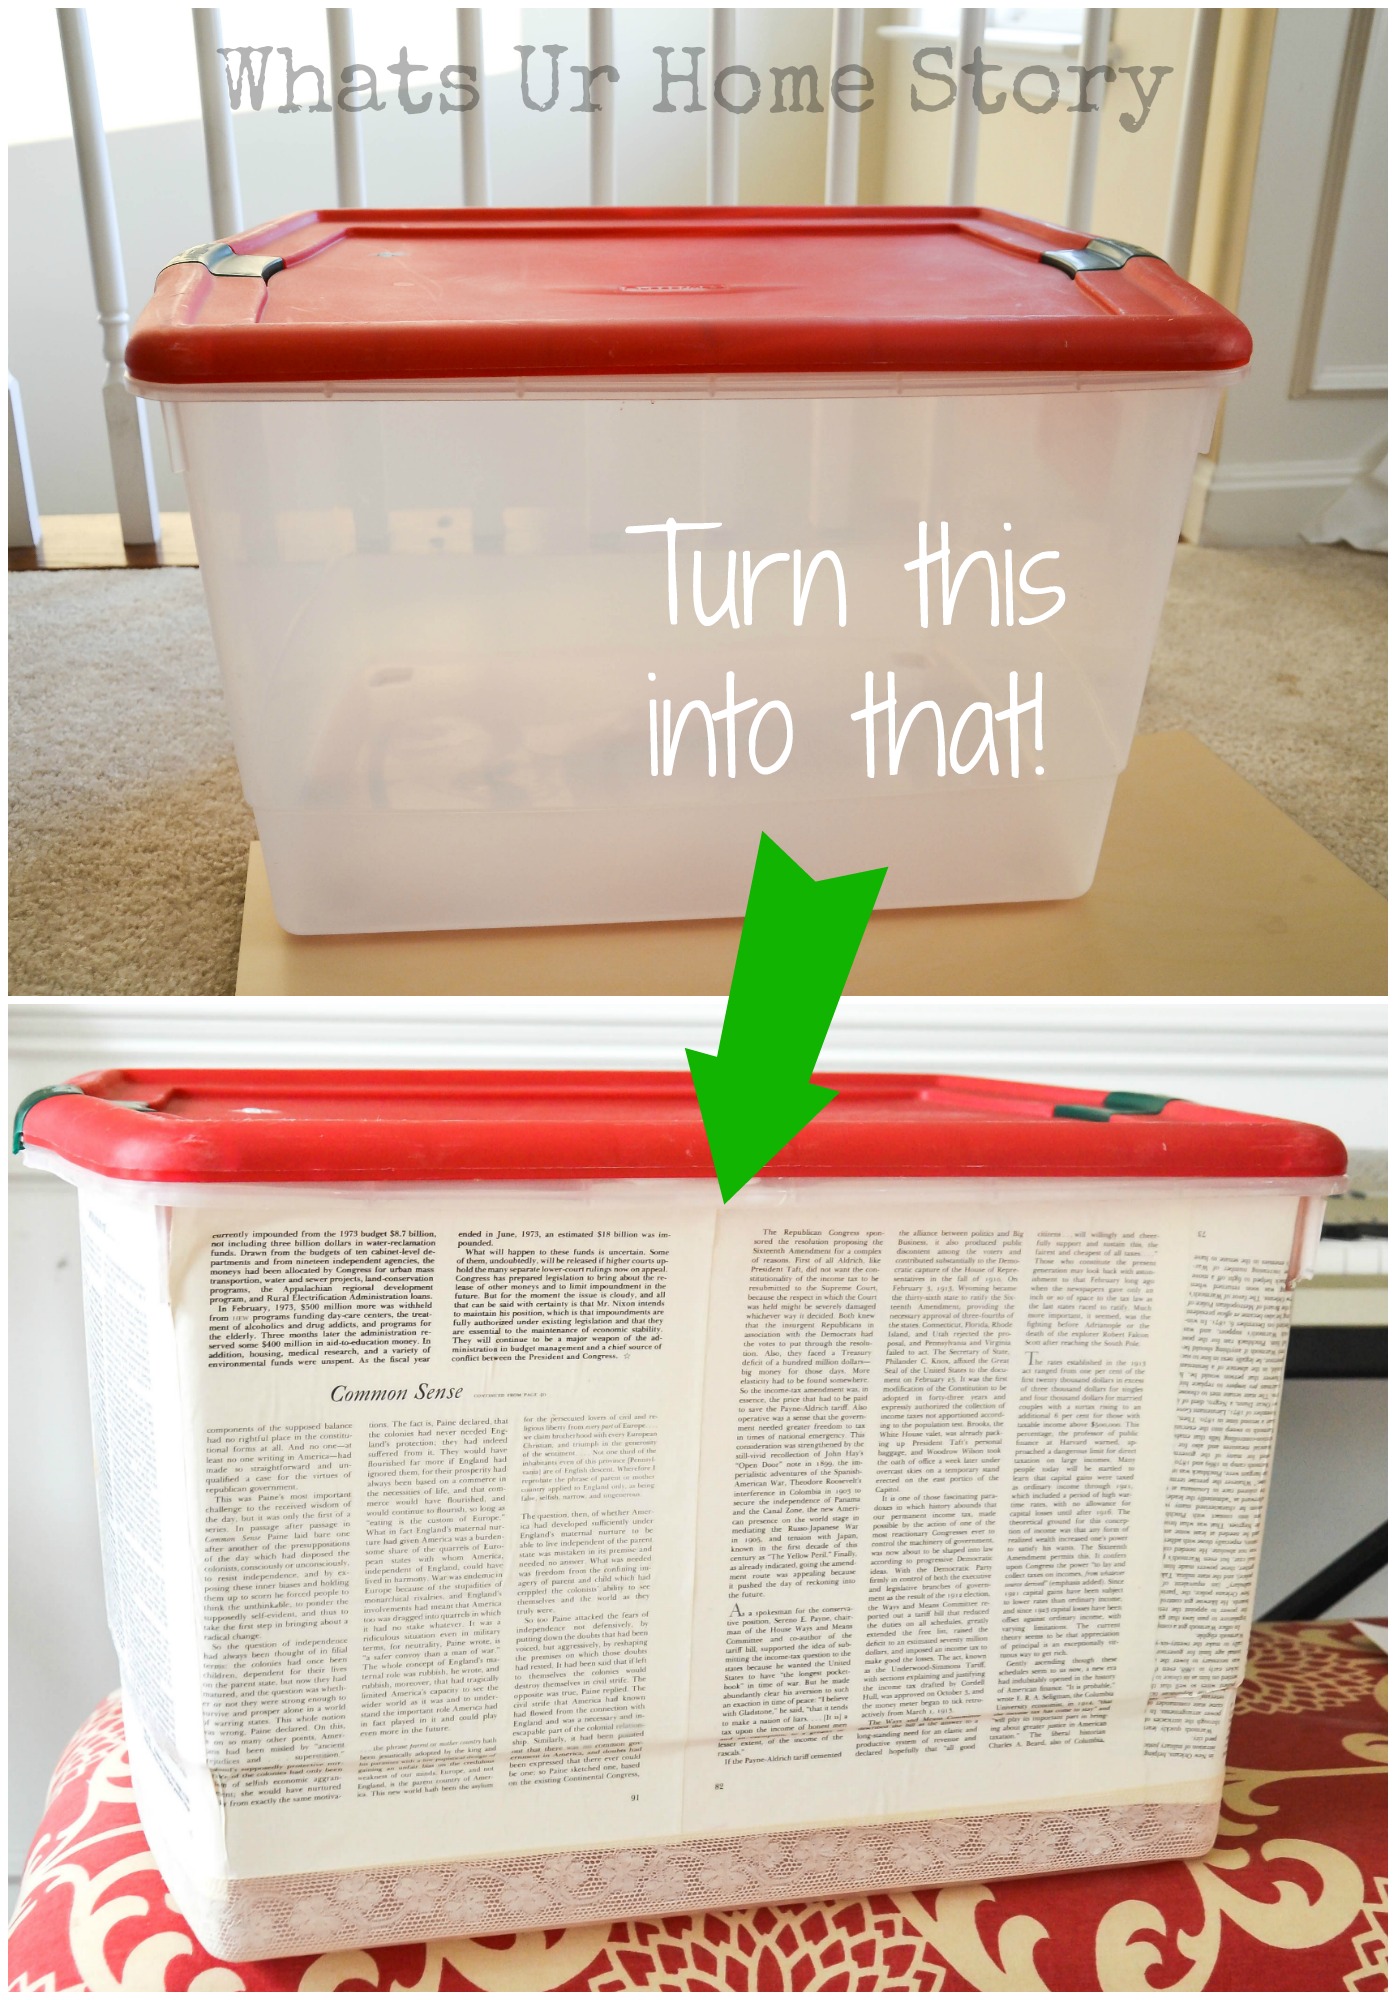
4. Decoupage With Paper Or Fabric
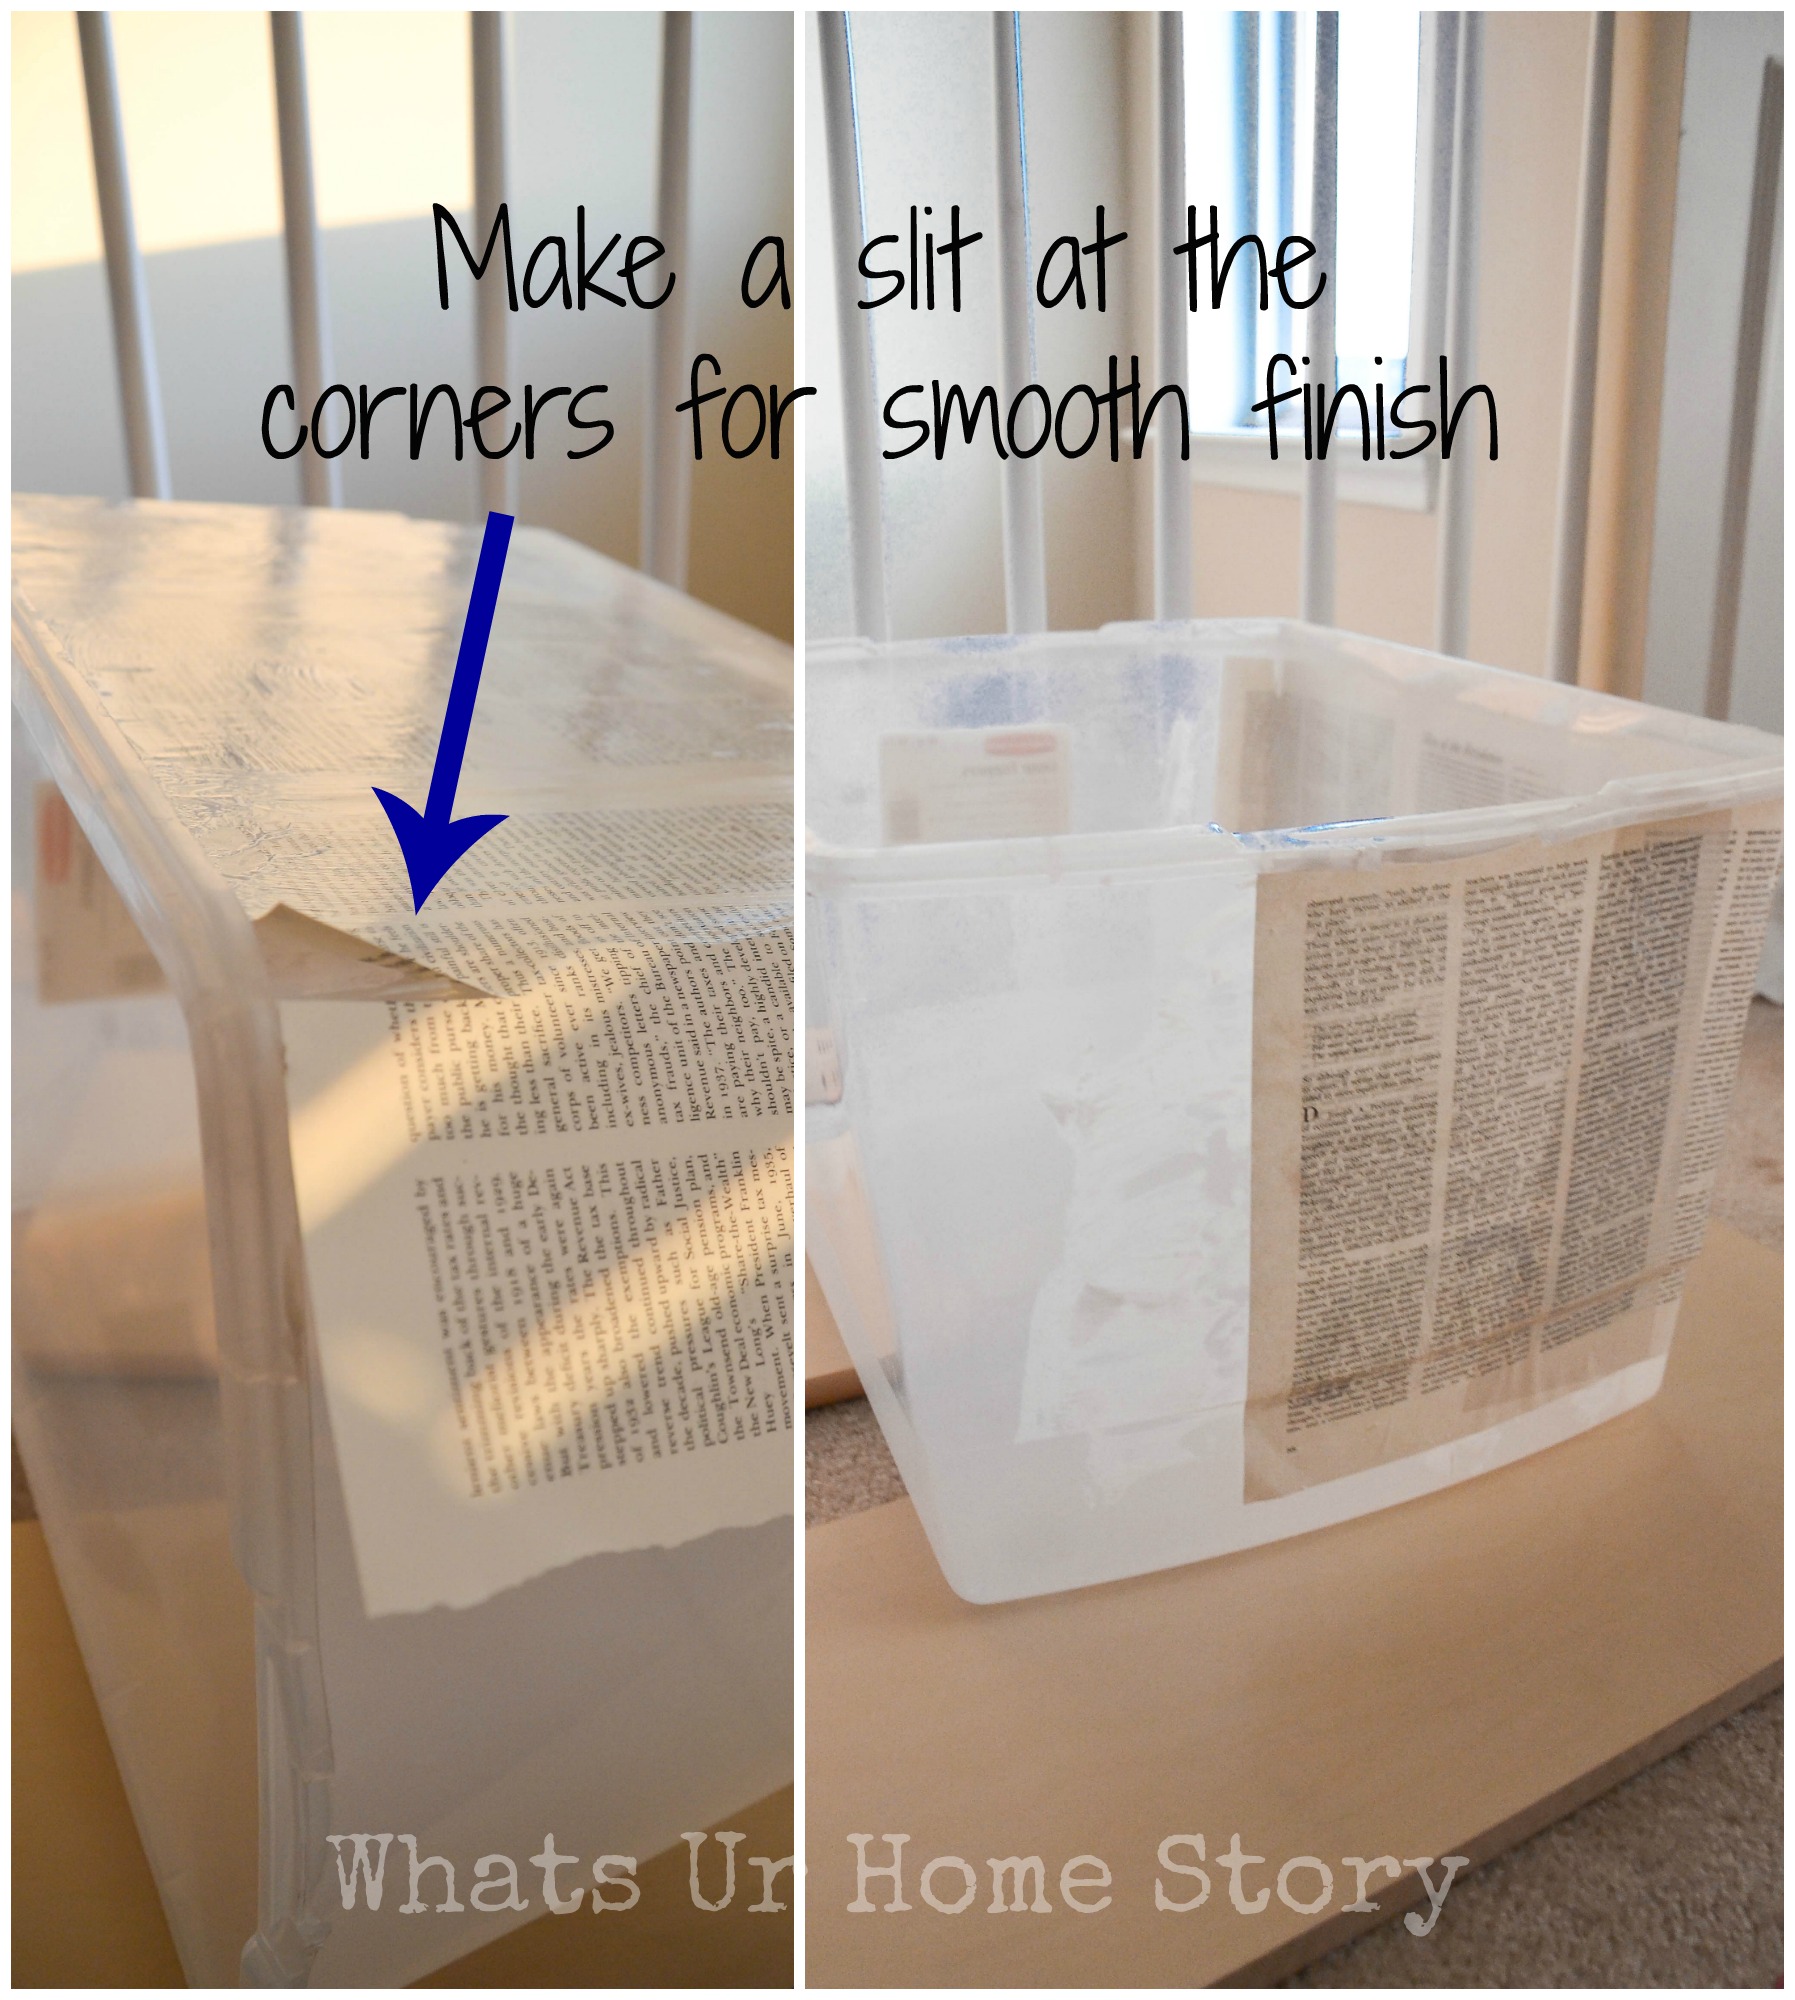
Use Mod Podge or another decoupage glue to attach decorative paper or fabric to your bin. Smooth out wrinkles, let dry, and add a top coat for durability.
Non-obvious insight: Use old maps, comic books, or wallpaper samples for unique patterns.
5. Add Legs Or Feet
Small bins can become side tables or plant stands by attaching wooden legs or furniture feet. Make sure the bin is sturdy enough to hold weight.
Safety tip: If using for seating or heavy items, reinforce the bottom with a wooden insert.
Credit: www.whatsurhomestory.com
Comparing Popular Decoration Methods
To help you choose, here’s a comparison of three common ways to upgrade plastic bins:
| Method | Cost | Skill Level | Durability | Best For |
|---|---|---|---|---|
| Spray Paint | Low | Easy | Medium | Modern looks, quick updates |
| Contact Paper | Low-Medium | Easy | Medium | Patterns, texture |
| Rope Wrapping | Medium | Moderate | High | Rustic, cozy bins |
Smart Organization: Making Bins Functional And Attractive
A good-looking bin isn’t helpful if it’s hard to use. Here’s how to make sure your bins stay organized and stylish.
Use Clear Labels
Even if you decorate your bin, add clear labels so you always know what’s inside. Try chalkboard labels for easy changes, or use picture labels for kids.
Stack Bins Neatly
Stacking bins saves space. Choose bins with flat lids or stackable shapes. Avoid over-stacking—tall stacks can be unsafe and hard to access.
Color-code By Room Or Purpose
Pick one color for each type of item or each room. For example, blue bins for toys, white bins for linens. This makes finding things quicker.
Add Dividers Inside
Use small boxes, baskets, or cardboard to create dividers inside large bins. This keeps items separated and prevents mess.
Pro tip: Adjustable dividers make it easy to change the layout as your needs change.
Upcycling And Eco-friendly Ideas
Upgrading plastic bins is a great way to be eco-friendly. Instead of throwing away old bins, give them new life.
Use Leftover Materials
Decorate bins with leftover paint, fabric scraps, or wallpaper samples. This reduces waste and saves money.
Make Bins Multi-purpose
A decorated bin can become a side table, planter, or pet bed. Multi-purpose items reduce clutter and the need for more furniture.
Donate Or Swap Unused Bins
If you have extra bins, consider donating them to schools, shelters, or community centers. Or swap with neighbors for different sizes or styles.
Insight: Some recycling centers accept plastic bins, but many do not. Upcycling is often the best option.
Mistakes To Avoid When Upgrading Plastic Bins
Many beginners make the same errors when trying to improve their storage bins. Avoid these for the best results:
1. Not Cleaning The Bin First
Paint, adhesive, or tape won’t stick to dusty or greasy bins. Always wash with soap and water, rinse, and dry completely.
2. Using The Wrong Paint Or Glue
Not all paints stick to plastic. Choose products labeled “for plastic. ” The same goes for glue—look for “multi-surface” or “plastic” compatibility.
3. Blocking Handles Or Lids
It’s easy to cover handles or block lids with decorations. Test the function after each step.
4. Overloading The Bin
After decorating, avoid filling bins with very heavy items. Some decorations (like rope or paint) add weight or change the bin’s balance.
5. Skipping A Test Area
Always test your decoration method on a small, hidden area first.
Step-by-step Example: Upgrading A Plastic Bin For The Living Room
Let’s walk through one detailed project as an example.
Supplies Needed
- Medium plastic storage bin (opaque or clear)
- Wood-look contact paper
- Scissors and ruler
- Chalkboard label and marker
- Rope (optional, for handles)
- Hot glue gun (if adding rope handles)
Steps
- Clean the bin with soap and water, dry thoroughly.
- Measure each side of the bin. Cut contact paper to fit.
- Peel and stick the contact paper to each side, smoothing out bubbles as you go. Use a ruler or credit card edge.
- For extra style, wrap rope around the top edge and secure with hot glue.
- Add a chalkboard label to the front. Write the bin’s contents (e.g., “Blankets”).
- Place the bin in your living room. Admire your work!
Pro tip: If you change your mind, contact paper and labels can usually be removed without damage.
Advanced Projects: Turning Bins Into Furniture
With a few basic tools and materials, you can turn plain bins into furniture or decor.
Turn A Bin Into A Side Table
- Spray paint the bin with a metallic or matte color.
- Add wooden legs or a round wood top (secure with screws or strong adhesive).
- Use as a side table or nightstand.
Create A Storage Ottoman
- Glue foam to the lid, cover with fabric, and staple underneath.
- Use strong glue or screws to attach short legs or wheels.
- Store blankets or games inside, and use as extra seating.
Make A Planter
- Drill drainage holes in the bottom.
- Wrap the outside with rope or cover with contact paper.
- Fill with soil and your favorite plants.
Non-obvious insight: Always check the weight limit of your bin before using it as furniture. Not all plastic bins are strong enough for sitting or heavy loads.
Real-life Examples And Inspiration
Many people have successfully transformed plastic bins into stylish storage. Here are a few inspiring examples:
- Modern Living Room: A set of matching bins, all wrapped in white marble contact paper with gold handles, stacked neatly on open shelves.
- Kids’ Playroom: Colorful bins with animal face decals, rope handles, and clear picture labels for easy cleanup.
- Entryway Bench: Three large bins under a wooden bench, each painted a different muted color, labeled for shoes, scarves, and hats.
Looking for more ideas? Pinterest and YouTube are full of creative projects and step-by-step guides. For more on plastic materials and how they’re used, check out this Wikipedia page on plastics.
Cost Comparison: Diy Vs. Buying Designer Storage
Is it worth making over your bins, or should you just buy new ones? Here’s a cost comparison.
| Option | Average Cost per Bin | Style Options | Durability |
|---|---|---|---|
| DIY Upgrade | $8–$15 | Unlimited, customizable | Good, if done well |
| Designer Bin | $25–$60 | Limited to store stock | Excellent |
| Plain Plastic Bin | $4–$10 | Basic, utilitarian | Very good |
Insight: DIY upgrades give you the most flexibility for the lowest price. Designer bins cost more and may not match your space perfectly.
Safety And Maintenance Tips
A good-looking bin should also be safe and easy to care for.
- Ventilation: If storing clothes, shoes, or food, make sure the bin has air holes or is opened regularly to prevent mold.
- Cleaning: Most decorated bins can be wiped with a damp cloth. Avoid soaking, especially if you used glue or paper.
- Handling: Don’t drag bins with added decorations across rough floors—this can damage the finish.
- Children and Pets: Avoid small, detachable decorations if bins are used in areas with kids or pets.
Frequently Asked Questions
How Do I Make Sure My Paint Or Decoration Sticks To The Bin?
Start by cleaning the bin with soap and water, and dry it completely. Lightly sand shiny surfaces with fine sandpaper to help paint or glue stick better. Always use products labeled for plastic.
Can I Remove The Decorations Later If I Change My Mind?
Yes, most contact papers, washi tapes, and chalkboard labels can be removed with little or no damage. Spray paint is more permanent but can sometimes be scraped off with effort.
What’s The Best Way To Label Bins For Kids Or Non-english Speakers?
Use picture labels—print or draw images of the items inside (like toys, clothes, or books). This makes it easy for everyone to find things, no matter their language skills.
How Do I Prevent Decorated Bins From Getting Scratched Or Dirty?
Choose durable materials and finishes, like outdoor-rated spray paint or sealed contact paper. Clean bins gently with a damp cloth and avoid sharp or rough objects nearby.
Are There Any Storage Items I Shouldn’t Keep In Decorated Plastic Bins?
Avoid storing food or anything that needs to “breathe” in tightly sealed or decorated bins, especially if materials aren’t food-safe. For heavy items, make sure the bin and decorations can handle the weight.
Upgrading plastic storage bins isn’t just about looks—it’s about making your home more organized, personal, and enjoyable. With a little creativity and the right approach, you can turn any plain bin into a stylish part of your space.
Credit: www.whatsurhomestory.com