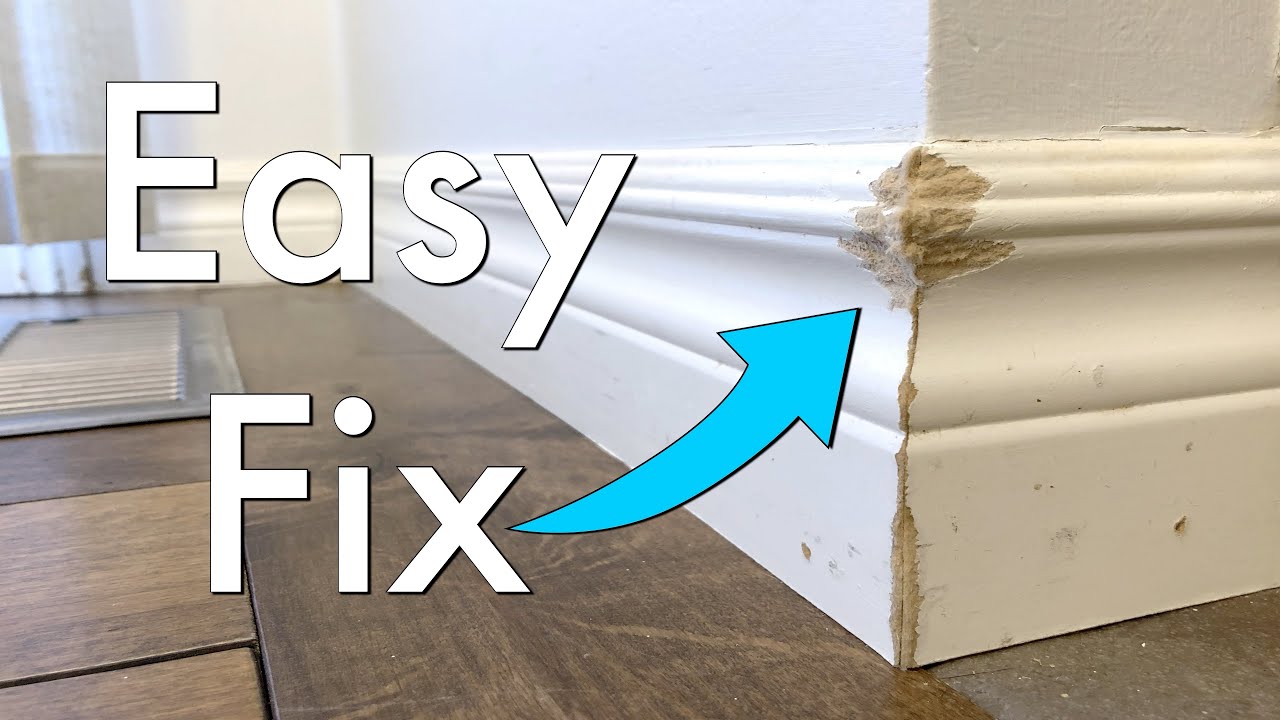
Fixing wood trim might seem like a small detail, but it can make a huge difference in your home’s appearance. Damaged, chipped, or scratched trim catches your eye every day. If you ignore it, small problems can become big ones, leading to costly repairs later.
The good news? Most wood trim fixes are straightforward, even if you’re not an expert.
This guide will walk you through everything you need to know about repairing wood trim, from identifying the type of damage to choosing the right materials and tools. You’ll learn how to tackle common issues like cracks, dents, and water damage, and understand when you can handle repairs yourself and when it’s time to call a professional.
With clear steps, practical tips, and expert advice, you’ll be ready to restore your wood trim to its best condition.
Understanding Wood Trim Problems
Before you grab a tool, it’s important to understand what’s wrong with your trim. Wood trim can suffer from many types of damage. The most common include:
- Scratches and dents from furniture, pets, or foot traffic.
- Cracks and splits caused by changes in humidity or impact.
- Water damage from leaks, spills, or high humidity.
- Loose trim that has pulled away from the wall.
- Rot and mold in areas exposed to moisture.
Each problem needs a different approach. For example, a small scratch might need only a touch-up, while rot may require replacing part of the trim. Knowing the exact issue helps you choose the right repair method and materials.
Common Types Of Wood Trim
Wood trim comes in several types, each with its own look and repair needs:
- Baseboards: These run along the bottom of walls, protecting them from kicks and furniture.
- Casing: This frames doors and windows, hiding gaps between the wall and the frame.
- Crown molding: Decorative trim at the top of walls, adding elegance to a room.
- Chair rail: Mid-wall trim that prevents chair backs from damaging the wall.
Baseboards and casing are the most likely to get damaged. Crown molding and chair rail are less exposed but can still suffer from cracks and separation.
Tools And Materials You’ll Need
Fixing wood trim is easier if you have the right tools and materials. Most repairs use simple items you can find at any hardware store.
Basic tools:
- Putty knife or scraper
- Sandpaper (medium and fine grit)
- Hammer
- Pry bar (for removing trim)
- Nail set
- Utility knife
- Paintbrush or sponge
Materials:
- Wood filler or putty
- Caulk (paintable, if trim will be painted)
- Replacement nails or finish nails
- Primer and paint or stain (to match your trim)
- Wood glue (for splits or cracks)
- Cleaner (mild soap and water)
- Rags or paper towels
If you’re dealing with serious damage like rot, you might need a saw and replacement wood trim.
Safety Gear
Don’t forget about safety. Wear safety glasses when prying or nailing. A dust mask is a good idea when sanding or using strong cleaners.
How To Fix Scratches And Dents
Scratches and small dents are the most common wood trim problems. They usually come from vacuum cleaners, shoes, pets, or kids’ toys. The good news: most are easy to fix.
Step 1: Clean The Area
Use a damp rag and mild soap to remove dust and dirt. Let the wood dry fully before moving to the next step.
Step 2: Sand The Damaged Spot
Lightly sand the area with fine-grit sandpaper (180-220 grit). Sand in the direction of the wood grain until the scratch feels smooth. Wipe away the dust with a clean rag.
Step 3: Apply Wood Filler
For deeper scratches or dents, use wood filler. Press the filler into the damaged area with a putty knife. Smooth it so it’s level with the trim. Let it dry according to the product instructions.
Step 4: Sand Again
Once the filler is dry, sand the spot again with fine sandpaper. The repaired area should feel even with the rest of the trim.
Step 5: Touch Up Paint Or Stain
Use a small brush to paint or stain the repaired area. If your trim is painted, match the color as closely as possible. For stained wood, use a matching stain pen or gel.
Tip: For very tiny scratches, sometimes a stain marker is enough. Just color in the scratch, wipe away excess, and let it dry.
Repairing Cracks And Splits
Wood trim can crack or split from changes in temperature, humidity, or impact. Cracks not only look bad, but they can let air, bugs, or moisture into your walls.
Step 1: Widen The Crack Slightly
Use a utility knife to gently widen the crack. This helps the filler grip better. Be careful not to make the crack bigger than needed.
Step 2: Fill With Wood Filler Or Caulk
For small cracks, use paintable caulk. For larger splits, use wood filler or wood glue. Press the filler deep into the crack. Smooth the surface with your putty knife.
Step 3: Let It Dry
Wait for the filler or caulk to dry completely. This usually takes a few hours, but check the product label.
Step 4: Sand And Finish
Sand the repaired area smooth. Wipe away dust. Paint or stain to match the trim.
Insight: For cracks in stained wood, filler may not match the color perfectly. Test on a scrap piece or in a hidden spot first.
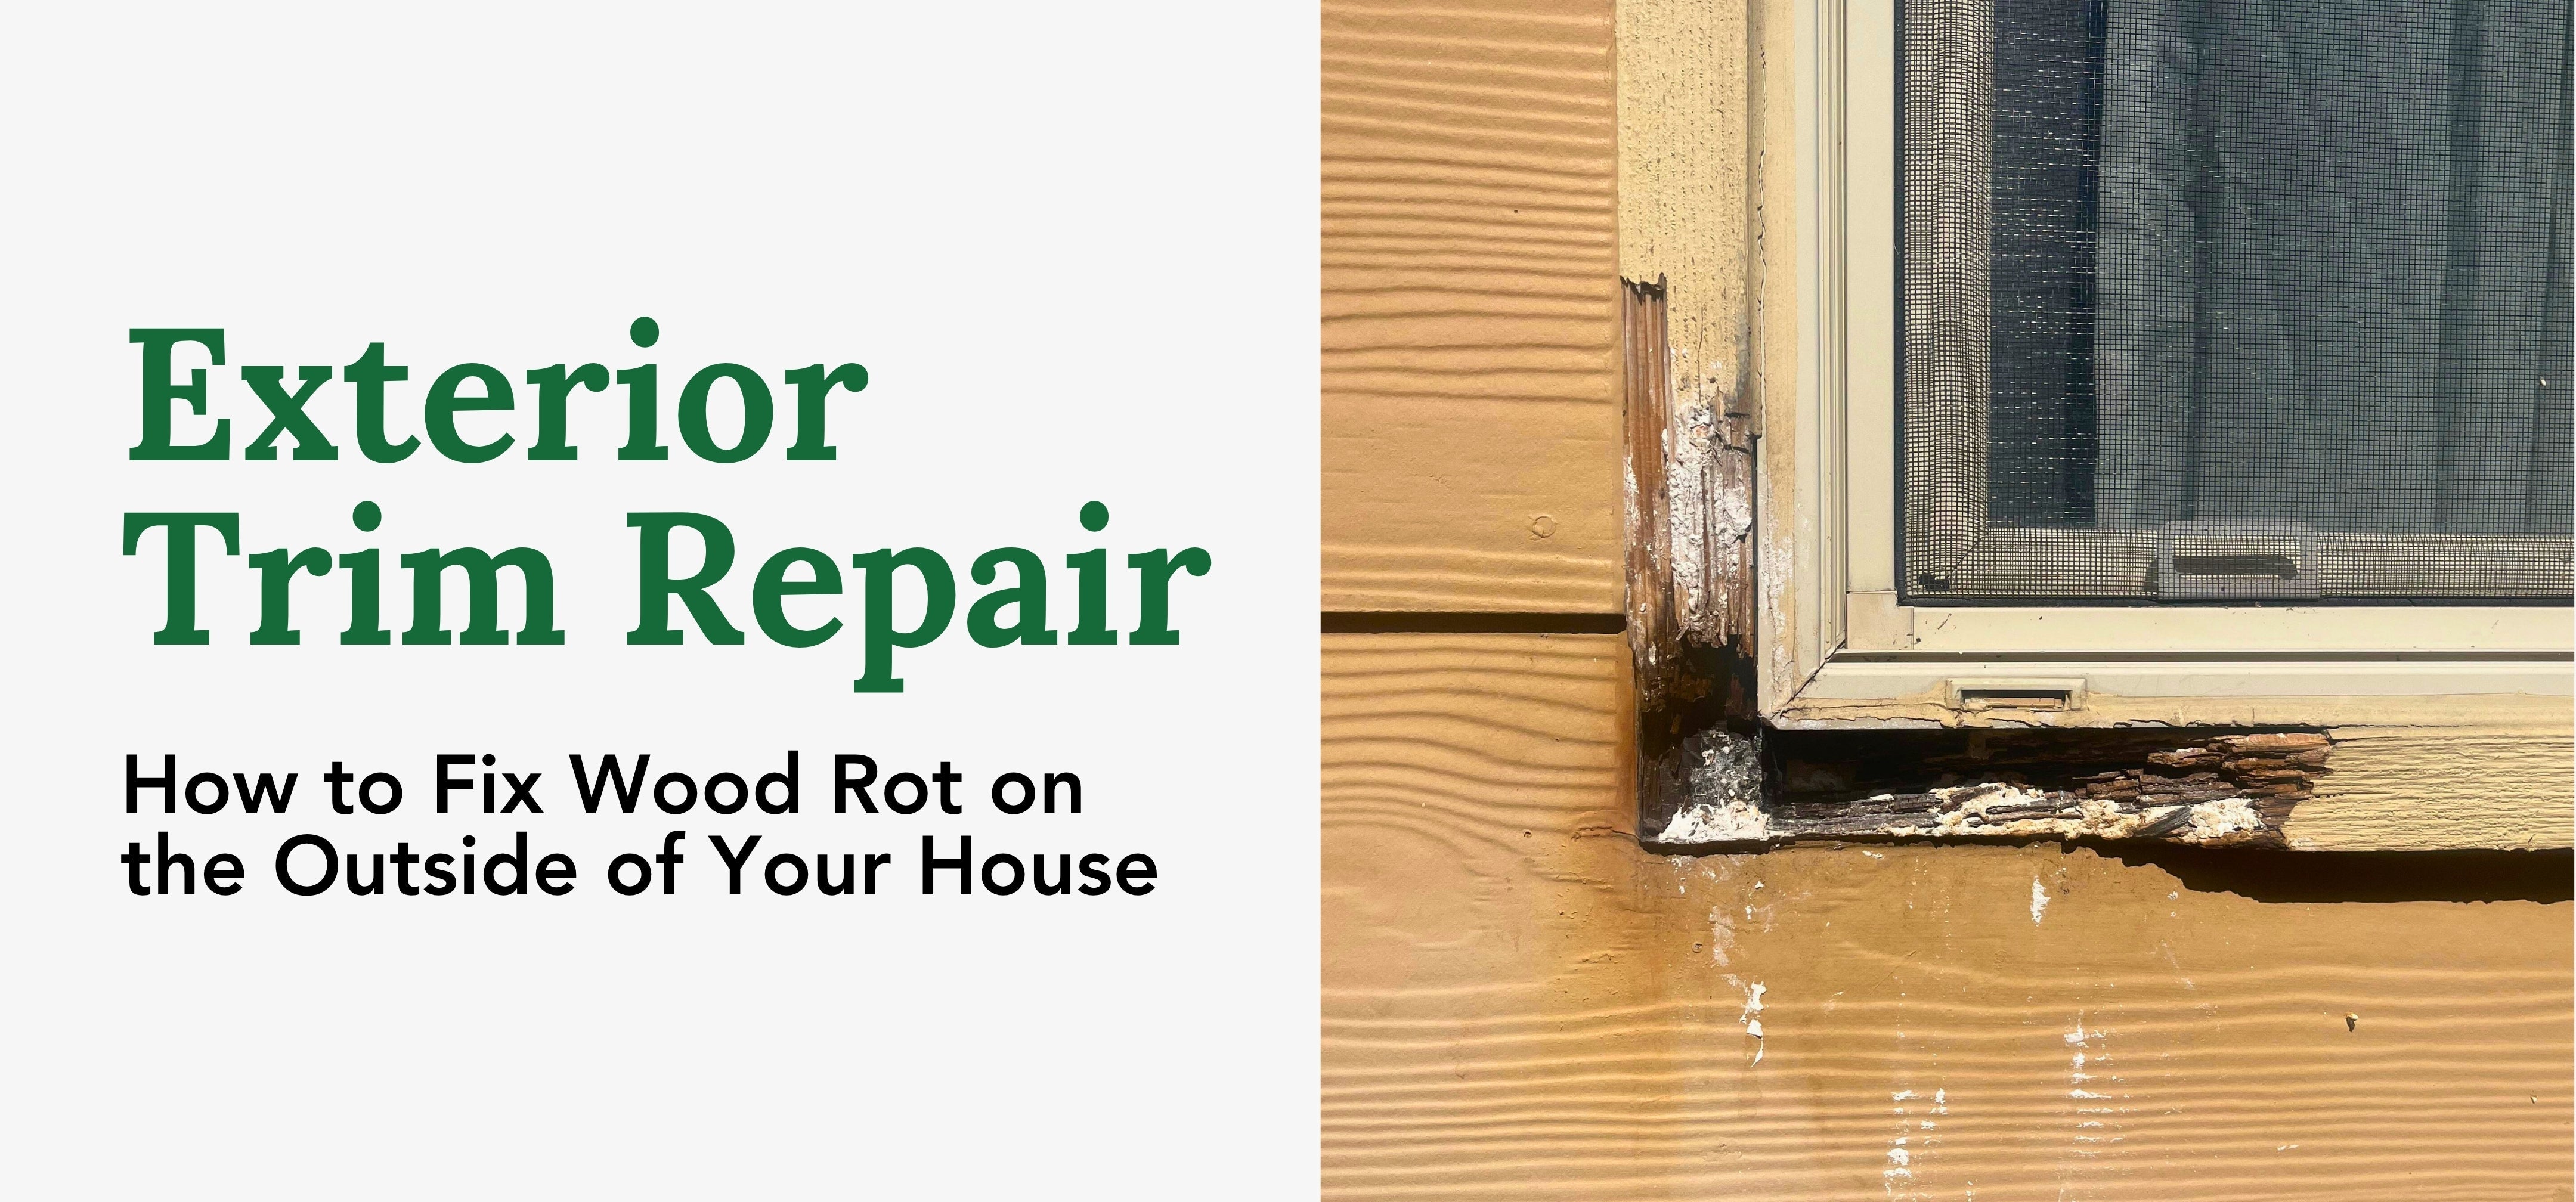
Fixing Water-damaged Trim
Water is one of wood’s worst enemies. If your trim is warped, stained, or soft, it’s probably from water damage. Early repairs can save you from replacing the whole piece.
Step 1: Find The Source
Before fixing the trim, stop the leak or water source. Otherwise, the problem will return.
Step 2: Dry The Area
Use a fan or open windows to let the trim dry. Don’t try to repair wood that’s still wet.
Step 3: Assess The Damage
If the wood is only stained or slightly warped, you may be able to repair it. If it’s soft, crumbly, or moldy, it likely needs replacing.
Step 4: Sand And Fill
For minor stains or raised grain, sand the area smooth. Use wood filler for small holes or cracks. Let it dry, then sand again.
Step 5: Prime And Paint
Moisture can ruin paint jobs. Use a stain-blocking primer before repainting. This prevents water stains from bleeding through.
Non-obvious tip: Even if you fix the surface, check inside the wall for hidden water damage. Mold can grow behind trim if leaks aren’t fixed.
Reattaching Loose Or Popped Trim
Sometimes trim pulls away from the wall or pops loose at the corners. This is usually caused by house settling, humidity, or nails pulling out.
Step 1: Check For Hidden Damage
Gently pull the trim to see if it’s attached. If the wood is cracked or broken, repair it before reattaching.
Step 2: Add New Nails
Use finish nails to reattach the trim. Hammer them in at an angle for better holding power. Countersink the nail heads with a nail set.
Step 3: Fill And Paint
Fill nail holes with wood filler or putty. Sand smooth, then paint or stain to match.
Expert tip: If your trim keeps coming loose, consider using construction adhesive on the back before nailing.

Credit: www.youtube.com
Dealing With Rot And Mold
Rot and mold are serious problems, especially in bathrooms, kitchens, or basements. If you find soft, crumbly, or blackened wood, you need to act fast.
Step 1: Remove Damaged Trim
Use a utility knife and pry bar to carefully cut and remove the rotten section. Wear gloves and a mask to avoid touching mold.
Step 2: Check The Wall
Look behind the trim for mold or rot in the wall. If you see black spots or soft drywall, you may need professional help.
Step 3: Cut A Replacement Piece
Buy a matching piece of trim. Cut it to the same size as the one you removed. Test-fit before attaching.
Step 4: Attach The New Trim
Use finish nails and wood glue to hold the new piece in place. Fill nail holes and joints with wood filler or caulk.
Step 5: Prime And Paint
Prime the new trim before painting. If the rest of the trim is stained, match the stain as closely as possible.
Insight: Even small patches of rot can spread. Always check for hidden moisture and fix leaks quickly.
Filling Gaps At Joints And Corners
Gaps between trim pieces or at corners are very common, especially in older homes. These gaps can let in drafts and look untidy.
Step 1: Clean The Gap
Use a brush or vacuum to remove dust and debris from the gap.
Step 2: Apply Caulk
Use paintable caulk for gaps less than 1/4 inch wide. Cut the tip at an angle, and run a smooth bead along the joint.
Step 3: Smooth The Caulk
Wet your finger or use a caulk tool to smooth the bead. Wipe away excess.
Step 4: Paint Over
Once dry, paint the caulk to match your trim.
Non-obvious tip: For larger gaps, use a backer rod (foam rope) in the gap before caulking. This saves caulk and gives better results.
Credit: www.youtube.com
Repairing Gouges And Large Holes
Bigger damage, like gouges or holes from door handles or accidents, needs a stronger fix.
Step 1: Clean And Sand
Clean out any loose wood or paint. Sand the area so filler sticks well.
Step 2: Fill With Epoxy Or Heavy-duty Filler
For holes bigger than a dime, use a two-part epoxy wood filler. Mix as directed, press into the hole, and shape with a putty knife.
Step 3: Let It Cure
Epoxy takes longer to cure than regular filler. Follow the package instructions carefully.
Step 4: Shape And Sand
Once hard, sand the area flush with the trim. Carve wood grain lines with a utility knife if needed.
Step 5: Paint Or Stain
Prime and paint, or stain as needed. Epoxy can be tricky to stain, so test on a scrap first.
Practical tip: For very deep holes, fill in layers. Let each layer dry before adding more.
Replacing Damaged Trim Pieces
Sometimes, repair isn’t enough. If your trim is badly split, warped, or rotten, replacement is the best option.
Step 1: Remove The Old Trim
Score the edges with a utility knife to break the paint seal. Pry the trim away gently with a pry bar. Remove all nails.
Step 2: Measure And Cut New Trim
Measure the length needed. Cut the new trim to size. For corners, use a miter saw to cut angles.
Step 3: Test Fit
Hold the new piece in place to check the fit. Make adjustments as needed.
Step 4: Attach The New Piece
Apply wood glue to the back (optional) and nail the trim in place. Countersink the nails.
Step 5: Fill, Sand, And Paint
Fill nail holes and joints. Sand smooth, prime, and paint or stain to match.
Comparison Example:
Here’s how two common trim materials compare for replacement:
| Material | Pros | Cons | Best For |
|---|---|---|---|
| Solid Wood | Strong, stainable, classic look | Expensive, can warp or crack | Historic homes, high-traffic areas |
| MDF (Medium Density Fiberboard) | Affordable, smooth finish, easy to cut | Not water-resistant, can swell | Painted trim, dry areas |
Expert guidance: If your home has old, ornate trim, try to match the profile exactly. Bring a piece to the store for reference.
Sanding And Smoothing For A Professional Finish
Sanding is key to making repairs invisible. Poor sanding leaves bumps and rough spots that show through paint.
Sandpaper Grit Guide
- Coarse (60-80 grit): For removing old paint or heavy damage.
- Medium (100-150 grit): For shaping filler or smoothing repairs.
- Fine (180-220 grit): For final smoothing before painting.
Always sand in the direction of the wood grain. Wipe away all dust before painting or staining.
Power Vs. Hand Sanding
Use a sanding block or sponge for small areas. For large sections, a palm sander saves time but be gentle to avoid gouging the wood.
Tip: After sanding, shine a light across the trim to spot any uneven areas.
Painting And Staining Repaired Trim
A good paint or stain job hides repairs and makes your trim look new.
Step 1: Prime Bare Or Patched Areas
Use a stain-blocking primer on any patched or bare wood. This helps paint or stain adhere and keeps old stains from showing through.
Step 2: Paint Or Stain
Use a small brush for detail work. Apply thin coats. For best results, use two coats, letting each dry fully.
Step 3: Finish With A Topcoat
For stained trim, add a clear polyurethane topcoat for extra protection. For painted trim, choose a durable semi-gloss or gloss finish.
Real-world advice: Always keep a small can of your trim paint or stain for future touch-ups. This saves time and keeps repairs invisible.
Preventing Future Damage
Fixing wood trim is great, but preventing damage saves time and money. Here’s how you can keep your trim looking good:
- Control humidity: Use a dehumidifier in damp areas to prevent swelling and rot.
- Use door stops: Prevent handles from smashing into trim.
- Clean gently: Avoid harsh chemicals that strip paint or finish.
- Check for leaks: Inspect around windows, doors, and bathrooms regularly.
- Touch up early: Fix small scratches or chips before they grow.
Non-obvious insight: Furniture pads and area rugs protect trim from vacuum damage and foot traffic.
When To Call A Professional
Some trim repairs are best left to experts:
- If you find extensive rot, mold, or water damage inside walls.
- If the trim is part of a load-bearing structure.
- If you need to match complex historic profiles.
- If you’re not comfortable with power tools or saws.
Hiring a pro may cost more, but it ensures safety and a long-lasting result.
Cost guide:
| Repair Type | DIY Cost (Approx.) | Pro Cost (Approx.) |
|---|---|---|
| Minor touch-up (scratch/dent) | $10-$25 | $75-$150 |
| Replace small section | $20-$50 | $150-$400 |
| Full room restoration | $100-$300 | $600-$2000 |
If you’re unsure, get a quote before starting big repairs.
Credit: fencearmor.com
Eco-friendly And Modern Options
Today, you can choose eco-friendly wood fillers made from natural fibers or recycled content. Water-based paints and stains also reduce fumes and environmental impact. Some homeowners are replacing old trim with composite materials that resist water, mold, and insects.
Modern tip: If you want a maintenance-free look, consider PVC or composite trim for bathrooms or basements. These materials never rot but can be painted to match wood.
To learn more about modern trim materials and installation, check out the official Family Handyman guide.
Frequently Asked Questions
What’s The Best Filler For Wood Trim?
For small cracks and holes, wood filler works best. For bigger repairs, epoxy wood filler is stronger and lasts longer. Use paintable caulk for filling gaps at joints or corners.
Can I Repair Trim Without Removing It From The Wall?
Yes, most repairs like filling scratches, dents, and small cracks can be done with the trim in place. Only remove trim if it’s rotten, warped, or needs full replacement.
How Do I Match Paint Or Stain On Repaired Trim?
Take a small chip of your trim to the hardware store for color matching. For stains, test on scrap wood first. Keep leftover paint or stain for touch-ups so repairs blend in.
Is It Better To Repair Or Replace Damaged Trim?
If damage is minor (scratches, small chips), repair is faster and cheaper. For deep rot, large cracks, or warped trim, replacement is best for a lasting fix.
How Can I Prevent Wood Trim From Getting Damaged Again?
Keep humidity stable, fix leaks quickly, use door stops, and clean gently. Regular touch-ups stop small problems from growing.
Fixing wood trim might take some effort, but it’s worth it. Well-maintained trim makes your whole room look better and can even add value to your home. With the right tools, materials, and know-how, you can handle most trim repairs yourself and enjoy the results for years to come.