Dealing with a GE dryer door that isn’t working properly can be frustrating. It disrupts your laundry routine and can cause delays in your day.
A malfunctioning dryer door can stem from several issues. From latches that don’t click to hinges that don’t align, the problem can be simple or complex. This blog post will help you identify the common causes and offer solutions. Understanding why your GE dryer door is not working properly can save you time and potentially money.
Let’s dive into the possible reasons and how to fix them, so you can get back to your laundry without hassle.
Credit: d3appliance.com
Common Door Issues
Experiencing issues with your GE dryer door can be frustrating. It disrupts your laundry routine and leaves you searching for solutions. Understanding common door issues can help you identify the problem and find a quick fix.
Door Won’t Close
A common issue with GE dryer doors is that they won’t close properly. This can be due to several reasons. Lint buildup around the door can prevent it from sealing shut. Clean around the door regularly to avoid this problem. Another reason could be a misaligned door. If the door is out of alignment, it might not close properly. Check for any visible signs of misalignment. Adjust the door if necessary.
Door Won’t Latch
Another frequent issue is the door not latching. This can happen if the latch is broken or worn out. Inspect the latch for any visible damage. Replace it if it looks worn or broken. Sometimes, the strike plate can also be the culprit. The strike plate is the part that the latch hooks onto. Ensure the strike plate is not loose or damaged. Tighten or replace it if needed.
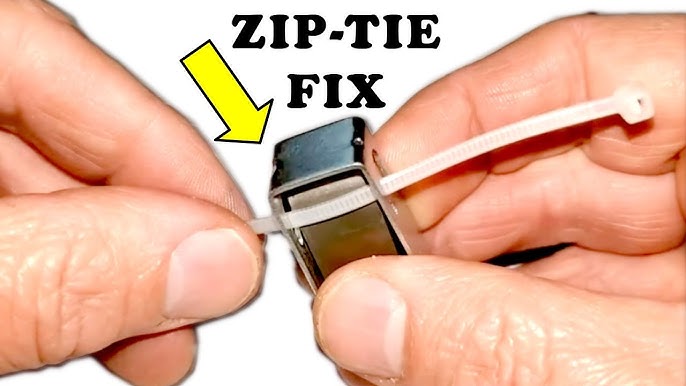
Credit: www.youtube.com
Safety Precautions
When dealing with a malfunctioning GE dryer door, safety should be your top priority. You might be tempted to jump in and fix things right away, but taking a few simple precautions can prevent accidents and injuries. Here are some essential safety measures to consider before you begin any repairs on your dryer.
Unplug The Dryer
This might seem obvious, but it’s easy to forget. Before you do anything, make sure your dryer is completely unplugged from the power source. You don’t want any surprises with electricity while you’re working. Imagine the shock—literally and figuratively—of accidentally starting the dryer while you’re tinkering with the door. So, make it a habit: unplug first, fix later.
Use Protective Gear
It’s always wise to wear protective gear when handling electrical appliances. Put on a pair of gloves to protect your hands from sharp edges or screws. Safety goggles are also a good idea to shield your eyes from any dust or debris. You might feel like a bit of a superhero, but trust me, it’s better to be safe than sorry.
Here’s a quick checklist for your protective gear:
- Insulated gloves
- Safety goggles
- Closed-toe shoes
By following these simple steps, you’ll reduce the risk of injury and make your repair process smoother. Remember, a little preparation goes a long way in keeping you safe while you work on that pesky dryer door.
Inspecting The Door Latch
A faulty door latch can stop your GE dryer from working. Inspecting the latch is a good first step. It helps you find and fix the problem. Follow these simple checks to get your dryer back in action.
Check For Damage
The door latch may be bent or broken. Open the dryer door and look closely at the latch. Does it look bent or out of place? A damaged latch won’t hold the door shut. If you see any damage, you might need to replace the latch.
Clean The Latch
Lint and dirt can build up on the latch. This buildup can stop the latch from working. Use a soft cloth to clean the latch. Gently wipe away any lint or dirt. You can use a small brush for hard-to-reach spots. Keeping the latch clean helps it work better.
Examining The Door Hinges
Is your GE dryer door not working properly? The door hinges might be the issue. Examining the door hinges can help you identify common problems. This guide will walk you through the steps. Let’s start by looking for misalignment and tightening loose screws.
Look For Misalignment
First, check if the door is aligned correctly. Misaligned doors can prevent proper closure. This can lead to problems with your dryer. Carefully observe the gaps around the door. Uneven gaps indicate misalignment. Gently push or pull the door to adjust its position. Make sure it aligns with the frame. A properly aligned door will close easily.
Tighten Loose Screws
Loose screws can cause the door to malfunction. Grab a screwdriver and inspect the screws. Look at the hinge area closely. Tighten any loose screws you find. This simple step can solve many door issues. Check the screws regularly to keep the door working well. A secure door ensures smooth operation of your dryer.
Replacing The Door Seal
Is your GE dryer door not closing properly? It might be time to replace the door seal. A worn-out seal can cause issues such as heat escaping, clothes taking longer to dry, and even safety hazards. Replacing the door seal is a simple fix that can save you time, energy, and money. Let’s walk through the steps to get your dryer back in top shape.
Remove Old Seal
Before you begin, make sure the dryer is unplugged. Safety first! Now, locate the door seal. It’s the rubbery part around the edge of the door. You’ll need to remove this old seal to install a new one.
- Step 1: Open the dryer door and carefully peel off the old seal. You might need a flathead screwdriver to gently pry it off.
- Step 2: Check for any leftover adhesive or small bits of the old seal. Clean the area thoroughly with a damp cloth to ensure a smooth surface for the new seal.
Install New Seal
Now that the old seal is removed, it’s time to install the new one. This part is straightforward, but it requires a bit of patience.
- Step 1: Take the new seal and align it with the edge of the dryer door. Start at the top and work your way around.
- Step 2: Press firmly to ensure the seal sticks well. You might need to go over it a few times to make sure it’s properly attached.
- Step 3: Close the door and check for any gaps. If everything looks good, plug the dryer back in and give it a test run.
Replacing the door seal is a simple task that can make a big difference in your dryer’s performance. Not only will your clothes dry faster, but you’ll also save on energy bills. So, why not give it a try? Happy drying!
Testing The Door Switch
When your GE dryer door isn’t working properly, it can be frustrating. However, one of the most common culprits is a faulty door switch. Testing the door switch is a fairly straightforward task and can help determine if the switch needs to be replaced. Let’s dive into the steps required to test the door switch efficiently.
Locate The Switch
First things first, you need to locate the door switch. Typically, the door switch is found near the door opening of the dryer. Here’s a simple guide to finding it:
- Open the dryer door.
- Look around the door frame; the switch is usually visible as a small plastic or metal piece that gets pressed when the door is closed.
- If you can’t see it right away, check the user manual for your specific dryer model – it should have a diagram showing the switch’s location.
Test With Multimeter
Once you’ve located the switch, the next step is to test it with a multimeter. A multimeter is a device that measures electrical properties like voltage, current, and resistance. Here’s how you can use it:
- Ensure the dryer is unplugged to avoid any electrical hazards.
- Set your multimeter to the resistance or continuity setting.
- Remove the door switch from its place. This might require unscrewing it from the door frame.
- Touch the multimeter probes to the terminals of the switch.
- If the multimeter shows a reading of zero or close to zero, the switch is working fine. If it shows an infinite reading or no change, the switch is faulty and needs to be replaced.
In conclusion, testing the door switch is a simple process that can help you identify whether it’s the root cause of your dryer door issues. By locating the switch and testing it with a multimeter, you can save yourself a lot of hassle and get your dryer back in working order in no time. Remember, safety first – always unplug your dryer before attempting any repairs!
Adjusting The Door Strike
Is your GE dryer door giving you a hard time by not closing properly? You might find that the issue lies with the door strike. Adjusting the door strike is a simple yet effective solution that can save you from the frustration of an uncooperative dryer door. In this section, we’ll walk you through the steps to identify and align the door strike, ensuring your dryer door works like a charm.
Identify The Strike Plate
First things first, let’s locate the strike plate. The strike plate is a small metal piece attached to the dryer door frame. Its job is to catch the door latch, keeping the door securely closed during drying cycles. Here’s how you can find it:
- Open the dryer door completely.
- Look at the area where the door meets the frame.
- You’ll see a metal plate with a small opening – that’s the strike plate.
Once you’ve identified the strike plate, you’re halfway there. It’s not rocket science, but it does require a bit of patience and attention to detail.
Align The Strike
Now that you’ve found the strike plate, it’s time to ensure it’s properly aligned with the door latch. Misalignment can cause the door to not close properly, leading to all sorts of drying issues. Follow these steps to align the strike:
- Loosen the screws holding the strike plate in place using a screwdriver. You don’t need to remove them completely, just enough to adjust the plate.
- Gently move the strike plate up, down, or side-to-side until it aligns perfectly with the door latch. This might take a few tries, but don’t give up!
- Once aligned, tighten the screws to secure the strike plate in its new position.
After adjusting the strike plate, close the dryer door to test if it latches properly. If it does, congratulations! You’ve successfully adjusted the door strike. If not, revisit the steps above and make further adjustments as needed.
Remember, a properly aligned door strike ensures that your dryer door remains closed during cycles, preventing heat loss and ensuring efficient drying. Plus, it saves you from the annoyance of dealing with a faulty door. So, take a few minutes to adjust the door strike – your future self will thank you!

Credit: www.youtube.com
When To Call A Professional
When it comes to household appliances, a broken dryer door can be quite a nuisance. If your GE dryer door isn’t working properly, you might be wondering whether it’s time to roll up your sleeves or call in the professionals. While some minor issues can be addressed with a bit of DIY effort, there are certain situations where it’s best to leave it to the experts. In this section, we’ll discuss when you should consider calling a professional for your GE dryer door issues.
Complex Repairs
Let’s face it, not all of us are born with a wrench in hand. Some dryer door issues are more complicated than others. For example, if the door won’t latch properly, it could involve intricate parts like the door switch or hinges. If you’re not comfortable tinkering with these components, it’s a good idea to call a professional. They have the knowledge and tools to diagnose and fix the problem efficiently. Why risk making the issue worse, right?
Warranty Considerations
Before you grab your toolbox, take a look at your dryer’s warranty. Many GE dryers come with a warranty that covers repairs for a certain period. If your dryer is still under warranty, attempting to fix it yourself might void the coverage. Instead, contact a certified technician who can perform the repair without affecting your warranty. Isn’t it better to let someone else handle the headache while you sit back and relax?
| Situation | Action |
|---|---|
| Minor adjustments (e.g., tightening screws) | DIY |
| Complex issues (e.g., broken door latch) | Call a Professional |
| Under Warranty | Call a Professional |
In conclusion, while a few issues with your GE dryer door might be manageable on your own, there are times when professional help is the best route. Don’t be shy to call in the experts, especially for complex repairs or if your warranty is still active. After all, why make things harder for yourself when help is just a phone call away?
Frequently Asked Questions
How Do I Know If My Ge Dryer Door Switch Is Bad?
Check if the dryer starts when the door is closed. If it doesn’t, the switch may be bad. Use a multimeter to test for continuity. If there’s no continuity, replace the switch.
Why Is My Dryer Door Not Closing Properly?
Your dryer door might not close properly due to a faulty latch, misaligned door, or damaged seal. Check and adjust these parts for a proper fit. If the issue persists, consider consulting a professional technician for repair.
What Is The Most Common Problem With A Ge Dryer?
The most common problem with a GE dryer is a faulty thermal fuse. This issue causes the dryer to stop heating.
What Is The Door Error On A Ge Dryer?
A door error on a GE dryer indicates that the door is not closed properly. Ensure the door is fully shut.
Why Is My Ge Dryer Door Not Closing Properly?
The door latch might be misaligned. Check for obstructions and ensure the latch is secure.
Conclusion
Fixing a GE dryer door can be simple. Follow the steps mentioned. Check hinges and latches regularly. Clean and lubricate parts. Seek professional help if needed. Your dryer will function smoothly. Enjoy hassle-free laundry days. Thank you for reading.