Having trouble with your Jitterbug Smart 3? Follow these troubleshooting tips to resolve any issues and get back to enjoying your device.
From simple resets to addressing software glitches, these helpful solutions will guide you through the process. Whether it’s a frozen screen, unresponsive buttons, or connectivity problems, we’ve got you covered. Keep reading to learn how to tackle common problems and troubleshoot your Jitterbug Smart 3 with ease.
Rest assured, with the right approach, you can quickly restore your device to its optimal functionality.
Basic Troubleshooting
This guide offers basic troubleshooting tips for the Jitterbug Smart 3, helping users to quickly address and resolve common issues they may encounter. Find solutions to improve the phone’s performance and functionality.
Basic TroubleshootingBefore contacting customer support, you can perform basic troubleshooting to resolve common issues with your Jitterbug Smart 3. Here are some simple steps to follow for power-related issues, battery level checks, connection problems, and screen/display concerns.“`htmlPowering On/off The Device
“`If your Jitterbug Smart 3 is unresponsive, try holding down the power button for 10 seconds. This often resolves minor software glitches.“`htmlChecking Battery Level
“`Make sure the battery is properly inserted and charged. To check the battery level, go to the Home screen and tap on “Settings,” then “Battery.” Here, you can monitor the current battery percentage.“`htmlConnection Issues
“`If you’re experiencing issues with Bluetooth or Wi-Fi connections, ensure that the respective features are enabled in the device settings. Check if the devices you’re trying to connect to are within range and have Bluetooth/Wi-Fi turned on.“`htmlScreen/display Problems
“`If you notice specks of dust or fingerprints on the screen, gently clean it using a microfiber cloth. If you’re experiencing display issues, such as flickering or unresponsiveness, consider restarting the device or adjusting the screen brightness in the settings.By following these basic troubleshooting steps, you can often resolve minor issues with your Jitterbug Smart 3 without needing to seek professional assistance.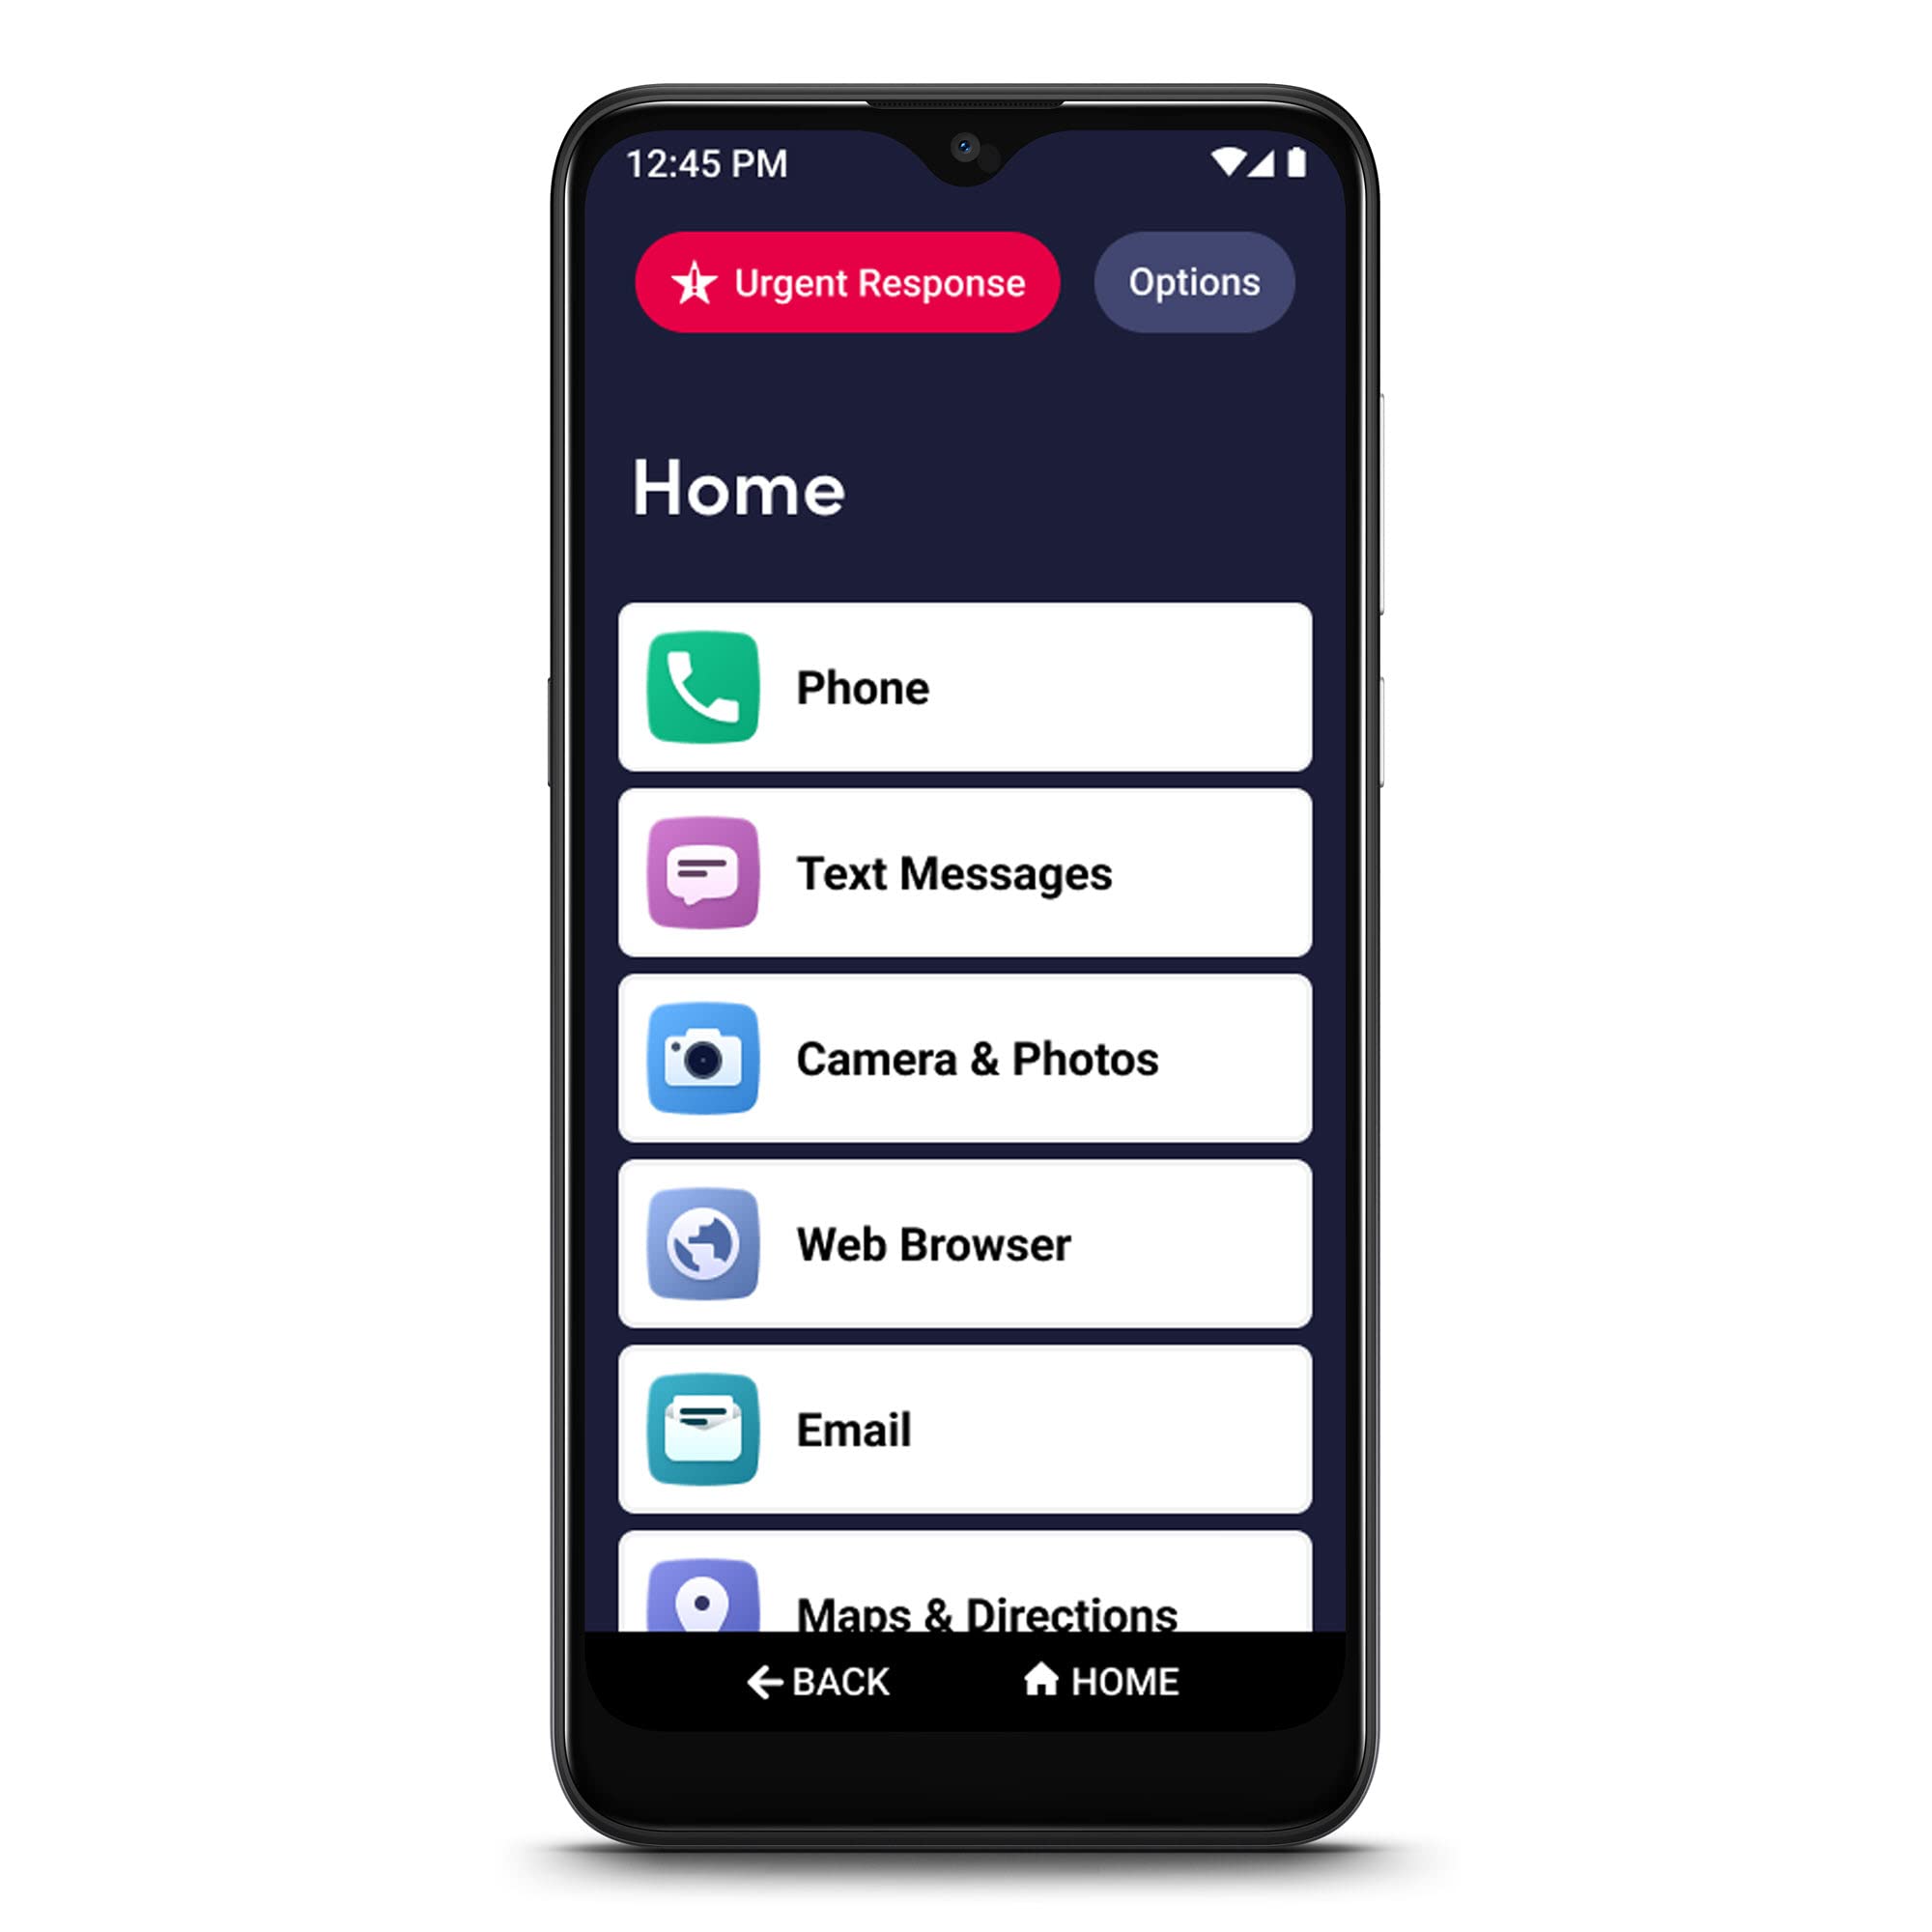
Credit: www.amazon.com
Software Troubleshooting
When encountering issues with your Jitterbug Smart 3, performing software troubleshooting can help resolve common problems. Here are some troubleshooting steps you can take to address software-related issues with your device.
Updating The Operating System
Keeping the operating system of your Jitterbug Smart 3 up to date is essential for ensuring optimal performance and compatibility with various applications. To update the operating system:
- Go to the Settings menu.
- Select “About phone” or “System updates.”
- Check for and install any available updates.
Clearing Cache And Data
Clearing the cache and data of apps can help resolve issues related to app crashes and performance. To clear cache and data:
- Go to Settings and select “Apps & notifications.”
- Choose the app experiencing issues.
- Select “Storage” and then tap “Clear cache” and “Clear data.”
Resetting App Preferences
If you are encountering issues with multiple apps, resetting app preferences can often resolve underlying conflicts. To reset app preferences:
- Access the Settings menu and go to “Apps & notifications.”
- Tap on “Advanced” and select “Reset app preferences.”
Uninstalling And Reinstalling Apps
If a specific app is causing problems, uninstalling and reinstalling it can sometimes resolve issues. To uninstall and reinstall apps:
- Long press on the app you want to uninstall and select “Uninstall.”
- Visit the Google Play Store to reinstall the app.
Network Troubleshooting
In today’s connected world, staying connected is crucial, especially when it comes to smartphones. The Jitterbug Smart 3 is no exception, but sometimes network issues can arise. If you are experiencing problems with your network connectivity, don’t worry. In this section, we will cover common network troubleshooting steps to help you get back on track.
Checking Wi-fi Connectivity
If you are having trouble connecting to a Wi-Fi network on your Jitterbug Smart 3, try these troubleshooting steps:
- Make sure the Wi-Fi on your device is enabled. You can check this by going to Settings > Wi-Fi and ensuring the toggle switch is in the “On” position. If it is already on, try turning it off and then back on again to refresh the connection.
- Ensure that you are within range of the Wi-Fi network you are trying to connect to. Sometimes, being too far away can result in a weak or unstable connection. Try moving closer to the router and see if that helps.
- Check if the Wi-Fi network you are connecting to requires a password. If it does, make sure you have entered the correct password. Double-check the password for any typos or mistakes.
- If you are still unable to connect to the Wi-Fi network, try restarting both your device and the router. This can often resolve temporary connectivity issues.
Troubleshooting Mobile Data
If you are unable to access the internet or use mobile data on your Jitterbug Smart 3, follow these troubleshooting steps:
- Check if mobile data is enabled on your device. You can do this by going to Settings > Network & Internet > Mobile network. Ensure that the toggle switch is in the “On” position. If it is already on, try turning it off and on again.
- Make sure you have sufficient mobile data or a working data plan. This could be a common reason for connectivity issues. Check your data plan balance or contact your service provider to ensure everything is in order.
- If you have determined that your mobile data is activated and working properly, try restarting your device. A simple restart can often resolve minor connectivity glitches.
- If none of the above steps work, contact your service provider for further assistance. There might be a network outage or specific settings that need to be adjusted on their end.
Fixing Bluetooth Connection Issues
If you are experiencing difficulties connecting your Jitterbug Smart 3 to a Bluetooth device, try these steps:
- Ensure that Bluetooth is turned on. You can check this by going to Settings > Connected devices > Bluetooth and ensuring the toggle switch is in the “On” position. If it is already on, try turning it off and on again.
- Make sure the Bluetooth device you are trying to connect to is in pairing mode. Consult the device’s user manual for instructions on how to enable pairing mode.
- If you have previously paired your Jitterbug Smart 3 with the Bluetooth device, try removing the device from the list of paired devices and then reconnecting it.
- Restart both your Jitterbug Smart 3 and the Bluetooth device. This can sometimes help establish a stable connection.
Resolving Gps Problems
If you are having issues with GPS functionality on your Jitterbug Smart 3, follow these troubleshooting steps:
- Make sure GPS is enabled on your device. You can check this by going to Settings > Security & Location > Location and ensuring the toggle switch is in the “On” position. If it is already on, try turning it off and on again.
- Check if you are in an area with a strong GPS signal. Obstructions such as tall buildings or dense foliage can interfere with GPS reception. Try moving to an open area and see if that improves GPS accuracy.
- If your Jitterbug Smart 3 is unable to get a GPS signal, try restarting the device. Sometimes, a simple restart can solve temporary GPS issues.
- If the problem persists, ensure that your device’s software is up to date. Installing the latest software updates can often fix bugs or improve GPS performance.
Hardware Troubleshooting
Having hardware issues with your Jitterbug Smart 3? Our troubleshooting guide provides easy, step-by-step solutions to resolve common problems quickly and efficiently. Find the answers you need to keep your device running smoothly.
Welcome to the hardware troubleshooting section of our Jitterbug Smart 3 guide. If you’re experiencing issues with your device’s physical components, such as buttons, ports, or overall performance, you’ve come to the right place. In this section, we’ll walk you through some common hardware problems you may encounter and provide step-by-step solutions to help you resolve them. Let’s dive in!
Checking Physical Connections
If you’re facing connectivity issues or your device isn’t charging properly, it’s crucial to check the physical connections first. Ensure that all cables are securely plugged in. Here’s a quick checklist for you:
- Verify that the charger cable is properly connected to both the device and the power source.
- Inspect the charging port for any debris, such as dust or lint.
- Make sure the headphone jack is clean and clear of any obstruction.
Cleaning The Device
Dirt can sometimes be the culprit behind device malfunctions. Regular cleaning can help maintain optimal performance. Here’s how to do it:
- Power off the device and unplug any connected cables.
- Use a soft, lint-free cloth to wipe the screen, buttons, and back of the device.
- Gently clean the charging port and headphone jack using a small brush or compressed air.
- For stubborn dirt, dampen the cloth slightly with water or a gentle cleaning solution and carefully wipe the affected areas.
- Ensure the device is completely dry before powering it back on or reconnecting any cables.
Fixing Issues With Buttons And Ports
If you’re experiencing problems with specific buttons or ports, follow these steps:
- Ensure that you’re pressing the buttons firmly and directly to avoid accidental pressing.
- If a specific button is unresponsive, gently press and release it multiple times to check for any debris obstruction.
- If the buttons are still not functioning correctly, restart your device and try again.
- For port-related issues, such as the headphone jack not detecting headphones, try using a different pair of headphones to determine if the problem lies with the device or the accessory.
Addressing Hardware Malfunctions
If your Jitterbug Smart 3 is suffering from hardware malfunctions, such as unexpected shutdowns or frequent freezing, consider the following steps:
- Check for software updates and ensure your device is running the latest firmware version.
- If the problem persists, perform a factory reset, but make sure to back up your data beforehand as this will erase all personal information.
- If the issue remains unresolved, it’s advisable to contact the Jitterbug customer support team or visit an authorized service center for further assistance.
By going through these helpful troubleshooting steps, you can often resolve common hardware issues with your Jitterbug Smart 3. However, if the problem persists, don’t hesitate to seek professional help to ensure your device is operating at its optimal level. Stay tuned for more troubleshooting tips in our upcoming sections!
Battery And Charging
The Jitterbug Smart 3 is a powerful device, but even the best of technology can encounter battery and charging issues at times. Here, we will explore troubleshooting techniques and tips to ensure optimal performance in these areas.
Optimizing Battery Life
To optimize the battery life of your Jitterbug Smart 3, consider implementing the following best practices:
- Avoid overcharging the device, unplug it once it reaches 100%.
- Adjust screen brightness to the lowest comfortable level.
- Close background apps and processes when not in use to conserve battery.
Resolving Charging Problems
If you encounter charging issues with your Jitterbug Smart 3, you can try the following troubleshooting steps:
- Use the original charging cable and adapter provided with the device.
- Clean the charging port and cable connectors to ensure a secure connection.
- Restart the device and try charging it again.
Determining Battery Health
To assess the health of your Jitterbug Smart 3 battery, you can use the built-in diagnostics provided by the device. Additionally, third-party battery health apps can provide insights into the overall condition and performance of the battery.
Using Battery-saving Features
The Jitterbug Smart 3 offers various battery-saving features that can extend its usage time. These include the power-saving mode and adaptive battery settings, which can be enabled to maximize battery efficiency.
Credit: www.bestbuy.com
Call And Audio Issues
If you’re encountering problems with the call and audio features on your Jitterbug Smart 3, don’t worry! We’ve got you covered. In this troubleshooting guide, we will address some common issues and provide you with simple solutions to resolve them.
No Sound During Calls
Is the sound not working while you’re on a call? This can be frustrating, but there are a few things you can try to fix the problem:
- First, ensure that the volume is turned up on your device. Check the volume buttons located on the side of your Jitterbug Smart 3 and make sure they are not muted.
- If the volume is already turned up, but you still can’t hear the caller, try restarting your phone. Sometimes a simple reboot can resolve software glitches that may be affecting the audio.
- Another potential issue could be with the earpiece. Make sure it is clean and not blocked by any debris that may be hindering the sound. You can gently clean it with a soft cloth or brush.
- If none of the above solutions work, it’s possible that there may be a hardware problem with your device. In this case, we recommend reaching out to the Jitterbug customer support team for further assistance.
Call Dropping Or Poor Call Quality
Experiencing call dropping or poor call quality can be frustrating, especially when you rely on your phone for important conversations. Here are a few steps you can take to address this issue:
- Ensure that you have a strong and stable network connection. Weak signals or network congestion can lead to call drops and poor call quality. Try moving to an area with better reception or restarting your device to refresh the connection.
- If the issue persists, check if the SIM card is properly inserted into your Jitterbug Smart 3. A loose or incorrectly inserted SIM card can cause connectivity issues. Remove the SIM card, clean it, and reinsert it securely.
- You can also try switching off any apps running in the background, as they might be consuming network resources and affecting call quality. Close unnecessary apps to free up system resources for better call performance.
- If the problem continues, it’s advisable to contact your service provider to ensure that there are no network-related problems in your area.
Troubleshooting Headphone/external Speaker
Are you experiencing issues with your Jitterbug Smart 3’s headphone or external speaker? Here are a few steps you can take to troubleshoot this problem:
| 1. Check the headphone or external speaker connection | Ensure that the headphone or external speaker is properly connected to your device. Make sure there are no loose connections or damaged cables that could affect the audio output. |
| 2. Test the headphone or external speaker on another device | Try using the headphones or external speaker on another device to determine if the issue lies with the Jitterbug Smart 3 or the accessory itself. If it works properly on another device, the problem may be with your phone. |
| 3. Restart your device | As with many technical issues, a simple restart can often resolve problems. Try restarting your Jitterbug Smart 3 and see if the headphone or external speaker starts working again. |
| 4. Check the sound settings | Make sure the sound settings on your Jitterbug Smart 3 are configured correctly. Go to the Settings menu, select Sound, and ensure that the audio output is set to the appropriate option (headphones or external speaker). |
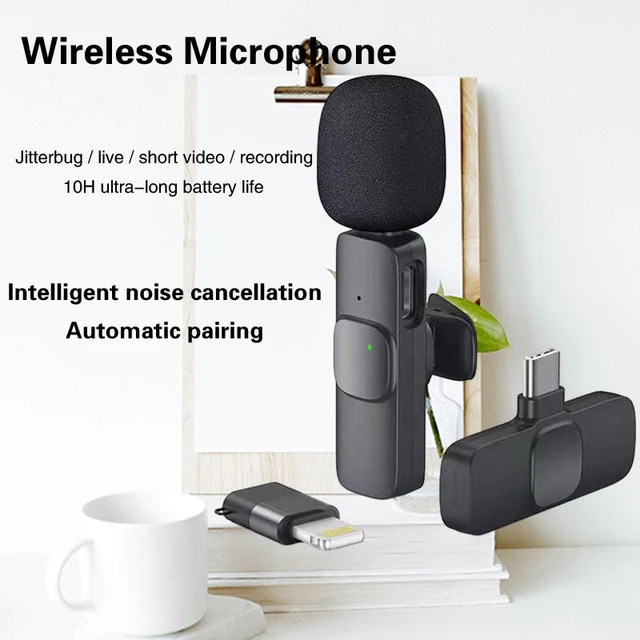
Fixing Microphone Issues
If you’re having problems with the microphone on your Jitterbug Smart 3, follow these steps to troubleshoot:
- Check for any physical obstructions around the microphone area. Sometimes, dust or debris can accumulate and affect microphone performance. Gently clean the microphone area with a soft cloth or brush.
- Ensure that the microphone is not blocked by a phone case or cover. Some cases may cover the microphone, resulting in muffled or distorted audio. Remove the case and test the microphone again.
- Restart your device and test the microphone after the reboot. This can help resolve any temporary software glitches that may be causing microphone issues.
- If the problem persists, it’s recommended to contact Jitterbug customer support for further assistance. They will be able to guide you through additional troubleshooting steps or arrange for a repair if necessary.
Camera And Media
The Camera and Media features on your Jitterbug Smart 3 are essential for capturing and enjoying special moments. However, you may encounter issues with the camera, video playback, audio recording, and media file transfers. Here are some troubleshooting tips to address these common issues.
Camera Not Working
If you encounter issues with the camera not functioning on your Jitterbug Smart 3, try the following troubleshooting steps:
- Ensure that the camera lens is clean and free from any obstructions.
- Restart your device and try accessing the camera again.
- If the issue persists, check for any available software updates for the camera app.
Troubleshooting Video Playback
Having trouble playing videos on your Jitterbug Smart 3? Follow these steps to troubleshoot video playback issues:
- Check that the video file format is supported by the device.
- Clear the cache of the video player app and try playing the video again.
- If the problem continues, restart your device to refresh the video player.
Issues With Audio Recording
If you are experiencing difficulties with audio recording, try the following troubleshooting tips:
- Ensure that the microphone is not obstructed by any debris or blockages.
- Check for any background apps that may be interfering with the audio recording function.
- If the problem persists, consider resetting the audio settings on your device.
Transferring Media Files
When transferring media files to or from your Jitterbug Smart 3, follow these steps to ensure a seamless process:
- Use a compatible USB cable to connect your device to a computer for file transfers.
- Confirm that the media files are in supported formats for smooth transfer and playback.
- If encountering issues, try using a different USB port on the computer or a different cable.
Messaging And Email
The messaging and email functionalities on your Jitterbug Smart 3 are vital for staying connected with your contacts. However, encountering issues with messaging and email can be frustrating. In this troubleshooting guide, we’ll walk through common problems related to text messaging, email synchronization, MMS, and messaging notifications, providing simple solutions to keep your communication seamless.
Troubleshooting Text Messaging
If you’re experiencing issues with text messaging on your Jitterbug Smart 3, there are several troubleshooting steps you can take to resolve the problem. First, ensure that you have a strong cellular signal and that your device is not in airplane mode. Check that the recipient’s phone number is entered correctly and verify that your device’s messaging app is updated to the latest version.
Fixing Email Synchronization Issues
Email synchronization problems can hinder your ability to access important messages on your device. To address this issue, verify that your device has an active internet connection and that your email account credentials are correctly entered. Ensure that your email settings are configured properly, and consider removing and re-adding the email account to refresh the synchronization.
Issues With Mms (multimedia Messaging Service)
If you’re encountering difficulties with sending or receiving multimedia messages, first confirm that your device has a data connection and that mobile data is enabled. Check your device’s APN settings to ensure they are correct for your carrier. Additionally, verify that the multimedia messages you are sending do not exceed the maximum file size allowed by your carrier.
Managing Messaging Notifications
Proper management of messaging notifications can enhance your user experience. To address issues with notifications not appearing, ensure that your device’s notification settings are properly configured for the messaging app. If you are not receiving notifications for incoming messages, check that the app has the necessary permissions to display notifications.
Accessibility Features
Having trouble with accessibility features on your Jitterbug Smart 3? Our troubleshooting guide provides simple solutions and tips to help you navigate and utilize its accessibility settings effectively. From adjusting font size to enabling voice commands, we’ve got you covered for a smoother user experience.
Enabling And Customizing Accessibility Options
The Jitterbug Smart 3 is designed to be user-friendly for individuals with various accessibility needs. With its range of accessibility features, you can easily enable and customize options to suit your specific requirements. Whether you have visual impairments, hearing difficulties, or simply prefer voice commands and dictation, the Jitterbug Smart 3 has got you covered.
Troubleshooting Accessibility-related Problems
Encountering issues with accessibility features can be frustrating, but rest assured that the Jitterbug Smart 3 offers troubleshooting solutions. Whether it’s an unresponsive screen reader or a glitch in the voice command function, you can rely on the device to help you overcome any accessibility-related problems. The troubleshooting process is simple and user-friendly, ensuring that you can quickly get back to enjoying the features that make the Jitterbug Smart 3 accessible.
Support For Hearing And Visual Impairments
One of the standout features of the Jitterbug Smart 3 is its support for individuals with hearing and visual impairments. The device offers customizable text size and high-contrast options for those with visual difficulties. For individuals with hearing impairments, the Jitterbug Smart 3 is compatible with hearing aids and offers adjustable volume settings.
Furthermore, the Jitterbug Smart 3 supports closed captioning, ensuring that individuals with hearing impairments can easily follow along with videos and other multimedia content. With these accessibility features, the Jitterbug Smart 3 strives to provide a seamless experience for users with different accessibility needs.
Using Voice Commands And Dictation
For individuals who prefer a hands-free experience, the Jitterbug Smart 3 offers voice command and dictation capabilities. This feature allows you to navigate the device, open apps, send messages, and more, all through simple voice commands. The Jitterbug Smart 3’s advanced voice recognition technology ensures accurate and convenient communication, making it an ideal choice for individuals who find traditional touch-screen navigation challenging.
With its range of accessibility features, easy troubleshooting options, and support for hearing and visual impairments, the Jitterbug Smart 3 sets the standard for user-friendly devices. Whether you need customizable options, voice control, or assistance with hearing and visual impairments, the Jitterbug Smart 3 has everything you need to stay connected in a modern world.
Security And Privacy
The Jitterbug Smart 3 is designed to provide a secure and private experience for its users. To ensure the protection of personal information and data, it’s important to implement robust security measures and address any privacy concerns that may arise. This troubleshooting guide will walk you through the steps to enhance the security and privacy of your Jitterbug Smart 3.
Setting Up Screen Lock
Setting up a strong screen lock is crucial for preventing unauthorized access to your device. To do this, navigate to the “Settings” menu, select “Security,” and then choose “Screen lock.” From here, you can set up options such as PIN, pattern, or password to ensure that only authorized users can access your device.
Managing App Permissions
It’s important to manage app permissions to control what information and features each app can access. Go to “Settings,” select “Apps,” and then tap on the specific app. From the app’s info page, you can manage permissions such as access to the camera, contacts, or location. Review and adjust these permissions to protect your privacy.
Addressing Privacy Concerns
When using the Jitterbug Smart 3, it’s essential to address privacy concerns promptly. Stay informed about the type of data being collected by apps and the device itself. Regularly review the privacy settings and adjust them accordingly to ensure that your personal information remains secure and private.
Protecting Against Malware And Viruses
To prevent security threats, such as malware and viruses, it’s important to take proactive measures. Avoid downloading apps from unknown sources, and only install applications from trusted sources, such as the Google Play Store. Additionally, consider installing a reputable antivirus app to provide an extra layer of protection for your device.
Storage And Memory
The Jitterbug Smart 3 troubleshooting guide provides solutions for common storage and memory issues. Find helpful tips to resolve memory errors, optimize storage space, and enhance the performance of your Jitterbug Smart 3 device.
Clearing Storage Space
To ensure smooth performance and optimize your Jitterbug Smart 3, it is important to periodically clear storage space. When your device’s storage is almost full, it can affect its overall speed and functionality. Fortunately, clearing storage space on your Jitterbug Smart 3 is a simple process.
To begin, navigate to the “Settings” menu on your device. Within the settings menu, locate and tap on the “Storage” option. This will provide you with an overview of your device’s storage usage. Here, you can see a breakdown of how much storage is being used by different apps and files.
Next, identify any apps or files that are taking up a significant amount of storage. You can then select these items and choose to uninstall or delete them. Be mindful of any important files or apps that you may need, and consider backing them up before deleting.
In addition to deleting apps and files, you can also clear cache data to free up storage space. Cached data includes temporary files and data stored by apps to improve their performance. To clear cache data, go back to the “Storage” menu and tap on the “Cached data” option. Confirm your selection to clear the cache.
Managing App Data
Managing app data is another important aspect of optimizing storage on your Jitterbug Smart 3. Some apps may accumulate a large amount of data over time, which can occupy valuable storage space. By managing app data, you can ensure that apps are not using excessive storage and causing performance issues.
To manage app data, go to the “Settings” menu and select “Apps” or “App Manager.” Here, you will find a list of all the apps installed on your device. Tap on an app to access more details and options.
Within the app settings, look for an option related to data storage or usage. This may be labeled as “Storage,” “Data usage,” or similar. Once you access this option, you can see how much storage space the app is using and manage its data accordingly.
Some apps offer the ability to clear specific types of data, such as cached files or offline data. You can also choose to uninstall and reinstall the app to start fresh and remove any unnecessary data.
Expanding Memory With Sd Card
If you find that the internal storage of your Jitterbug Smart 3 is consistently running low, you can expand its memory by using an SD card. An SD card provides additional storage space for your device, allowing you to store more apps, photos, videos, and files.
To expand memory with an SD card, first, ensure that your Jitterbug Smart 3 supports external storage and locate the SD card slot on the device. Insert the SD card into the slot, ensuring a secure fit.
Once the SD card is inserted, you may need to format it to work with your Jitterbug Smart 3. To format the SD card, go to the “Settings” menu, select “Storage,” and tap on the SD card option. From there, follow the on-screen prompts to format the SD card.
After formatting, you can choose to save new files and apps directly to the SD card to free up internal storage space. Additionally, you can move existing files and apps from the internal storage to the SD card. To do this, go to the “Settings” menu, select “Apps,” choose an app, and tap on the “Move to SD card” option.
Troubleshooting Low Memory Errors
If you continue to experience low memory errors on your Jitterbug Smart 3 despite clearing storage space and managing app data, there are a few additional troubleshooting steps you can take.
Firstly, restart your device. This simple action can help clear temporary files and refresh the device’s memory, potentially resolving any memory-related issues.
If the problem persists, you may need to consider uninstalling unnecessary apps or deleting files that you no longer need. Be cautious and ensure that you are not removing any crucial apps or files that may be causing the issue.
Alternatively, you can try performing a factory reset on your Jitterbug Smart 3. Please note that a factory reset will erase all data and settings on your device. Therefore, it is important to back up any important files or data before proceeding with a factory reset.
To perform a factory reset, go to the “Settings” menu, select “System,” and tap on the “Reset” option. Follow the on-screen instructions to complete the process.
By following these troubleshooting steps, you should be able to effectively address low memory errors on your Jitterbug Smart 3 and enjoy a smoother and more efficient user experience.
Sync And Backup
One of the most important features of the Jitterbug Smart 3 is its ability to sync contacts and calendar events, as well as perform automatic backups to ensure you never lose your valuable data. In this section, we will explore how to sync your contacts and calendar, set up automatic backups, troubleshoot any sync issues you may encounter, and restore from a backup when needed.
Syncing Contacts And Calendar
To easily keep all your contacts and calendar events up to date across your devices, follow these simple steps:
- Open the Jitterbug Smart 3 settings and scroll down to ‘Accounts’.
- Select ‘Add account’ and choose the account type you want to sync, such as Google or Microsoft Exchange.
- Enter your account credentials and follow the on-screen instructions to complete the setup.
- Once the account is added, make sure the ‘Sync Contacts’ and ‘Sync Calendar’ options are enabled.
- Your contacts and calendar events will now sync automatically, ensuring you have the latest information at your fingertips.
Setting Up Automatic Backups
Automatic backups provide peace of mind by saving your important data on a regular basis. Here’s how you can set up automatic backups on your Jitterbug Smart 3:
- Open the Jitterbug Smart 3 settings and go to ‘Backup & Reset’.
- Select the ‘Backup my data’ option and toggle the switch to enable it.
- Choose the backup account you want to use, such as Google Drive or a cloud storage service.
- Make sure the ‘Automatic restore’ option is also enabled to easily restore your data.
- From now on, your Jitterbug Smart 3 will automatically back up your data at regular intervals, safeguarding it in case of any unexpected events.
Troubleshooting Sync Issues
If you encounter any issues with syncing your contacts and calendar, don’t worry. These troubleshooting steps can help you resolve the problem:
- Check your internet connection to ensure it’s stable and working properly.
- Verify that you’ve entered the correct account credentials for the account you’re trying to sync.
- Update the Jitterbug Smart 3 software to the latest version to benefit from bug fixes and performance improvements.
- Restart your device and try syncing again to see if the issue persists.
Restoring From A Backup
If you ever need to restore your Jitterbug Smart 3 from a backup, follow these steps:
- Open the Jitterbug Smart 3 settings and navigate to ‘Backup & Reset’.
- Select the ‘Restore my data’ option and choose the backup you want to restore from.
- Follow the on-screen instructions to complete the restoration process.
- Once the restore is finished, your Jitterbug Smart 3 will be back to its previous state, including your contacts, calendar events, and other backed-up data.
Troubleshooting Tips And Tricks
Encountering issues with your Jitterbug Smart 3 can be frustrating, but don’t worry! There are several troubleshooting techniques you can try to resolve common problems. In this section, we’ll explore some useful tips and tricks to help you get your device back on track.
Performing A Factory Reset
If you’re experiencing persistent issues with your Jitterbug Smart 3, performing a factory reset can often provide a solution. This process resets your device to its original factory settings, erasing any data or customized settings you may have made. It can be helpful when dealing with software glitches or performance issues that seem unresolvable.
To perform a factory reset on your Jitterbug Smart 3:
- Access the Settings menu by tapping on the gear icon on your Home screen.
- Scroll down to the “System” category and tap on “Reset” or “Backup & Reset.”
- Select “Factory Data Reset” or a similar option.
- Review the information provided and confirm your decision by tapping “Reset Phone” or “Erase Everything.”
- Wait for the process to complete, and your device will reboot with default settings.
Using Safe Mode
If you suspect that a recently installed app is causing issues on your Jitterbug Smart 3, you can try booting your device into Safe Mode. In Safe Mode, only pre-installed apps will run, allowing you to determine if a third-party app is the culprit.
To enter Safe Mode on your Jitterbug Smart 3:
- Press and hold the Power button until the “Power off” option appears on your screen.
- Tap and hold the “Power off” option until you see a prompt to boot into Safe Mode.
- Tap “OK” or “Restart” to confirm.
- Once your device reboots, “Safe Mode” will be displayed at the bottom left corner of your screen.
- If the issue does not persist in Safe Mode, you can uninstall the problematic app and reboot your device to exit Safe Mode.
Finding Online Resources And Support
When troubleshooting your Jitterbug Smart 3, it’s always a good idea to leverage online resources and support. The internet is a treasure trove of valuable information that can guide you through various problems and provide detailed step-by-step instructions.
Here are some online resources to check when you need assistance:
- Visit the official website of Jitterbug Smart to access product-specific guides, user forums, and FAQs.
- Explore technology forums and community platforms where fellow Jitterbug Smart users share their experiences and solutions to common issues.
- Follow Jitterbug Smart’s social media channels for updates, tips, and advice from the company and its dedicated support team.
Seeking Professional Assistance
If all else fails and you’re still unable to resolve the problem on your Jitterbug Smart 3, it may be time to seek professional assistance. Jitterbug Smart offers exceptional customer support through multiple channels, ensuring you receive the help you need.
To seek professional assistance:
- Contact Jitterbug Smart’s customer support hotline or send them an email describing your issue in detail.
- Consider scheduling an appointment with a Jitterbug Smart technician who can diagnose and fix hardware-related problems.
- Visit an authorized Jitterbug Smart service center near you for in-person assistance.
By utilizing these troubleshooting tips and tricks, you’ll be well-equipped to overcome obstacles with your Jitterbug Smart 3 and enjoy a seamless user experience!
Credit: www.aliexpress.com
Conclusion
Troubleshooting the Jitterbug Smart 3 can be a breeze with the right knowledge and tips. By following the steps outlined in this blog post, you can easily address common issues such as freezing, battery drain, and software glitches. Remember to contact customer support if you encounter any persistent issues.
Happy troubleshooting!