A leaking Amana washer can be a frustrating issue. This problem can disrupt your daily routine and lead to water damage.
Dealing with a leaking washer is never fun, but it’s a common problem many face. Understanding the cause of the leak is the first step to fixing it. Whether it’s a minor seal issue or something more complex, addressing it quickly can save you from further damage and expense.
In this post, we will explore the possible reasons your Amana washer might be leaking. By identifying the root cause, you can take the necessary steps to fix the problem and prevent it from happening again. Let’s dive in and get your washer back in working order.
Common Causes Of Leaks
Nothing is more frustrating than a washer that leaks. If your Amana washer is causing you grief with unexpected puddles, don’t worry; you’re not alone. Leaks can be annoying, but they are often due to common issues that can be easily fixed. Let’s dive into the most frequent culprits behind a leaky washer.
Hose Issues
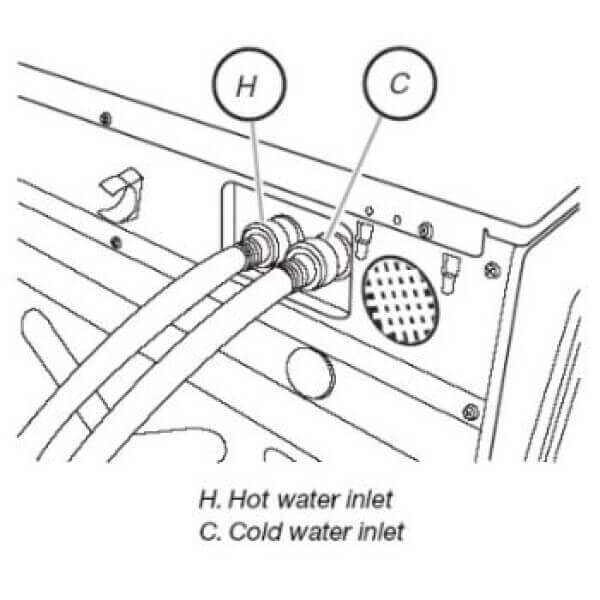
One of the primary reasons for leaks in an Amana washer is hose-related problems. Hoses can become loose, cracked, or even completely disconnected over time.
- Loose Connections: Check if the hoses are tightly connected to both the washer and the water supply. A loose connection can cause water to seep out.
- Cracks or Holes: Over time, hoses can develop cracks or holes, leading to leaks. Inspect the hoses carefully and replace them if you find any damage.
- Worn Out Hoses: Hoses don’t last forever. If they are old, it’s a good idea to replace them to prevent future leaks.
Remember, it’s better to address hose issues sooner rather than later. A small leak can turn into a big problem if ignored.
Door Seal Problems
Another common cause of leaks is the door seal, also known as the gasket. This is the rubber ring around the door of your washer. If it’s damaged or not sealing properly, water can escape.
- Inspect for Damage: Look for any tears, cracks, or signs of wear on the door seal. Even a small tear can lead to leaks.
- Clean the Seal: Sometimes, dirt or debris can prevent the door from sealing properly. Clean the seal with a damp cloth to ensure it is free of any obstructions.
- Replace If Needed: If the seal is damaged beyond repair, it might be time to replace it. A new gasket can make a world of difference.
Keeping the door seal in good condition is crucial for maintaining a leak-free washer.
Detergent Drawer Leaks
The detergent drawer, where you add soap, can also be a source of leaks. It might seem unlikely, but it happens more often than you might think.
- Overfilling: If you put too much detergent in the drawer, it can overflow and cause leaks. Always follow the recommended detergent amounts.
- Blocked Dispenser: Sometimes, detergent residue can build up and block the dispenser. Clean the drawer regularly to prevent blockages.
- Misalignment: Ensure the detergent drawer is properly aligned and fully closed before starting the washer. A misaligned drawer can cause leaks.
By keeping an eye on the detergent drawer and following these simple steps, you can prevent unnecessary leaks and keep your washer running smoothly.
So, the next time your Amana washer starts leaking, you’ll know where to look first. Fixing these common issues can save you time, money, and a lot of frustration. Happy washing!
Credit: www.amana.com
Safety Precautions
Dealing with a leaking Amana washer can be quite the headache, but before you dive into fixing the problem, it’s crucial to take some safety precautions. You don’t want to make the situation worse or put yourself at risk, right? Let’s walk through two important steps: unplugging the washer and turning off the water supply. These actions will help you avoid any electrical mishaps or water damage. Ready? Let’s get started!
Unplugging The Washer
First things first, always unplug your washer before you start any repair. This step is essential to avoid any electrical shock. Here’s a simple way to do it:
- Locate the power cord at the back of your washer.
- Firmly grip the plug, not the cord, and pull it out from the outlet.
It’s as easy as that! Just think of it like unplugging your phone charger. You wouldn’t yank it out from the cord, would you?
Turning Off Water Supply
Next up, let’s turn off the water supply. Water and electricity don’t mix, and the last thing you want is a water flood in your laundry room. Here’s how to do it:
- Locate the water supply valves, usually found behind the washer.
- Turn the valves clockwise until they are tightly closed. This shuts off the water flow.
Remember, righty-tighty, lefty-loosey! Once the water is off, you can safely check for leaks without worrying about more water gushing out.
By following these simple safety precautions, you’re already ahead in dealing with your Amana washer leak. Stay safe and good luck!
Inspecting Hoses
Inspecting the hoses on your Amana washer is crucial. Leaking can occur for several reasons. Hoses play a significant role. This section will guide you through the steps to inspect them properly.
Checking For Cracks
First, turn off the washer. Next, carefully examine each hose. Look for visible cracks or splits. Feel the surface for any weak spots. Cracks can cause leaks.
Replace any damaged hoses immediately. Use manufacturer-approved parts. This ensures compatibility and durability.
Ensuring Secure Connections
Loose connections can also cause leaks. Check where each hose connects to the washer. Ensure each connection is tight.
Use a wrench to tighten if needed. Do not over-tighten. This can damage the connection points. Also, check the hose clamps. They should be secure and in good condition.
Following these steps can help prevent leaks. Regular inspections are essential. Keep your Amana washer in top shape.
Credit: www.amana.com
Examining The Door Seal
Is your Amana washer leaking? One common culprit is the door seal. This part plays a crucial role in keeping the water inside your machine, where it belongs. A damaged or dirty seal can lead to leaks. Let’s dive into how you can inspect and address this issue.
Cleaning The Seal
First things first, you need to ensure your door seal is clean. Over time, detergent, dirt, and debris can build up, causing gaps and leaks. Here’s a simple guide to clean it:
- Open the washer door and locate the rubber seal.
- Wipe around the seal with a damp cloth to remove any visible grime.
- For stubborn stains or mold, mix a solution of equal parts water and vinegar. Dip a cloth in this solution and scrub the seal gently.
- Rinse with a clean, damp cloth and dry thoroughly.
Regular cleaning can prevent many common issues. Plus, it keeps your washer smelling fresh!
Looking For Tears
Even with regular cleaning, door seals can wear out. This is where you’ll need to check for tears or damage. Follow these steps:
- With the door open, carefully inspect the entire seal. Look for any rips, tears, or signs of wear.
- Run your fingers along the seal. If you feel any rough spots or holes, these could be the source of the leak.
- If you find damage, it’s time to replace the seal. Refer to your washer’s manual for guidance on how to do this.
Remember, a damaged seal can cause more than just leaks. It can also allow mold and mildew to grow, which nobody wants.
In conclusion, examining your washer’s door seal is a simple yet effective way to address and prevent leaks. By keeping it clean and checking for damage, you can ensure your Amana washer runs smoothly and efficiently. Now, who wouldn’t want a little less laundry drama?
Assessing The Detergent Drawer
Have you ever noticed a puddle under your Amana washer and wondered why it’s leaking? One common culprit is the detergent drawer. This small but essential part of your washing machine can sometimes cause big headaches if not properly maintained. In this section, we’ll guide you through the process of assessing the detergent drawer, ensuring it’s clean, damage-free, and functioning correctly.
Removing And Cleaning
Before diving into the nitty-gritty, ensure your washer is turned off and unplugged. Safety first! Now, let’s get to the task at hand. Removing the detergent drawer is usually a straightforward process:
- Gently pull the drawer out as far as it will go.
- Locate the release tab. It’s often at the back of the drawer or on one side.
- Press the release tab and pull the drawer completely out.
With the drawer in hand, it’s time for a thorough cleaning. Over time, detergent residue and fabric softener can build up, leading to clogs and leaks. Here’s a quick and easy way to clean the drawer:
- Fill a basin with warm, soapy water.
- Soak the drawer and any removable compartments.
- Use a soft brush to scrub away any buildup.
- Rinse thoroughly and let everything dry completely before reassembling.
Doesn’t sound too bad, right? Now let’s move on to the next step.
Inspecting For Damage
Once the detergent drawer is clean, it’s time to inspect it for any signs of damage. Even a small crack or break can cause leaks. Here’s what you should look for:
| Component | Signs of Damage |
|---|---|
| Drawer Housing | Cracks, chips, or warping |
| Release Tab | Broken or not functioning |
| Compartments | Loose or missing parts |
If you find any damage, it may be time to replace the affected parts. Don’t worry, replacement parts for Amana washers are usually easy to find online or at your local appliance store.
Assessing the detergent drawer might seem like a small task, but it can make a big difference in preventing leaks and ensuring your washer runs smoothly. So, roll up your sleeves, and let’s tackle that detergent drawer! Who knew laundry maintenance could be this engaging?

Credit: www.youtube.com
Checking The Drain Pump
Is your Amana washer leaking? One possible culprit is the drain pump. It helps remove water from the washer after each cycle. Checking and cleaning the drain pump can often resolve leaks and improve your washer’s performance.
Locating The Pump
First, unplug your washer. Safety first. Next, move the washer away from the wall. This gives you space to work. The drain pump is usually at the bottom of the washer. Remove the back panel using a screwdriver. Once removed, you should see the pump near the bottom right.
Cleaning The Filter
Now, locate the filter attached to the pump. It’s a small, mesh-like part. Gently remove it. Rinse the filter under running water. Make sure it’s free of debris. Reattach the filter to the pump. Place the back panel on the washer. Plug the washer back in and run a cycle. Check for leaks to ensure the problem is fixed.
Balancing The Washer
A leaking Amana washer can be frustrating. One common cause is an unbalanced washer. Ensuring your washer is balanced can prevent leaks and improve performance.
Leveling The Feet
Check if your washer is sitting level. Use a bubble level tool. Place it on top of the washer. Adjust the feet if needed. Most washers have adjustable feet. Turn the feet clockwise or counterclockwise. Adjust until the washer sits perfectly level.
Distributing The Load Evenly
An unbalanced load can cause leaks. Open the washer and check the load. Make sure the clothes are evenly distributed. Avoid stuffing too many clothes in one side. Balance heavy items with lighter ones. This helps the washer spin properly. It also reduces strain on the machine.
When To Call A Professional
So, you’ve noticed a puddle forming under your Amana washer and the frustration begins to set in. It’s a situation no one likes to deal with, but sometimes, it’s unavoidable. While some leaks can be fixed with a quick DIY approach, there are times when it’s best to call in a professional. But how do you know when that time has come? Let’s dive into the specifics.
Persistent Leaks
Picture this: you’ve mopped up the water once, twice, maybe even three times, but the puddle keeps coming back. Persistent leaks are often a sign of a more serious issue. It could be anything from a worn-out seal to a hidden crack in the washer’s drum. If the leak persists despite your best efforts, it’s time to call a professional. They have the tools and experience to diagnose and fix the root cause of the leak.
Complex Repairs
Let’s be honest, not all of us are born with a knack for fixing appliances. If you find yourself scratching your head at the sight of the washer’s inner workings, you’re not alone. Complex repairs, such as replacing a faulty pump or dealing with electrical components, should be left to the experts. Attempting these repairs without proper knowledge can lead to further damage or even injury.
- Safety First: A professional can handle electrical repairs safely, reducing the risk of shocks or fires.
- Proper Tools: They have specialized tools that make the job easier and more efficient.
- Experience: With years of experience, they can quickly identify and fix issues that may take you hours to figure out.
Remember, sometimes the peace of mind that comes from knowing the job is done right is worth the cost of hiring a professional. So, next time your Amana washer starts leaking, consider whether it’s a job you can handle or one best left to the pros. After all, your time and safety are invaluable.
Frequently Asked Questions
Why Is My Amana Washer Leaking From Underneath?
Your Amana washer might be leaking from underneath due to a damaged hose, faulty pump, or loose connection. Check these parts.
Why Is My Washing Machine Leaking From Underneath?
Your washing machine might be leaking due to a faulty hose, pump, or seal. Check for loose connections and damaged parts. If problems persist, contact a professional for repair.
What Is The Most Common Problem With Amana Washers?
The most common problem with Amana washers is that they don’t drain properly. This issue often stems from a clogged drain pump or hose. Regular maintenance can help prevent this.
Why Is My Washer Dripping Water Inside?
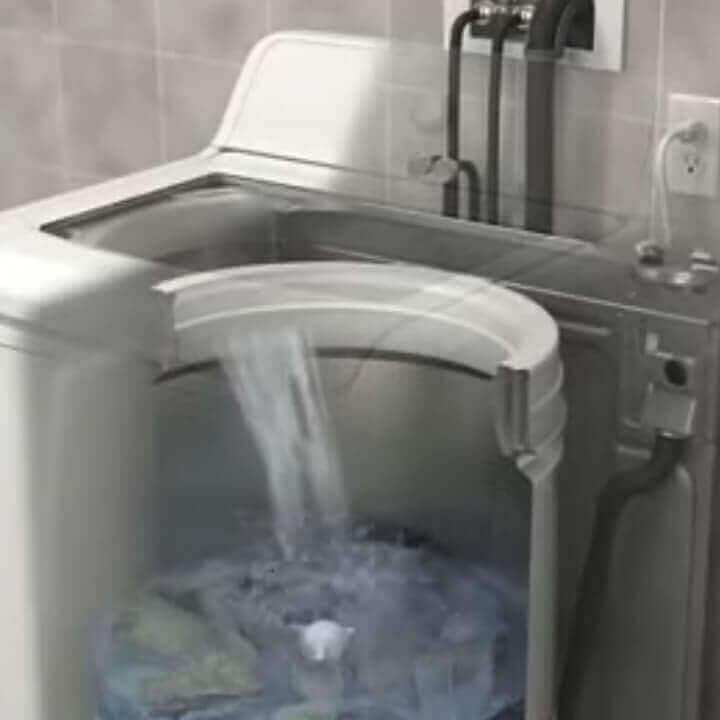
Your washer might be dripping water inside due to a faulty water inlet valve, blocked drain, or damaged hoses. Regular maintenance can prevent this issue.
Why Is My Amana Washer Leaking Water?
A clogged drain hose, loose hose, or damaged seal can cause leaks.
Conclusion
Fixing a leaking Amana washer can seem daunting, but solutions exist. Check for common issues like clogged hoses or faulty seals. Regular maintenance helps prevent leaks and prolongs your washer’s life. When in doubt, consult the user manual or seek professional help.
Addressing leaks promptly avoids further damage. Keep your washer in top shape for smooth laundry days. Ensure peace of mind and efficient performance. Happy washing!