Pioneer mini split systems are popular for their efficiency. But, they can have issues.
When your Pioneer mini split system malfunctions, it can be frustrating. Common problems include leaking, strange noises, and poor cooling. Understanding these issues is important for maintaining a comfortable home. In this blog post, we will explore common Pioneer mini split problems.
By identifying these issues early, you can take steps to fix them. This guide aims to help you keep your system running smoothly. Let’s dive into the details and find solutions to common problems with Pioneer mini splits.
Common Issues
When it comes to Pioneer Mini Split systems, homeowners often experience a few common issues. Whether you’re a first-time user or someone who’s had their unit for years, it’s essential to know what to look out for. Let’s dive into some of the typical problems you might encounter and how to handle them.
Poor Cooling
One frequent issue with Pioneer Mini Splits is poor cooling. Imagine it’s a scorching summer day, and your mini-split isn’t keeping your home cool. It can be frustrating, right? This problem can arise due to several reasons:
- Dirty Filters: If the filters are clogged, airflow is restricted. Clean or replace them regularly.
- Low Refrigerant Levels: If the unit is low on refrigerant, it won’t cool effectively. A professional can check and refill it.
- Thermostat Issues: Sometimes, it’s as simple as a thermostat set incorrectly. Double-check your settings.
Regular maintenance can prevent these issues. It’s like keeping your car in good shape – a little care goes a long way.
Leaking Water
Another common problem is leaking water. Have you ever noticed water pooling around your mini-split unit? This can be a sign of a few different issues:
- Blocked Drain Pipe: If the drain pipe is blocked, water can’t escape and ends up leaking out. Cleaning the pipe can fix this.
- Improper Installation: Sometimes, the issue stems from poor installation. Ensure your unit is installed correctly by a professional.
- Frozen Coils: When coils freeze and then thaw, water can leak. This might be due to low refrigerant or poor airflow.
Addressing these problems promptly can save you from bigger headaches down the line. No one wants water damage on top of a malfunctioning air conditioner!
In conclusion, while Pioneer Mini Splits are reliable, they’re not immune to problems. By being aware of these common issues and addressing them quickly, you can ensure your unit keeps your home comfortable year-round. Got any funny or frustrating mini-split stories? Share them in the comments below – we’d love to hear from you!

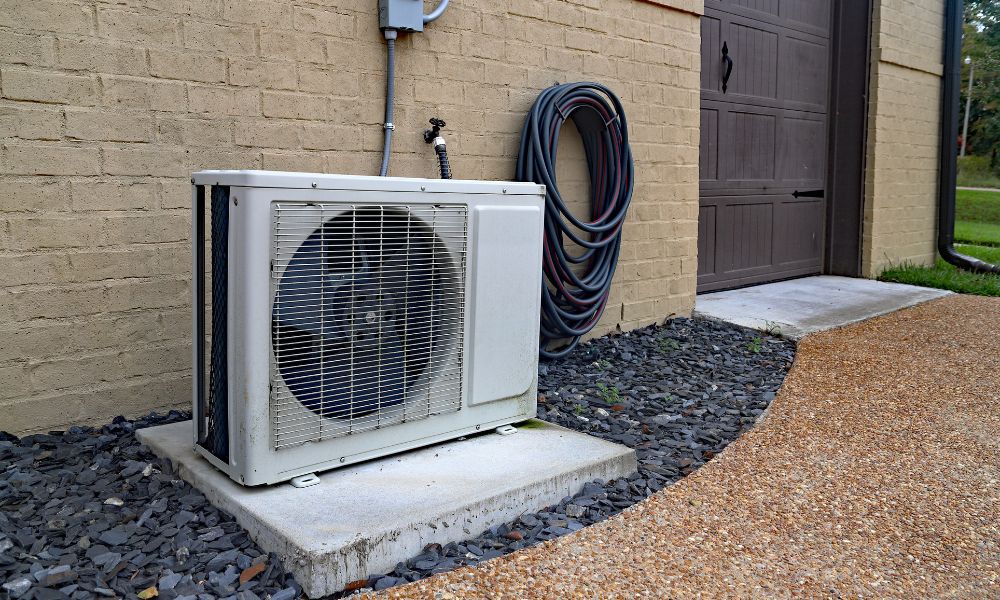
Credit: www.pioneerminisplit.com
Troubleshooting Steps
Having issues with your Pioneer Mini Split system? Don’t worry, you’re not alone. While these systems are known for their efficiency and reliability, they can sometimes encounter problems. Fortunately, many of these issues can be resolved with some basic troubleshooting steps. In this section, we’ll guide you through the process of checking filters and inspecting the thermostat. Let’s dive in!
Checking Filters
Believe it or not, a dirty filter is one of the most common reasons for a malfunctioning mini split system. A clogged filter can restrict airflow, making the unit work harder and less efficiently. Here’s how to check and clean your filters:
- Turn off the Unit: Safety first! Make sure to turn off your mini split system before you start.
- Locate the Filters: Open the front panel of your indoor unit. You should see the filters behind it.
- Remove the Filters: Gently slide the filters out. Be careful not to damage them.
- Clean the Filters: Use a vacuum cleaner to remove dust and debris. If the filters are very dirty, you can wash them with warm water and mild soap. Let them dry completely before putting them back.
- Reinstall the Filters: Once the filters are clean and dry, slide them back into place and close the front panel.
Regularly cleaning your filters can help maintain optimal performance and extend the life of your Pioneer Mini Split system.
Inspecting Thermostat
The thermostat is the brain of your mini split system. If it’s not working correctly, your system won’t either. Let’s check it out:
- Check the Settings: Ensure the thermostat is set to the correct mode (cooling, heating, etc.) and the desired temperature.
- Replace Batteries: If your thermostat is battery-operated, try replacing the batteries. Sometimes, low battery power can cause issues.
- Clean the Thermostat: Dust and dirt can interfere with the thermostat’s sensors. Use a soft brush or cloth to clean it gently.
- Check Wiring: If you’re comfortable doing so, check the thermostat’s wiring connections. Loose or damaged wires can cause problems.
If you’ve tried these steps and your thermostat still isn’t working, it might be time to call a professional. A faulty thermostat can lead to bigger problems if not addressed promptly.
By following these troubleshooting steps, you can often resolve common issues with your Pioneer Mini Split system. Remember, regular maintenance is key to keeping your system running smoothly. If you’re still having problems, don’t hesitate to reach out to a qualified technician for help.
Installation Errors
Installing a Pioneer Mini Split system can be quite the task, especially if you’re not familiar with HVAC systems. Even small mistakes during installation can lead to big problems down the road. It’s like trying to bake a cake without a recipe – you might end up with a mess instead of a masterpiece. Let’s break down some common installation errors, so you can avoid these pitfalls and keep your system running smoothly.
Incorrect Placement
Where you place your Mini Split unit matters – a lot. Imagine putting your fridge in the living room; it just doesn’t work. Similarly, placing the indoor unit in the wrong spot can cause uneven cooling or heating, making certain areas feel like a sauna while others remain chilly. Here are some tips to avoid incorrect placement:
- Avoid direct sunlight: Place the unit away from windows to prevent it from working overtime.
- Keep away from heat sources: Don’t install near ovens or heaters as they can interfere with the unit’s performance.
- Height matters: Mount the unit high on the wall but not too close to the ceiling to ensure proper air circulation.
Improper Wiring
Wiring is the backbone of your Mini Split system. Think of it like the nervous system in your body – if something’s not connected right, it just won’t function properly. Improper wiring can cause short circuits, system failures, or even pose a fire hazard. Here’s how to avoid common wiring mistakes:
- Follow the manual: Stick to the installation guide like glue. It’s there for a reason!
- Check connections: Ensure all connections are tight and secure. Loose wires can lead to serious issues.
- Use the right tools: Don’t cut corners with tools. Use the appropriate equipment to handle electrical work safely.
In conclusion, taking the time to properly install your Pioneer Mini Split system can save you a world of trouble. It’s like setting the foundation for a house – get it right, and everything else will fall into place. And remember, when in doubt, it’s always a good idea to call in a professional. Better safe than sorry, right?
Maintenance Tips
Maintaining your Pioneer Mini Split system is essential to ensure its efficiency and longevity. Regular maintenance can help you avoid unexpected problems and costly repairs. In this section, we will cover some crucial maintenance tips that will keep your mini split system running smoothly. Let’s dive in!
Regular Cleaning
One of the simplest yet most effective ways to maintain your Pioneer Mini Split is through regular cleaning. Dust and debris can accumulate in the filters and coils, reducing the system’s efficiency. Here’s a basic guide to cleaning your unit:
- Clean the Filters: Remove and clean the filters at least once a month. You can wash them with mild soap and water, then let them dry completely before reinstalling.
- Wipe the Coils: Use a soft cloth to gently wipe the indoor unit’s coils. This will help maintain good airflow and cooling efficiency.
- Clear the Outdoor Unit: Ensure that the outdoor unit is free from leaves, dirt, and other debris. Keeping the area around the unit clear will help it operate more efficiently.
By incorporating these simple cleaning tasks into your routine, you can significantly extend the life of your Pioneer Mini Split system.
Seasonal Checks
Performing seasonal checks is another critical aspect of maintaining your Pioneer Mini Split. These checks ensure that your system is ready to handle the changing demands of different seasons. Here’s a quick checklist:
- Spring: Before the summer heat sets in, check for any signs of wear and tear. Make sure the outdoor unit is clear of any winter debris.
- Summer: During the hot months, monitor the system for any unusual noises or performance issues. Keep the filters clean for optimal airflow.
- Fall: As the weather cools, inspect the outdoor unit for any leaves or dirt that may have accumulated. This is a good time to schedule a professional tune-up.
- Winter: Ensure that the outdoor unit is not obstructed by snow or ice. If you use a heat pump function, make sure it’s working efficiently.
These seasonal checks help you catch potential issues before they become major problems. They also ensure that your system is running at its best throughout the year.
With these maintenance tips, you can keep your Pioneer Mini Split in top condition, providing you with reliable comfort all year round. Remember, a little effort goes a long way in preventing problems and ensuring your system’s longevity.
Professional Help
Dealing with problems in your Pioneer mini split can be frustrating. Sometimes, you need professional help to fix these issues. Knowing when to call a technician and how to choose a reliable service is crucial. Let’s explore these points in detail.
When To Call A Technician
Not all issues require professional help. Simple problems like cleaning filters can be done at home. But certain signs mean you need a technician. For instance, if your unit is not cooling or heating, it’s a serious issue. Strange noises or bad smells are also red flags. Water leaks or electrical issues are other signs. Always prioritize safety and call a professional for these problems.
Choosing A Reliable Service
Finding a trustworthy technician is important. Start by checking reviews online. Look for companies with good feedback. Ask friends or family for recommendations. Ensure the technician is certified and experienced. Check if they offer a warranty for their work. This ensures you get quality service. Always compare prices but don’t choose the cheapest blindly. Quality service at a fair price is key.
Credit: www.pioneerminisplit.com
Diy Fixes
Is your Pioneer Mini Split giving you headaches? Before you throw in the towel and call a professional, consider trying some DIY fixes. Not only can these save you a pretty penny, but they can also be incredibly satisfying to tackle on your own. Think about it – wouldn’t you love to brag about your newfound handyman skills at the next family gathering?
Simple Repairs
Let’s start with the basics. Sometimes, the simplest solutions are the best. Here are a few common issues and how you can address them:
- Unit Not Turning On: Check if the unit is properly plugged in and the circuit breaker hasn’t tripped. Sometimes, a quick reset is all it needs.
- Strange Noises: If you hear odd sounds, it could be a loose part. Tightening screws and bolts might do the trick.
- Poor Cooling: Clean the filters. Over time, they can get clogged with dust and debris, reducing efficiency.
Remember the time when you fixed the squeaky door at home? Same concept here, just a bit more techy.
Tools Needed
Before diving in, ensure you have the right tools. Here’s a handy list to get you started:
| Tool | Purpose |
|---|---|
| Phillips Screwdriver | For opening the unit and tightening screws |
| Multimeter | To check electrical connections |
| Vacuum Cleaner | To clean filters and other components |
| Soft Cloth | For wiping down surfaces |
Having these tools at hand can make the repair process smooth and easy. Remember, it’s always better to be prepared than to scramble around looking for the right tool at the last minute.
So, roll up those sleeves and give your Pioneer Mini Split the TLC it deserves. You’ll be amazed at what you can achieve with a little patience and the right tools. And who knows, you might just discover a hidden talent for fixing things!
Energy Efficiency
When it comes to keeping your home comfortable, Pioneer mini splits have gained popularity for their flexibility and efficiency. However, like any other system, they come with their own set of challenges. One critical aspect that homeowners often overlook is energy efficiency. Understanding and optimizing the energy efficiency of your Pioneer mini split can lead to better performance and significant savings on your energy bills. Let’s dive into some practical tips and insights.
Optimizing Performance
To get the best out of your Pioneer mini split, regular maintenance is key. Did you know that something as simple as cleaning the filters can drastically improve performance? Dirty filters block airflow, making the unit work harder than it needs to. This not only reduces its efficiency but also increases wear and tear.
- Clean Filters Regularly: Aim to clean the filters at least once a month.
- Check for Blockages: Ensure that the outdoor unit is free of leaves, dirt, and other debris.
- Set the Right Temperature: Avoid setting temperatures too high or too low; moderate settings are more efficient.
Another trick is to use the ‘auto’ mode. This setting allows the mini split to adjust the fan speed and temperature based on current room conditions, making it more efficient. Have you tried it yet?
Reducing Energy Bills
One of the biggest perks of a well-maintained mini split is lower energy bills. But how do you achieve this? Here are some practical steps:
- Insulate Your Home: Proper insulation helps in maintaining the desired temperature, reducing the load on your mini split.
- Use Curtains and Blinds: Simple, right? Closing curtains during hot days and opening them during cold days can help in maintaining indoor temperatures.
- Install a Programmable Thermostat: This allows you to set temperatures based on your schedule, ensuring you’re not wasting energy when you’re not home.
Imagine coming home to a perfectly cooled or heated room without having to leave your mini split running all day. Sounds great, doesn’t it?
In a nutshell, being mindful of these small yet effective practices can significantly enhance the energy efficiency of your Pioneer mini split. Not only will this ensure optimal performance, but it will also put a smile on your face when you see those reduced energy bills. Have you adopted any of these tips yet? If not, now’s a great time to start!
Credit: www.pioneerminisplit.com
Warranty And Support
When facing issues with your Pioneer Mini Split system, understanding your warranty and support options is crucial. Proper support ensures your unit functions optimally and extends its lifespan. This section covers key aspects to help you navigate warranty and support efficiently.
Understanding Your Warranty
The Pioneer Mini Split warranty typically covers parts and labor for a specific period. Most units come with a warranty lasting up to one year for parts. Some components may have extended coverage. Always check the warranty details in your user manual.
Register your product soon after purchase. This ensures your warranty is valid. Keep your receipt and warranty card in a safe place. You may need these documents for any future claims.
Getting Manufacturer Support
Contacting Pioneer support is straightforward. Visit their official website and navigate to the support section. There, you can find contact information and helpful resources.
Before reaching out, gather all necessary information. Include your unit’s model number and a detailed description of the issue. This helps the support team assist you more effectively.
Many common problems have solutions in the user manual or on the website. Check these resources first. You may find a quick fix without needing to contact support.
If you need professional help, Pioneer can guide you to authorized service centers. These centers have trained technicians familiar with your unit. They can provide the best service and parts for your needs.
Frequently Asked Questions
Why Won’t My Pioneer Mini Split Cool?
Your Pioneer mini split might not cool due to dirty filters, low refrigerant, incorrect settings, or blocked airflow.
How Long Will A Pioneer Mini Split Last?
A Pioneer Mini split can last up to 15-20 years with proper maintenance and care. Regular servicing extends its lifespan.
What Is The Most Reliable Brand Of Mini-split?
Mitsubishi Electric and Daikin are the most reliable mini-split brands. They offer excellent performance, efficiency, and durability.
Why Does My Pioneer Mini Split Keep Shutting Off?
Your Pioneer Mini split may shut off due to power issues, dirty filters, incorrect temperature settings, or faulty components. Regular maintenance and professional checks can help resolve the problem.
What Are Common Pioneer Mini Split Problems?
Common issues include leaks, weak airflow, and strange noises. Regular maintenance can prevent these problems.
Conclusion
Addressing Pioneer Mini Split problems can save time and money. Regular maintenance helps avoid many issues. Check filters, refrigerant levels, and electrical connections. Clean units to prevent dust buildup. Monitor for unusual noises or smells. Seek professional help for complex problems.
Stay proactive with your mini split system. This ensures comfort and efficiency all year round. Investing in proper care enhances performance. Keep your Pioneer Mini Split in top shape. Enjoy peace of mind and a comfortable home.