Have you ever installed a new light fixture only to discover an unsightly hole left exposed on your ceiling or wall? It’s a common problem that can turn your home improvement project into a frustrating experience.
You meticulously choose the perfect light to illuminate your space, only to be left staring at an unexpected gap that refuses to be ignored. This issue not only disrupts the aesthetic harmony of your room but also leaves you wondering how to fix it without compromising your design vision.
We’re going to explore practical, easy solutions that will help you seamlessly cover that hole and restore the beauty of your space. Whether you’re a DIY enthusiast or new to home projects, you’ll find the guidance you need to tackle this challenge with confidence. Stay with us to discover the simple tricks that can turn a small setback into an opportunity for creativity and style.
Credit: diy.stackexchange.com
Common Causes Of Visible Holes
Visible holes around light fixtures can be unsightly. They disrupt the aesthetic of a room. Understanding the causes can help in finding solutions. Several factors lead to these issues. Let’s explore common causes. They often result from improper installation, fixture size mismatches, or changes during renovation.
Improper Installation
Poor installation often leaves gaps. Installers may not measure the area correctly. This results in oversized holes. Incorrect tools or methods also contribute. Installers might rush the process. These mistakes lead to visible gaps. Double-checking measurements can prevent this. Proper training for installers is crucial.
Fixture Size Mismatch
Fixtures must fit their designated space. Mismatched sizes create visible holes. A fixture too small leaves gaps. Oversized fixtures cause alignment issues. Always measure before purchasing. Compare fixture dimensions with the space. This ensures a snug fit. Proper planning avoids mismatches.
Renovation And Remodeling
Renovations often change room layouts. Old fixtures might not suit new designs. This leaves visible holes. Walls may shift during remodeling. Fixtures need repositioning, creating gaps. Update fixtures to match new styles. Consider layout changes when renovating. This avoids future alignment issues.
Simple Patch Solutions
Home renovations sometimes leave unexpected gaps. A light fixture that doesn’t cover a hole can be unsightly. Thankfully, simple patch solutions can resolve this issue. These solutions are easy to apply and budget-friendly. They blend seamlessly with your existing decor.
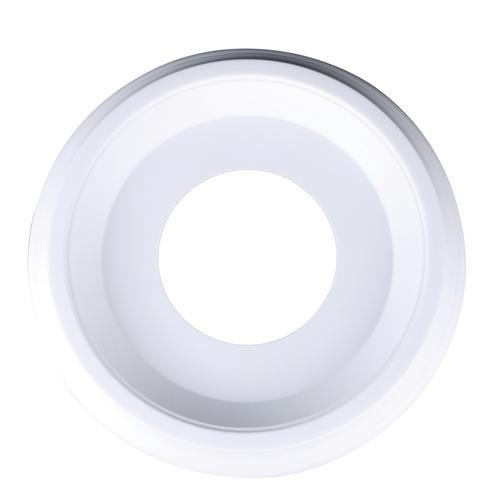
Using Ceiling Medallions
Ceiling medallions offer a decorative touch. They come in various sizes, styles, and materials. You can find them in wood, plaster, or lightweight polyurethane. Choose one that complements your room’s design. Install it around the base of the light fixture. This covers the hole and adds elegance to the ceiling.
Applying Drywall Compound
Drywall compound is another effective solution. Use it to fill small gaps or holes. Start by cleaning the area around the hole. Apply the compound with a putty knife. Smooth it out and let it dry. Sand the area until it is even. Paint over it to match the ceiling color. This creates a seamless look.
Decorative Wall Plates
Decorative wall plates can hide larger holes. These plates come in different designs and finishes. They are easy to install and require no special tools. Choose a plate that fits the size of the hole. Secure it with screws around the light fixture. This provides a stylish cover and blends with the decor.
Diy Techniques For A Seamless Look
Struggling to hide gaps around your light fixture? Discover easy DIY methods to achieve a flawless finish. Use ceiling medallions or paint to blend the fixture seamlessly with the ceiling.
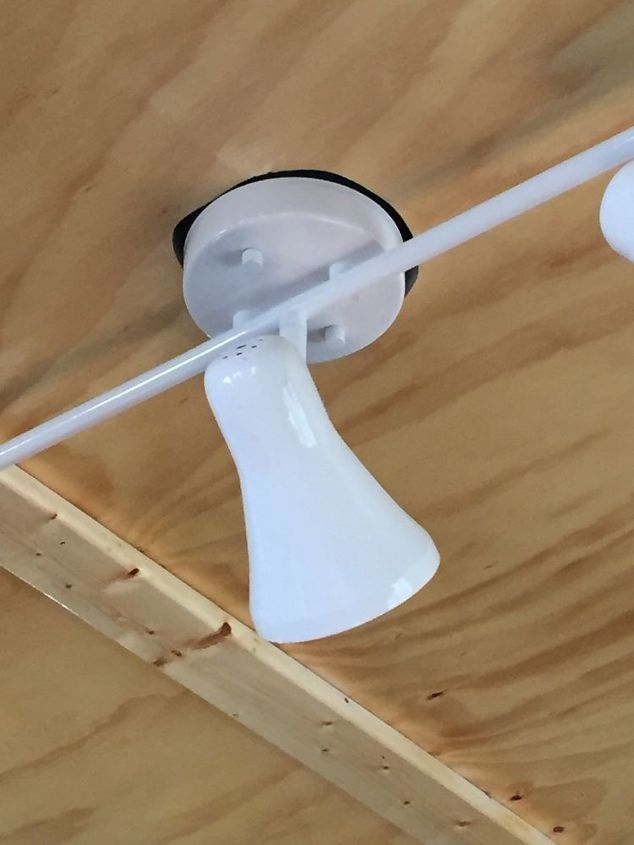
When you’re tackling a home improvement project, sometimes the little details can trip you up. Like when your light fixture doesn’t quite cover the hole in the ceiling. It’s a common issue that can make your room look unfinished. But don’t worry—there are DIY techniques you can use to achieve a seamless look. These methods are not just cost-effective but also add a personal touch to your space.Custom Trim Installation
Adding custom trim around the light fixture can be a game-changer. It’s an easy way to cover the gap and add a decorative element to your ceiling.First, measure the circumference of the hole and the light fixture. Head to your local hardware store to find a trim that suits your decor style. Simple wood trim or even ornate options can do the trick.Once you have your trim, cut it to fit the space around the fixture. Use wood glue or small nails to secure it in place. Sand down any rough edges and paint it to match the ceiling for a polished finish.Paint Matching Strategies
If you’re dealing with a small gap, sometimes all it takes is a little paint. It’s a quick fix that blends the exposed area with the rest of the ceiling.Start by taking a sample of your ceiling paint to your local paint store. They can mix a batch that matches your current color.If you don’t have a sample, consider using a digital color matching app. These apps are surprisingly accurate and can save you a trip to the store.After you have your paint, use a small brush to carefully apply it around the light fixture. Make sure to feather the edges so it blends seamlessly with the existing paint.Creative Cover-ups
Sometimes the best solution is to think outside the box. If traditional methods aren’t appealing, consider creative cover-ups for your light fixture gap.Decorative ceiling medallions can add a touch of elegance and easily cover any inconsistencies. They come in various designs and sizes, making it easy to find one that complements your decor.Another option is using fabric or decorative paper. Cut it to size and use spray adhesive to affix it to the ceiling. This can add texture and color, making it a focal point rather than an eyesore.Why settle for a basic fix when you can turn a small issue into an opportunity for creativity? What unique solutions can you come up with for your home?When To Call A Professional
Sometimes, a light fixture doesn’t cover the entire hole in the ceiling. This can be frustrating and might lead to bigger issues. When unsure about fixing it, calling a professional is often the best choice. Professionals can handle tricky situations and ensure everything is done safely and correctly.
Safety Concerns
Electrical work involves risks. Incorrect handling can lead to accidents. A professional electrician knows the dangers. They follow safety protocols to prevent hazards. This keeps you and your home safe.
Complex Electrical Work
Light fixtures may involve complex electrical components. Incorrect installation can cause malfunctions. Professional electricians understand these complexities. They ensure everything works perfectly and safely. This prevents future problems and potential hazards.
Ensuring Proper Fixture Support
Proper support is essential for light fixtures. Incorrect support can lead to falls or damage. Professionals ensure fixtures are securely mounted. This guarantees long-lasting stability and safety. They use the right tools and techniques for secure installation.
Preventing Future Issues
Preventing future issues with light fixtures can save you time and money. A well-installed fixture avoids unnecessary repairs and keeps your home looking great. Follow these tips to ensure your light fixtures are perfectly positioned and functional.
Choosing The Right Fixture
Measure the space before buying a light fixture. Ensure the size fits the hole and the room. Choose fixtures that match your home’s style and color scheme. Consider the bulb type and brightness. It should provide enough light without being overpowering.
Check the fixture’s installation method. Some require additional support or special wiring. Read reviews and ask for advice from experts. They can help you select a fixture that fits your needs.
Regular Maintenance Tips
Inspect your fixtures regularly. Look for loose screws and damaged parts. Clean them to avoid dust buildup, which can affect lighting. Replace bulbs before they burn out completely. This prevents strain on the fixture and wiring.
Check the wiring and connections occasionally. Ensure they are secure and not frayed. This can prevent electrical issues. Schedule annual professional inspections for peace of mind.
Planning For Renovations
Think about lighting during renovations. Plan for fixture placement early. Consider using adjustable fixtures for flexibility. They allow you to change lighting as needed.
Consult with professionals for electrical work. This ensures proper installation and safety. Discuss future needs and preferences with them. They can suggest options that accommodate your plans.
Credit: www.hometalk.com

Credit: thispeacefulhome.wordpress.com
Frequently Asked Questions
Why Doesn’t My Light Fixture Cover The Hole?
The fixture might be too small or installed incorrectly. Check measurements. Consider using a larger fixture or a ceiling medallion.
Can I Use A Ceiling Medallion To Cover Gaps?
Yes, ceiling medallions can cover gaps around fixtures. They’re decorative and come in various sizes and styles.
How Do I Install A Larger Fixture?
Remove the old fixture. Check wiring compatibility. Install the new fixture securely. Ensure it covers the hole completely.
What Tools Do I Need For Installation?
You’ll need a screwdriver, wire stripper, and possibly a drill. Ensure the power is off before starting.
Is It Safe To Leave The Hole Uncovered?
No, it’s not safe. Exposed wires can be dangerous. Cover holes to prevent electrical hazards.
Conclusion
Fixing a light fixture that doesn’t cover a hole is simple. First, assess the size of the hole. Then, choose a larger fixture or use a ceiling medallion. Both options hide gaps effectively. Ensure the fixture is securely mounted. Safety is crucial.
A well-covered hole enhances room aesthetics. It also boosts lighting efficiency. Avoid complex solutions. Simple fixes work best. With these tips, your room will look polished. A seamless finish adds value and appeal. Enjoy your improved space.