Replacing a Trane thermostat can seem daunting. Yet, it is simpler than you think.
Whether you’re upgrading to a new model or your old thermostat has stopped working, replacing it yourself can save time and money. In this guide, we’ll walk you through the process step-by-step. You’ll learn how to safely remove your old thermostat and install the new one.
With basic tools and a bit of patience, you can have your new thermostat up and running in no time. Let’s dive in and make your home comfortable again.
Gathering Necessary Tools
Before starting the process of replacing your Trane thermostat, it is crucial to have all the necessary tools ready. This preparation will ensure a smooth and efficient installation. Having the right tools on hand will save time and prevent any unnecessary interruptions.
Essential Tools
Here are the essential tools you will need:
- Screwdriver Set: A variety of screwdrivers, including both Phillips and flathead.
- Drill: Used to make holes if needed for mounting the new thermostat.
- Wire Stripper: Necessary for cutting and stripping wires.
- Level: Ensures your thermostat is mounted straight.
- Voltage Tester: Checks if wires are live before handling them.
- Thermostat Manual: Provides specific instructions for your model.
Optional Tools
While not always necessary, these optional tools can make the job easier:
- Needle-Nose Pliers: Useful for gripping small wires.
- Multimeter: For more precise voltage and continuity testing.
- Labeling Tape: Helps to mark wires for easy identification.
- Flashlight: Useful if working in a dimly lit area.
- Wire Nuts: For securing wire connections.
Having these tools at hand will streamline the thermostat replacement process. Ensure you gather all the essential tools before you begin. This preparation will help avoid any disruptions and ensure a successful installation.
Turning Off Power
Replacing a Trane thermostat is a task that requires some basic knowledge. The first and most important step is turning off the power. This ensures your safety and prevents damage to the thermostat or your home’s electrical system.
Locating Circuit Breaker
Begin by finding your home’s main circuit breaker panel. This panel is usually located in the basement, garage, or a utility room. Once you have located it, open the panel door to reveal the switches inside.
Ensuring Power Is Off
Look for the switch that controls power to your HVAC system. This switch might be labeled as “HVAC,” “Furnace,” or “AC.” Flip this switch to the “off” position. After turning off the breaker, double-check to ensure the power is off.
Go to your Trane thermostat and try to turn it on. If the display is blank, the power is off and it is safe to proceed. Safety first!
Removing Old Thermostat
Replacing your Trane thermostat begins with safely removing the old unit. This part is crucial. It ensures a smooth installation of the new thermostat. Follow these steps carefully to avoid any damage or confusion.
Detaching The Cover
First, turn off the power to your thermostat. This prevents electric shock. Locate the cover of the thermostat. It is usually attached with clips or screws.
- If clips: Gently pull to detach the cover.
- If screws: Use a screwdriver to remove them.
Place the cover and screws in a safe place. You might need them later.
Labeling Wires
Once the cover is off, you will see several wires. These wires connect your thermostat to your HVAC system. It is crucial to label each wire before disconnecting. This helps in connecting the new thermostat correctly.
- Use small pieces of tape to label each wire.
- Write the corresponding terminal letter on the tape. For example, “R” for the red wire.
Below is a table with common wire labels:
| Wire Color | Terminal Letter |
|---|---|
| Red | R |
| White | W |
| Yellow | Y |
| Green | G |
| Blue | C |
After labeling, gently unscrew the terminals. Carefully detach each wire. Keep the wires from falling back into the wall.
Installing New Thermostat
Installing a new thermostat can improve your home’s comfort. It can also save energy. This guide will help you replace your old Trane thermostat with a new one. Follow each step carefully for the best results.
Mounting The Base
First, turn off the power to your HVAC system. This ensures safety. Remove the old thermostat’s cover. Unscrew the base from the wall. Keep the screws for later use.
Next, align the new thermostat’s base with the wall. Use a level to ensure it is straight. Mark the holes with a pencil. Drill pilot holes where marked. Attach the base to the wall with the screws you saved.
Connecting The Wires
Check the wiring of your old thermostat. Each wire should be labeled with a letter. These letters match terminals on the new thermostat. If the wires are not labeled, label them before removing them.
Remove the old thermostat’s wires from the terminals. Attach the wires to the corresponding terminals on the new thermostat. Secure them tightly. Make sure no wires are touching each other.
After connecting the wires, snap the thermostat cover onto the base. Turn the power back on to the HVAC system. Test the new thermostat to ensure it works properly.
Restoring Power
Restoring power to your Trane thermostat is essential for its operation. After replacing the thermostat, the next step is ensuring it receives power. This involves turning on the circuit breaker and checking the power supply. Follow these steps to restore power efficiently.
Turning On Circuit Breaker
Locate your home’s electrical panel. It is usually in the basement or garage. Find the circuit breaker that controls your HVAC system. It should be labeled clearly. Flip the breaker to the “On” position. This will restore power to your thermostat.
Checking Power Supply
Once the breaker is on, check if the thermostat is receiving power. Look at the display screen. If it lights up, the power is restored. If not, ensure the wires are connected properly. You may need to reset the breaker again. Confirm that the HVAC system is working. Listen for the sound of the system starting up.

Credit: www.doityourself.com
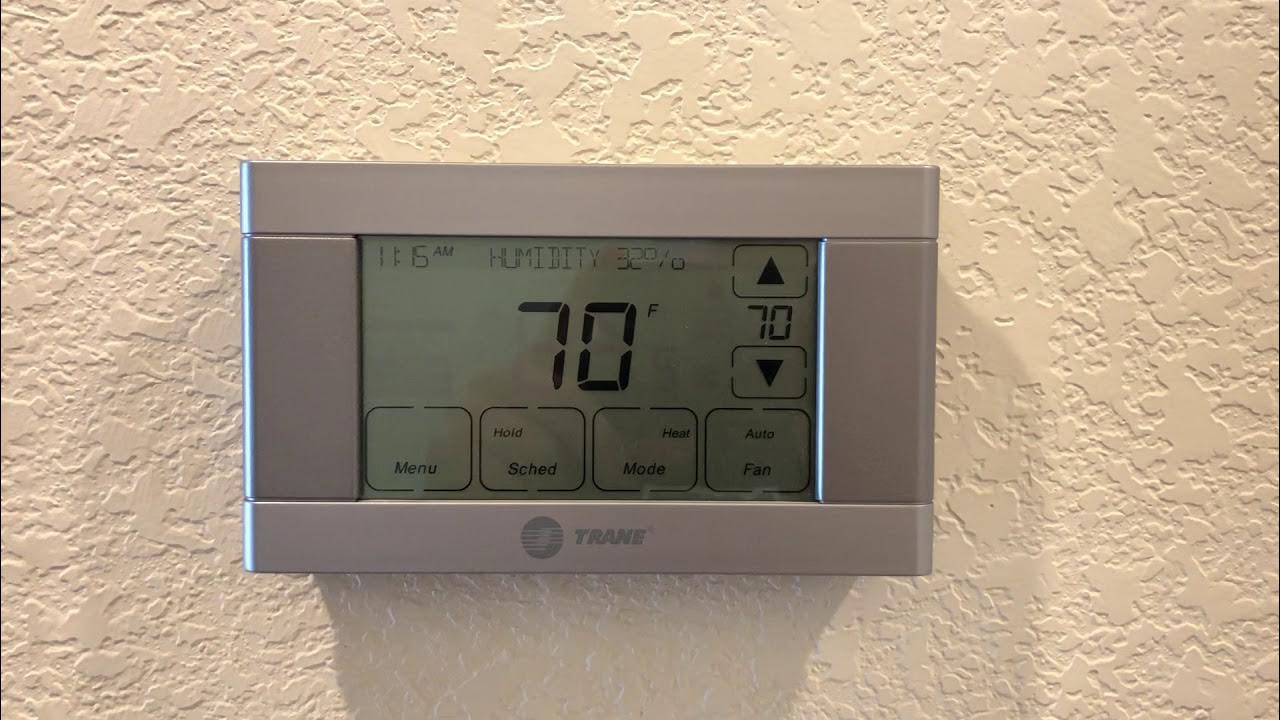
Configuring Settings
After installing your new Trane thermostat, configuring settings is the next crucial step. Proper settings ensure your thermostat works efficiently. This part involves setting the date and time and adjusting temperature settings. Let’s dive into these steps to make sure your thermostat is ready to go.
Setting The Date And Time
First, set the correct date and time. This is important for accurate scheduling. Look for the menu button on your thermostat. Press it to access settings. Navigate to the “Date and Time” option. Use the arrow buttons to adjust the date. Press “Enter” to confirm. Then, move to the time setting. Adjust the hours and minutes. Again, press “Enter” to confirm. Your thermostat should now display the correct date and time.
Adjusting Temperature Settings
Next, adjust the temperature settings. This ensures your home stays comfortable. Access the main menu again. Find the “Temperature Settings” option. You will see options for heating and cooling. Use the arrows to set your desired temperature. Confirm each setting by pressing “Enter.” You can also set different temperatures for different times of the day. This is helpful for saving energy. Your thermostat will now maintain the temperatures you set.
Testing The Thermostat
Testing your newly installed Trane thermostat ensures it works correctly. This step verifies if the thermostat communicates well with your HVAC system. A thorough test can prevent future problems. Let’s dive into the details.
Running A Test Cycle
Start by setting the thermostat to a comfortable temperature. Choose a setting that is different from the current room temperature. This triggers the system to kick in.
Wait for the HVAC system to respond. Listen for the sound of the furnace or air conditioner starting up. Feel for warm or cool air coming from the vents.
If the system responds well, the thermostat works correctly. Repeat this process for both heating and cooling settings. Ensure each mode activates the correct system.
Troubleshooting Common Issues
The system doesn’t respond? Check the wiring connections. Make sure each wire is secure in its terminal.
The display is blank? Verify the thermostat has power. Check the circuit breaker and ensure it’s on. Replace the batteries if needed.
Temperature readings seem off? Calibrate the thermostat. Check the user manual for specific instructions on calibration.
Unexpected system behavior? Reset the thermostat to its factory settings. This often resolves many common issues. Consult the user manual for reset instructions.
Testing your thermostat is crucial. These steps ensure your HVAC system runs smoothly. Regular checks help maintain comfort in your home.
Credit: www.reddit.com
Credit: www.youtube.com
Frequently Asked Questions
How Do You Replace A Trane Thermostat?
Turn off power. Remove old thermostat. Connect wires to new thermostat. Mount and test.
What Tools Are Needed For Trane Thermostat Replacement?
Screwdriver, wire stripper, and drill. Basic tools. Simple process.
Can I Replace My Trane Thermostat Myself?
Yes, it’s straightforward. Follow instructions. Ensure safety by turning off power.
How Long Does It Take To Replace A Trane Thermostat?
Usually, about 30 minutes. Depends on experience level. Follow step-by-step guide.
What Are Common Issues After Replacing A Trane Thermostat?
Incorrect wiring, power issues, or wrong settings. Double-check connections. Consult manual.
Conclusion
Replacing a Trane thermostat is simpler than you think. Follow our guide step-by-step. Gather your tools and take your time. Safety first; turn off the power. Remove the old thermostat carefully. Install the new one, following instructions. Double-check the wiring connections.
Turn the power back on and test the system. Enjoy a comfortable home climate. You can handle this task easily. Save money and feel accomplished. Thanks for reading our guide. Happy DIY!