Is your Dyson vacuum losing suction? You’re not alone.
Many Dyson users face this issue at some point. A vacuum that doesn’t suck up dirt is frustrating. It can make cleaning a chore. Understanding why your Dyson has lost suction can help you fix the problem. This blog post will explore common reasons for suction loss.
We will guide you through simple checks and fixes. By the end, you’ll know how to get your Dyson working like new again. Let’s dive in and solve the suction mystery together.

Credit: www.reddit.com
Common Causes
Have you ever experienced the frustration of your Dyson vacuum losing suction power? You’re not alone. It’s a common issue that can turn a simple cleaning task into a major headache. But don’t worry! In this blog post, we’ll explore the common causes of lost suction and how you can easily fix them. Let’s dive in, shall we?
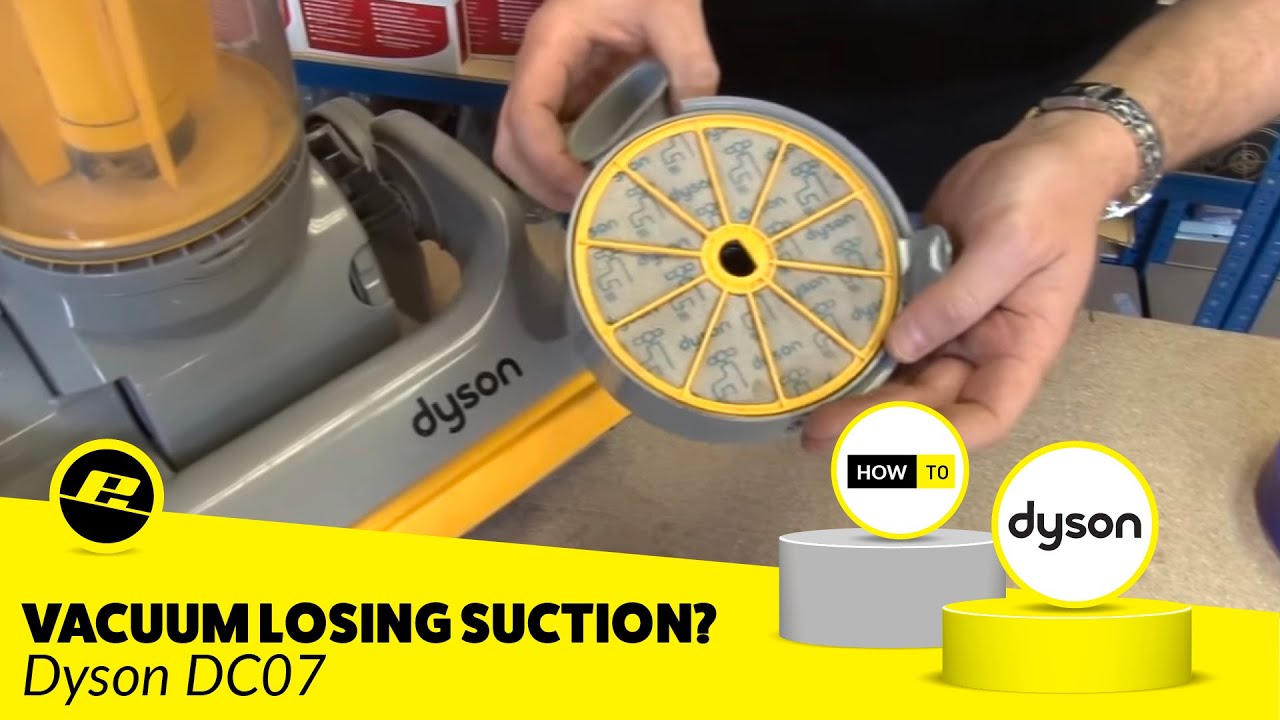
Clogged Filters
One of the most frequent culprits behind a Dyson vacuum losing suction is clogged filters. These filters are designed to trap dust, dirt, and allergens, but over time, they can become blocked. This reduces the airflow and, consequently, the suction power.
What can you do? It’s simple! Check your vacuum’s filters regularly and clean them according to the manufacturer’s instructions. Most Dyson models have washable filters. Just rinse them under cold water, let them dry completely, and pop them back in. Voila! Your vacuum should be back to its powerful self.
Blockages In Hose
Another common reason for lost suction is blockages in the hose. It’s easy for small objects, hair, or large dust particles to get stuck in the hose, especially if you have pets or kids. These blockages can severely impact the performance of your vacuum.
How to fix it? First, detach the hose from the vacuum. Then, use a long object like a broomstick or a flexible cleaning rod to gently push out any blockages. If the blockage is stubborn, try using a bit of soapy water to loosen it. Always ensure the hose is completely dry before reattaching it to avoid any water damage.
Understanding these common causes can save you time and effort. Plus, it keeps your Dyson vacuum performing at its best. Have you faced any other issues with your Dyson vacuum? Share your experiences and tips in the comments below!
Credit: www.youtube.com
Checking Filters
A Dyson vacuum losing suction can be frustrating. One common cause is clogged filters. Regular maintenance ensures your vacuum works efficiently. Checking filters is essential. It helps maintain strong suction power.
Removing Filters
First, unplug your Dyson vacuum. Locate the filters. Different models have filters in various places. Consult your manual if unsure. Usually, there are two filters. One near the cyclone and another in the ball or base.
Remove the filters gently. Avoid damaging them. Take note of their position. You will need to place them back correctly after cleaning.
Cleaning Methods
Wash the filters under cold water. Do not use detergents or put them in the washing machine. Squeeze the filters gently. Remove excess water. Let the filters dry completely. This might take 24 hours.
Never place wet filters back in the vacuum. It can cause damage. Clean filters ensure your Dyson vacuum maintains optimal suction power. Regular cleaning is key to a well-functioning vacuum.
Inspecting Hose
Have you ever experienced the frustration of your Dyson vacuum losing suction just when you need it the most? It’s a common problem, but one that can often be easily fixed. One of the first places to inspect is the hose. A blocked or damaged hose can significantly reduce the suction power of your vacuum. Let’s dive into the process of inspecting your Dyson vacuum hose to get your machine back to peak performance.
Disconnecting Hose
First things first, you’ll need to disconnect the hose from your Dyson vacuum. This might sound daunting, but it’s quite simple. Start by turning off and unplugging your vacuum. Safety first! Next, locate the hose connection point. For most Dyson models, this will be at the back of the vacuum. Press the release button (usually a red or gray button) and gently pull the hose away from the vacuum.
Clearing Obstructions
With the hose disconnected, it’s time to check for any obstructions. You’d be surprised at what can get stuck in there! Shine a flashlight through the hose and look for blockages. Common culprits include hair, dust bunnies, and small objects like coins or Lego pieces. If you spot an obstruction, use a long, flexible tool like a coat hanger or a pipe cleaner to carefully remove it. Be gentle to avoid damaging the hose.
Don’t forget to inspect both ends of the hose and the hose itself for any cracks or tears. A damaged hose can also lead to loss of suction. If you find any damage, it might be time to replace the hose. You can usually find replacement hoses online or at your local vacuum cleaner store.
By following these simple steps, you can often restore your Dyson vacuum’s suction power and get back to cleaning with ease. Remember, regular maintenance and inspection of your vacuum’s hose can prevent future problems and keep your vacuum running smoothly for years to come.
Brush Bar Issues
Dyson vacuums are known for their powerful suction. But sometimes, they lose suction. One common culprit is the brush bar. The brush bar plays a key role in cleaning. It lifts dirt and debris from the floor. But when it has issues, your vacuum struggles. Let’s explore some common brush bar problems.
Tangled Hair
Hair can easily get tangled in the brush bar. Long hair, pet hair, and even fibers can wrap around it. This restricts its movement. When the brush bar can’t spin freely, suction decreases. Regularly check and remove tangled hair. Use scissors or a brush to clean it. This simple task can restore your vacuum’s performance.
Worn Bristles
Bristles on the brush bar wear out over time. Worn bristles can’t pick up dirt effectively. They lose their stiffness and become less effective. Inspect the bristles regularly. If they look flattened or frayed, consider replacing the brush bar. A new brush bar can make a big difference. It helps maintain strong suction and clean floors better.
Emptying The Bin
Emptying the bin of your Dyson vacuum is a crucial step in maintaining its efficiency. A clogged or full bin can significantly reduce suction power, leaving your home less clean than it should be. In this section, we’ll explore the importance of regularly emptying the bin, how to do it properly, and the best ways to dispose of the debris.
Full Bin Problems
When the bin of your Dyson vacuum gets full, you might notice a decrease in suction power. A full bin can block the airflow, making it harder for the vacuum to pick up dirt and dust. This can be frustrating, especially when you’re trying to clean up a mess quickly.
- Reduced Suction: As the bin fills up, the vacuum struggles to maintain its suction power, leading to less effective cleaning.
- Overheating: A full bin can cause the vacuum to overheat, potentially damaging the motor over time.
- Wear and Tear: Constantly running the vacuum with a full bin can wear out the components faster, leading to costly repairs.
To avoid these issues, it’s essential to keep an eye on the bin and empty it regularly. But how do you do it correctly? Let’s find out.
Proper Disposal
Emptying the bin might seem like a straightforward task, but doing it properly can make a big difference. Follow these steps to ensure you’re disposing of the debris correctly:
- Turn Off the Vacuum: Always turn off and unplug your Dyson vacuum before emptying the bin to avoid any accidents.
- Remove the Bin: Detach the bin from the vacuum body by pressing the release button. This process may vary slightly depending on your Dyson model, so refer to the user manual if needed.
- Empty the Contents: Hold the bin over a trash can and press the release button at the bottom to empty the contents. Make sure to tap the sides gently to release any stuck debris.
- Clean the Bin: Wipe the inside of the bin with a damp cloth to remove any remaining dust or dirt. This helps prevent buildup and keeps your vacuum running efficiently.
- Reattach the Bin: Once the bin is empty and clean, reattach it to the vacuum body by clicking it back into place.
By following these simple steps, you can ensure your Dyson vacuum remains in top shape, providing you with powerful suction every time you clean.
Remember, a little maintenance goes a long way. Keep your bin empty, and your Dyson vacuum will thank you with years of reliable performance.
Seal And Gasket Inspection
Dyson vacuums are known for their powerful suction. But sometimes, they lose suction power. One common issue is with the seals and gaskets. These parts ensure the vacuum is airtight. If they are damaged, the vacuum loses suction. Inspecting and maintaining these parts can help restore your vacuum’s performance.
Checking Seals
First, unplug the vacuum. Safety first. Then, locate the seals. They are usually found near the dustbin or filters. Look for cracks or wear. A damaged seal can let air escape. This reduces suction power. If you see any damage, the seal needs replacing.
Replacing Gaskets
Gaskets are rubber rings that create airtight seals. They can wear out over time. To check the gaskets, remove them gently. Inspect them for cracks or stiffness. A worn-out gasket won’t seal properly. If the gasket is damaged, replace it. New gaskets can be bought online or at a vacuum store. Install the new gasket carefully. Ensure it fits snugly.
Motor Malfunctions
Motor malfunctions in Dyson vacuums can lead to lost suction. A malfunctioning motor struggles to generate the required power. This results in weak suction. Understanding motor issues helps in troubleshooting.
Motor problems often arise from overheating or wear and tear. Knowing the signs can prevent further damage. Regular maintenance is key.
Overheating Signs
Overheating is a common issue with vacuum motors. A hot motor emits a burning smell. It may also shut down unexpectedly. This is a safety feature to prevent damage.
Another sign is unusual noise. The motor may sound louder than usual. It might also make grinding or whining sounds. Reduced suction is often the first clue.
Check for blockages in the vacuum. A blocked airway forces the motor to work harder. This leads to overheating. Clean filters and clear any obstructions.
Professional Repair
Sometimes, a professional repair is necessary. If overheating signs persist, consult a technician. They can diagnose and fix the problem.
Technicians have the tools and expertise. They can replace worn parts. This ensures your vacuum runs efficiently.
Regular professional check-ups can extend your vacuum’s life. Preventative maintenance is always a good investment. It saves you money in the long run.
Preventative Maintenance
Dyson vacuums are known for their powerful suction and advanced technology. However, even the best of machines need some tender loving care to keep performing at their best. That’s where preventative maintenance comes in. By following a few simple steps, you can ensure that your Dyson vacuum continues to suck up dirt and debris like a pro, without losing its oomph.
Regular Cleaning
Just like we need a good shower to stay fresh, your Dyson vacuum needs regular cleaning to function properly. The dirt and dust can build up inside the vacuum, clogging filters and reducing suction power. Here’s what you can do:
- Empty the dustbin after every use. This might seem obvious, but it’s a step that often gets overlooked.
- Wash the filters. Most Dyson models have washable filters. Check your user manual for instructions and clean them every month.
- Check for blockages. Inspect the hose and brush bar for any obstructions. A small toy or clump of hair can easily get stuck and cause problems.
Proper Storage
Storing your Dyson vacuum properly can also make a big difference. You wouldn’t leave your car out in the rain, right? The same goes for your vacuum. Here are some tips:
- Keep it dry: Store your vacuum in a dry place. Moisture can damage the electronic components and lead to mold growth.
- Organize attachments: Keep all the attachments in one place. This makes it easier to find what you need and prevents loss.
- Wrap the cord: Neatly wrap the power cord to avoid tangles and potential damage.
By following these simple preventative maintenance steps, you can keep your Dyson vacuum in top shape. Think of it as a small investment of time that pays off with a clean home and a vacuum that works like new. After all, a stitch in time saves nine, right?
Remember, taking care of your vacuum doesn’t have to be a chore. It’s like giving your trusty cleaning companion a little TLC. And who knows, you might even find it oddly satisfying!

Credit: www.ifixit.com
Frequently Asked Questions
Why Is My Dyson Vacuum Losing Suction?
Your Dyson vacuum may be losing suction due to a clogged filter, full dustbin, or blocked hose. Clean or replace parts as needed.
Why Is My Dyson No Longer Picking Up?
Your Dyson may not pick up due to a clogged filter, full bin, or blocked hose. Clean and check these parts.
What Is The Life Expectancy Of A Dyson Vacuum?
A Dyson vacuum typically lasts around 7 to 10 years. Regular maintenance can extend its life. Quality and care matter.
Why Did My Vacuum Suddenly Stop Suctioning?
Your vacuum may have stopped suctioning due to a clogged hose, dirty filter, or full dustbin. Check these components and clean or replace them if necessary.
Why Has My Dyson Vacuum Lost Suction?
Your Dyson vacuum may have lost suction due to a clogged filter or hose.
Conclusion
Maintaining your Dyson vacuum ensures it works efficiently. Regularly clean filters and check for blockages. Replace worn-out parts promptly. This keeps suction strong and your home clean. A well-maintained vacuum saves time and effort. Follow these tips for a reliable Dyson vacuum.
Keep your cleaning routine smooth and effective. Happy cleaning!