As an Amazon Associate I earn from qualifying purchases.
No, you cannot install a Nest Thermostat without turning off the power. Safety is key when dealing with electrical devices.
Installing a smart thermostat like the Nest can improve your home’s energy efficiency and comfort. But, working with electrical wiring can be dangerous. Even a small mistake can cause serious injury or damage. That’s why it’s crucial to turn off the power before starting the installation.
We will guide you through the steps to safely install your Nest Thermostat. We’ll explain why turning off the power is necessary and how to do it correctly. Stay safe and get ready to enjoy the benefits of your new smart thermostat!
Introduction To Nest Thermostat Installation
Installing a Nest Thermostat can seem like a complex task. But with the right guidance, it becomes manageable. This guide will walk you through the steps of installing a Nest Thermostat without turning off the power.
What Is A Nest Thermostat?
The Nest Thermostat is a smart device that controls your home’s heating and cooling. It learns your habits and adjusts the temperature automatically. This can save energy and reduce your bills.
People love the Nest Thermostat for its sleek design and user-friendly interface. You can control it from your smartphone, even when you are not at home.
Common Installation Concerns
Many people worry about installing a Nest Thermostat. One common concern is whether you need to turn off the power. Safety is a top priority, but with proper precautions, you can install the thermostat without turning off the power.
Other concerns include understanding the wiring and ensuring the thermostat is compatible with your HVAC system. The good news is that the Nest Thermostat comes with a detailed installation guide and tools to help you.
| Concern | Solution |
|---|---|
| Turning off power | Use insulated tools and be cautious |
| Wiring complexity | Follow the Nest installation guide |
| Compatibility | Check compatibility on the Nest website |
Make sure to have the right tools before starting. These include a screwdriver, pliers, and insulated gloves. Following the steps carefully will help you install the Nest Thermostat safely and efficiently.
Importance Of Turning Off Power
Installing a Nest Thermostat can be exciting. But safety should come first. Turning off the power is crucial. It ensures safety and prevents accidents. Let’s explore why this step is important.
Electrical Safety Basics
Electricity can be dangerous. Always handle it with care. When installing devices, follow safety guidelines. Turning off the power is one of them.
Here are some basic safety tips:
- Use insulated tools
- Wear rubber-soled shoes
- Keep your hands dry
These precautions help prevent electric shocks. They also protect your equipment. Never underestimate the power of these safety measures.
Risks Of Live Wiring
Live wires carry electric current. They can be hazardous. Working with live wiring can lead to serious injuries.
Consider these risks:
| Risk | Description |
|---|---|
| Electric Shock | Contact with live wires can cause a shock. |
| Short Circuit | Improper handling can create a short circuit. |
| Fire Hazard | Live wiring can spark and cause a fire. |
These risks are preventable. Just turn off the power before starting. It is a simple step, but it makes a big difference.
Remember, safety is always the priority. Follow these guidelines to ensure a safe and successful installation.
Tools Needed For Installation
Installing a Nest Thermostat can seem daunting, especially if you are unsure about the tools needed. To make the process easier, we have compiled a list of essential and optional tools. These tools will ensure a smooth installation, even if you choose not to turn off the power.
Essential Tools
The following tools are necessary for installing your Nest Thermostat:
- Phillips screwdriver: Most screws used in thermostat installations require a Phillips head.
- Level: Ensures your thermostat is mounted straight. Some thermostats come with a built-in level.
- Needle-nose pliers: Helps in handling and adjusting wires.
- Wire stripper: Essential for preparing wires for connection.
Optional Tools For Safety
Consider these tools to enhance safety during installation:
- Voltage tester: Checks if there is power running through the wires. It helps to ensure your safety.
- Insulated gloves: Provides extra protection when handling electrical components.
- Headlamp or flashlight: Useful if your working area is dimly lit.
Having these tools ready will make the installation process smoother and safer. Always prioritize safety when working with electrical components.
Credit: www.homedepot.com
Step-by-step Installation Guide
Installing a Nest Thermostat without turning off the power might seem daunting. But with this step-by-step guide, you can complete the installation safely and efficiently. Follow these steps closely to ensure a smooth process.
Preparing For Installation
Before you begin, gather all necessary tools. You will need:
- Phillips screwdriver
- Flathead screwdriver
- Wire labels
- Nest Thermostat
Check the Nest Thermostat package. Ensure you have all components, including the base, display, and screws. Safety first: switch off the power at the breaker to avoid any electrical hazards.
Connecting The Wires
Remove the cover from your current thermostat. Label the wires using the provided wire labels. This will help you identify each wire later.
- Disconnect the wires from the old thermostat.
- Attach the base of the Nest Thermostat to the wall using the screws.
- Insert the labeled wires into the corresponding terminals on the Nest base.
- Ensure each wire is secure by giving it a slight tug.
After connecting the wires, attach the display to the base. Turn the power back on at the breaker. The Nest Thermostat should power up. Follow the on-screen instructions to complete the setup.
By following these steps, you can install your Nest Thermostat safely. Enjoy the comfort and efficiency it brings to your home.
Safety Tips For Working With Live Wires
Working with live wires can be dangerous. It is important to follow safety tips to avoid accidents. Here are some essential Safety Tips for Working with Live Wires to help you stay safe while installing your Nest Thermostat.
Protective Gear
Always wear the right protective gear when working with live wires.
- Insulated gloves: These protect your hands from electric shocks.
- Safety glasses: Prevents debris from getting into your eyes.
- Rubber-soled shoes: These reduce the risk of electric shock by providing insulation.
Safe Handling Practices
Follow safe handling practices to ensure your safety and the safety of others.
- Use insulated tools: Always use tools with insulated handles.
- Check for damaged wires: Inspect wires for any damage before touching them.
- Keep your workspace dry: Water conducts electricity and increases the risk of shock.
- Avoid distractions: Focus on the task to avoid mistakes.
By following these safety tips, you can install your Nest Thermostat safely without turning off the power. Always prioritize your safety and take necessary precautions.
Alternative Methods For Safe Installation
Installing a Nest Thermostat without turning off the power can be risky. However, there are alternative methods to ensure a safe installation. These methods can help you avoid potential electrical hazards.
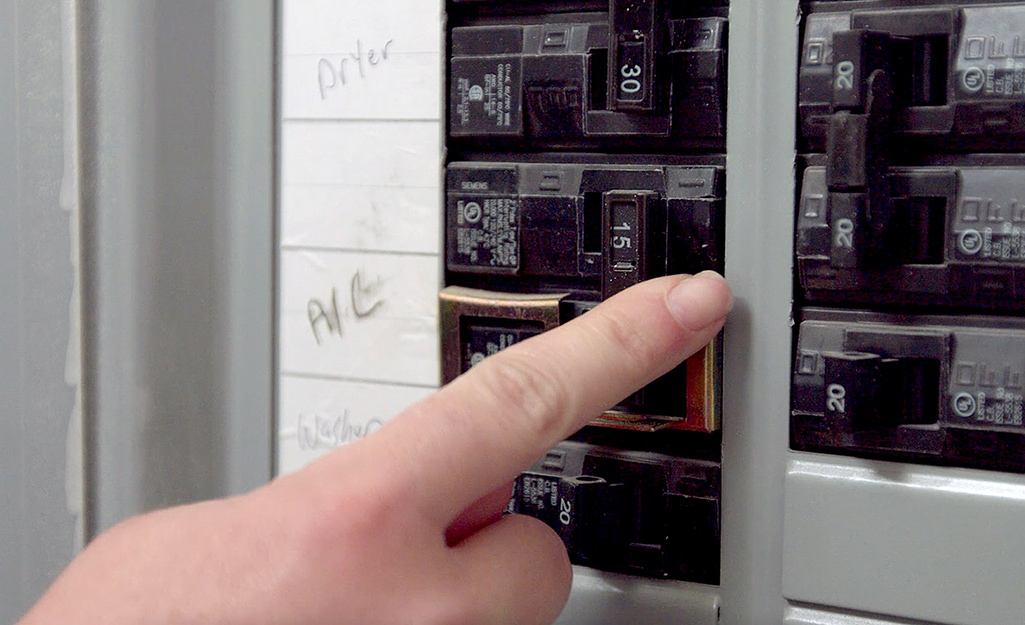
Using A Circuit Breaker
One option is to use the circuit breaker. Locate the circuit breaker panel in your home. Identify the switch that controls the power to your thermostat. Turn off this switch to cut the power. This method ensures safety and prevents electrical shocks. Once you finish installing, turn the circuit breaker back on.
Hiring A Professional
Another safe method is hiring a professional. An experienced electrician can install the Nest Thermostat safely. They have the necessary tools and knowledge. This ensures the job is done correctly and safely. Hiring a professional can provide peace of mind. It also reduces the risk of injury or damage to your home.
Common Mistakes And How To Avoid Them
Installing a Nest Thermostat without turning off power can be risky. Many people make common mistakes. Understanding these errors and learning how to avoid them can ensure a smooth installation process. Let’s dive into some of the most frequent mistakes.
Incorrect Wiring
Incorrect wiring is a common issue during installation. Many users connect wires to the wrong terminals. This can cause the thermostat to malfunction or not work at all. Always check the wiring diagram in the manual. Match each wire to the correct terminal. Take your time and double-check connections.
Neglecting Safety Precautions
Neglecting safety precautions can lead to serious problems. Working with live wires can cause electric shocks. It’s crucial to use insulated tools. Avoid touching bare wires directly. If you’re unsure, consult a professional. Safety should always come first.
Credit: www.reddit.com
Testing And Finalizing The Installation
After you install the Nest Thermostat without turning off the power, the next step is testing and finalizing the installation. This ensures that everything works properly and safely. Follow these steps to complete the process.
Ensuring Proper Functionality
First, check the display of the Nest Thermostat. It should light up and show the home screen. If it does, this is a good sign.
- Navigate through the menu to set the desired temperature.
- Listen for the click sound of the relay as the thermostat activates the heating or cooling system.
- Check if the system responds correctly by either starting the heater or the air conditioner.
If everything responds as expected, your installation is functional. If not, you might need to check the wiring or consult the manual.
Final Safety Checks
Before concluding the process, perform a few final safety checks to ensure everything is secure and safe.
- Inspect the wiring connections behind the thermostat. Ensure there are no loose wires.
- Check the thermostat’s position. It should be securely attached to the wall.
- Make sure the circuit breaker is in the correct position and not tripped.
Once all checks are complete and everything looks secure, you can consider the installation process finished. Now, enjoy the comfort and efficiency your new Nest Thermostat brings to your home.

Credit: www.youtube.com
Frequently Asked Questions
Do You Need To Turn Off Power To Install Nest Thermostat?
Yes, turning off power is recommended for safety during installation.
Can You Install Nest Thermostat Without Professional Help?
Yes, you can install it yourself by following the provided instructions.
What Happens If You Install Nest Thermostat With Power On?
It can cause electrical shock or damage to the thermostat.
How Long Does It Take To Install Nest Thermostat?
It typically takes about 30 minutes to install.
Is It Safe To Install Nest Thermostat Yourself?
Yes, as long as you follow the instructions and turn off the power.
Conclusion
Installing a Nest Thermostat without turning off the power can be risky. Always prioritize safety. Turning off the power prevents electrical accidents. Follow the instructions carefully. Ensure your safety and avoid damage to the device. Taking this step ensures a smooth installation.
You can enjoy your new thermostat without worries. If unsure, consult a professional. Safe practices lead to better outcomes. Save time and avoid costly mistakes. Stay safe and enjoy your smart home upgrade.
