Drill problems can be a common headache for many. They can disrupt your work and waste your time.
Drills are crucial tools in many tasks, from DIY projects to professional work. Yet, they can sometimes malfunction, causing delays and frustration. Understanding the common issues with drills can help you fix them quickly. Whether it’s a stuck bit, overheating, or a dead battery, knowing what to look for saves time and effort.
This blog will explore various drill problems, offering solutions and tips to keep your projects running smoothly. Stay tuned to learn how to troubleshoot and maintain your drill, ensuring it works efficiently when you need it the most.
Introduction To X Drill
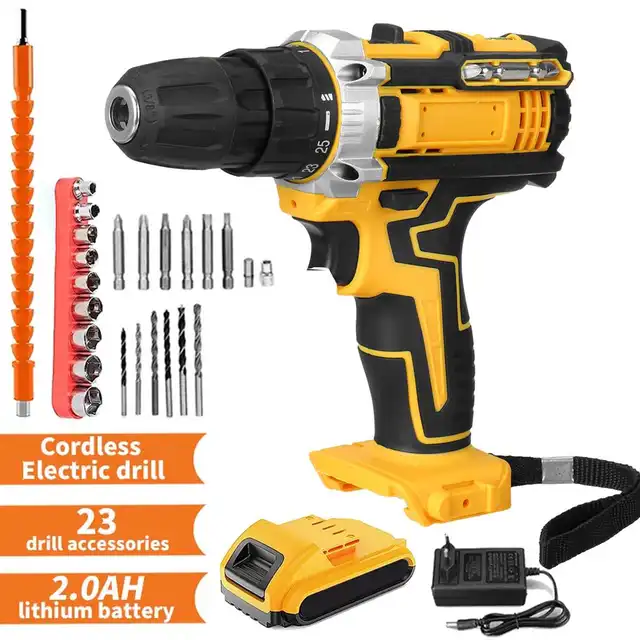
X Drill is a widely-used tool in various industries. It helps in tasks that require precision and efficiency. Many professionals rely on X Drill for its versatility and reliability.
Understanding X Drill is crucial for anyone in technical fields. This section will cover what X Drill is and its importance.
What Is X Drill?
X Drill is a specialized tool designed for drilling operations. It is used for creating precise holes in different materials. The tool is known for its accuracy and ease of use. It comes in various sizes and types to suit different needs.
Users can operate X Drill manually or with a power source. Its design ensures high performance and safety during use. Professionals value X Drill for its durability and effectiveness.
Importance Of X Drill
X Drill plays a key role in many industries. It is essential for construction, manufacturing, and repair tasks. The tool helps in achieving precise results, which is critical for quality work.
Using X Drill improves efficiency and reduces time spent on tasks. It ensures that holes are accurate and clean, which is important for structural integrity. The tool’s reliability makes it a preferred choice for many professionals.
Having a good understanding of X Drill can enhance job performance. It allows workers to complete tasks with greater precision and confidence.

Credit: www.walmart.com
Common Issues
It’s no secret that using a drill can sometimes be more frustrating than rewarding. If you’ve ever found yourself dealing with unexpected hitches while drilling, you’re not alone. Many users encounter common problems that can hamper their progress. In this section, we’ll discuss two of the most frequent issues: Overheating and Power Loss. Let’s dive in and see how you can address these pesky problems.
Overheating
Drills, like people, can get hot under pressure. If you’ve ever felt your drill heating up after prolonged use, you know what I mean. Overheating not only affects performance but can also damage your tool.
| Causes | Solutions |
|---|---|
| Continuous Use | Take breaks to let the drill cool down. |
| Blocked Ventilation | Ensure vents are clear of dust and debris. |
| High Friction | Use lubrication or reduce drill speed. |
Let’s face it, nobody wants a smoking hot drill (literally). A simple trick is to use your drill in short bursts rather than long, continuous runs. It’s much like taking a break during a workout – your drill needs to catch its breath too!
Power Loss
Power loss can feel like your drill is going on a coffee break without telling you. One moment you’re drilling away, and the next, your drill is losing its oomph. Here are a few reasons why this might be happening and what you can do about it:
- Battery Issues: If you’re using a cordless drill, the battery might be the culprit. Ensure it’s fully charged or try using a different battery.
- Worn Out Brushes: In electric drills, brushes can wear out over time, leading to reduced power. Replacing them can make a significant difference.
- Loose Connections: Sometimes, a simple loose wire can cause intermittent power loss. Check all connections to make sure everything is snug.
Ever had that awkward moment when your drill just gives up on you mid-task? It’s like it’s saying, “I’m done for the day!” By keeping an eye on your battery levels and ensuring all components are in good shape, you can avoid these untimely interruptions.
Dealing with drill problems doesn’t have to be a headache. By understanding common issues like overheating and power loss, you can keep your projects running smoothly. Happy drilling!
Mechanical Failures
When it comes to drilling, mechanical failures can throw a wrench in the works. These issues not only halt progress but can also lead to costly repairs and downtime. For anyone using a drill, understanding common mechanical failures is crucial. Let’s dive into two significant problems: broken bits and gear malfunctions.
Broken Bits
Broken bits are a common frustration for many drill users. Imagine you’re in the middle of an important project, and suddenly, your drill bit snaps. It’s annoying, right? Broken bits can happen due to several reasons:
- Material Weakness: Cheap or low-quality bits are prone to breaking under pressure.
- Excessive Force: Applying too much force can cause the bit to snap, especially if the material you’re drilling is tough.
- Improper Use: Using the wrong type of bit for the material can lead to breakage.
To avoid broken bits, always choose high-quality bits, apply steady pressure, and select the appropriate bit for the job. Trust me, it’s worth the extra effort to prevent those frustrating breaks!
Gear Malfunctions
Gear malfunctions are another mechanical failure that can bring your drilling to a grinding halt. Gears are essential for the smooth operation of your drill, and when they fail, it can be a real headache. Common causes of gear malfunctions include:
- Wear and Tear: Over time, gears can wear down and lose their effectiveness.
- Improper Maintenance: Failing to regularly clean and lubricate your drill can lead to gear issues.
- Overloading: Using the drill beyond its capacity can strain the gears and cause them to malfunction.
Regular maintenance is key to preventing gear malfunctions. Clean your drill after each use, lubricate the gears as needed, and avoid overloading the tool. A little care goes a long way in keeping your drill running smoothly.
In conclusion, mechanical failures like broken bits and gear malfunctions can be a real pain, but with the right knowledge and a bit of preventive care, you can keep your drill in top shape. Happy drilling!
Electrical Problems
Electrical problems with your drill can be incredibly frustrating. They often seem to happen at the worst possible time, right when you need your drill the most. But don’t worry, we’ve got you covered. Let’s dive into some common electrical problems you might encounter and how to address them.
Circuit Breakdowns
Circuit breakdowns are a frequent issue with electrical drills. If your drill suddenly stops working, the circuit might be the culprit. Here’s a simple way to check:
- First, unplug the drill. Safety first!
- Next, open the casing to inspect the wires and connections.
- Look for any burnt or broken wires. These are often the cause of circuit issues.
- If you find any, replace them with new wires of the same gauge.
Still not working? The issue might be more complex. In such cases, it’s best to consult a professional. But hey, at least you gave it a shot!
Battery Issues
Ah, the good old battery problems. It’s like our drills have a mind of their own, right? If your drill isn’t holding a charge or cuts out quickly, the battery could be to blame. Here’s what you can do:
- Check the Charger: Sometimes, the charger might be at fault. Ensure it’s working correctly.
- Inspect the Battery: Look for any signs of damage or wear. If the battery looks bloated or is leaking, it’s time for a replacement.
- Test the Voltage: Use a multimeter to check the battery voltage. If it’s significantly lower than the rated voltage, the battery might be dead.
| Battery Issue | Solution |
|---|---|
| Not Charging | Check connections and charger |
| Short Run Time | Inspect battery health |
| Overheating | Allow to cool and try again |
Don’t forget, batteries have a limited lifespan. If you use your drill often, the battery will eventually need replacing. It’s just a fact of life, like losing socks in the laundry.
And there you have it! A few simple checks and fixes can keep your drill buzzing along nicely. Remember, when in doubt, always seek professional help to avoid further damage. Happy drilling!
Operational Challenges
Operational challenges can significantly impact the efficiency of X Drill operations. These challenges often stem from various factors that can be addressed with proper attention and care. Let’s explore two common operational challenges: user errors and maintenance neglect.
User Errors
User errors are a frequent cause of operational issues with X Drills. Inexperienced operators may misuse the equipment, leading to suboptimal performance. Incorrect settings can also result in damaged materials or equipment. Proper training is essential to minimize these errors.
Maintenance Neglect
Maintenance neglect is another critical operational challenge. Regular maintenance ensures the drill functions correctly and safely. Skipping routine checks can lead to unexpected breakdowns. These breakdowns can cause delays and increase repair costs. Consistent maintenance practices help prevent these issues.
Troubleshooting Tips
Experiencing problems with your drill can be frustrating. But don’t worry, many issues can be fixed with some simple troubleshooting tips. Understanding the common problems and knowing how to address them can save you time and money. Let’s dive into some key troubleshooting tips.
Basic Checks
Before diving into complex solutions, start with basic checks. Ensure the drill is plugged in properly. Check the power source for any issues. Sometimes, an outlet might not be supplying power. Verify that the drill’s switch is in the correct position. These simple steps can often solve the problem.
Examine the drill bit. A dull or damaged bit may cause problems. Replace it if necessary. Also, check if the chuck is tightened properly. A loose chuck can result in ineffective drilling. These basic checks can help you identify and fix common problems quickly.
Advanced Diagnostics
If basic checks don’t resolve the issue, move to advanced diagnostics. Inspect the drill’s motor. If it’s making unusual noises, there might be internal damage. In such cases, professional help may be required.
Examine the wiring inside the drill. Look for any signs of wear or damage. Faulty wiring can cause the drill to malfunction. Also, check the brushes in the motor. Worn-out brushes can lead to poor performance. Replacing them can often restore the drill’s functionality.
Finally, consider the drill’s battery if it’s a cordless model. Ensure it is charged fully. Sometimes, a weak battery can cause the drill to stop working. If the battery is old, it might need replacement. Following these advanced diagnostics can help you troubleshoot more complex issues.
Preventive Measures
Preventive measures can significantly reduce X Drill problems. Regular care and proper handling extend the life of your drill. Here are some key actions to consider:
Regular Maintenance
Regular maintenance keeps your drill in top condition. Clean your drill after each use. Remove dust and debris from the vents. Inspect the drill bits for wear and tear. Lubricate moving parts to ensure smooth operation. Check the battery and charger connections regularly. Replace damaged parts immediately to avoid bigger issues.
Proper Storage
Proper storage prevents damage to your drill. Store the drill in a cool, dry place. Avoid exposing it to extreme temperatures. Use a case or toolbox to protect it from dust and moisture. Keep it away from children and pets. Make sure it is unplugged before storing it. Proper storage extends the lifespan of your drill.
Credit: www.aliexpress.com
When To Seek Professional Help
Dealing with drill problems can be frustrating. Minor issues can often be fixed at home. But some problems need professional help. Knowing when to seek a specialist can save you time and stress.
Identifying Severe Issues
Some drill problems are too complex for DIY fixes. Strange noises are a red flag. Unusual vibrations can signal a serious problem. If the drill loses power often, it’s a sign of a bigger issue. Smoke or burning smells mean you need professional help immediately.
Another severe issue is overheating. If the drill gets too hot, stop using it. This can prevent further damage. Never ignore these warning signs. Identifying severe issues early can save your tool from permanent damage.
Finding A Specialist
Finding a specialist is crucial for severe drill problems. Look for repair shops with good reviews. Ask for recommendations from friends or family. Choosing a certified technician ensures quality service. They have the right tools and expertise to fix your drill.
Many specialists offer warranties on their work. This gives you peace of mind. Always ask about the warranty before the repair. A good specialist will provide clear information on costs and repair time. This helps you make an informed decision.

Credit: www.amazon.com
Frequently Asked Questions
What Is The Common Problem In A Drilling Machine?
The common problem in a drilling machine is overheating. Overheating can damage components and affect performance. Regular maintenance and proper lubrication help prevent this issue.
Why Is My Drill Not Working?
Check the power source and ensure the drill is plugged in or the battery is charged. Inspect for a tripped breaker or blown fuse. Verify the drill’s trigger switch and settings. Clean the drill bit and remove any debris. If issues persist, consult the manual or a professional.
What Is The Common Cause Of Breakdown Of An Electric Drill?
The common cause of an electric drill breakdown is motor burnout due to overheating or excessive use. Regular maintenance helps prevent this.
Why Is My Drill Not Penetrating?
Your drill might not penetrate due to a dull bit, incorrect bit type, low speed setting, or insufficient pressure. Check for obstructions.
What Are Common X Drill Problems?
Common problems include drill bit slipping, overheating, and poor hole alignment. These issues affect drilling efficiency.
Conclusion
Solving X drill problems can be challenging, but you can overcome them. Practice consistently. Understand each step. Take your time. Remember, patience is key. Learn from mistakes and keep improving. You’ll soon see progress. Stay focused. Keep tools in good condition.
Share tips with others. Together, you can tackle any drill issue. Your skills will grow with persistence. Happy drilling!