Imagine transforming a simple block of clay into a beautiful, handmade piece of art right from your kitchen. Sounds intriguing, right?
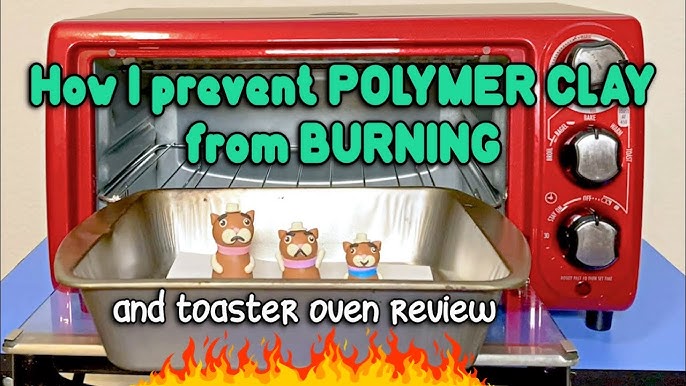
If you’re a crafting enthusiast looking for a convenient and efficient way to bake polymer clay, you might be surprised to discover that your trusty toaster oven can do the trick. Yes, the same appliance you use for quick snacks and crispy toast can also be a powerful tool in your creative arsenal.
By the end of this article, you’ll learn how to safely and effectively use your toaster oven to bake polymer clay, unlocking a world of artistic possibilities without stepping foot in an art studio. Ready to dive into this creative adventure? Let’s get started!

Credit: thebluebottletree.com
Benefits Of Using A Toaster Oven For Polymer Clay
Using a toaster oven for baking polymer clay has several benefits. Many artists find it a practical and efficient choice. Its compact size and energy efficiency make it popular. Let’s explore these advantages in detail.
Compact And Convenient
A toaster oven is small and fits in tight spaces. Ideal for those with limited workspace. It heats up quickly, saving time. No need for a large oven. Just place it on a counter. Easy to store and transport. Perfect for artists on the move. Baking polymer clay becomes hassle-free.
Energy Efficiency
Toaster ovens use less energy than conventional ovens. This makes them eco-friendly. Lower energy consumption means reduced electricity bills. Also, they provide even heat distribution. This ensures the clay bakes evenly. The result? Beautifully crafted polymer clay pieces. Efficient and cost-effective for artists.
Credit: www.youtube.com
Choosing The Right Toaster Oven
Selecting a toaster oven for baking polymer clay requires attention to temperature accuracy and size. Ensure it maintains consistent heat and fits your workspace. This choice can greatly impact your crafting results.
Choosing the right toaster oven is crucial for baking polymer clay. This small appliance offers precision and control. It can enhance your crafting experience. But, not all toaster ovens are suitable. You need to consider a few key factors.Size And Capacity
Think about where you’ll place the toaster oven. Ensure it fits in your workspace. Check its interior dimensions too. You’ll need enough space for your projects. Larger ovens can handle bigger pieces. If space is limited, find a compact model. But don’t compromise on interior room.Temperature Controls
Accurate temperature control is essential for polymer clay. Look for a toaster oven with precise settings. Digital controls are often more accurate. Some models have adjustable thermostats. They allow fine-tuning for perfect results. Avoid ovens with only basic heat settings. These might not offer the control you need.Preparing Polymer Clay For Baking
Preparing polymer clay for baking is a crucial step. Proper preparation ensures your finished piece turns out well. The process involves conditioning, shaping, and sculpting. Each step plays a vital role in the outcome. Let’s explore how to get started.
Conditioning The Clay
Conditioning clay makes it soft and pliable. This step is essential. Use your hands or a clay roller. Knead the clay until it is smooth. Ensure there are no cracks or dry spots. Proper conditioning prevents breakage during baking.
Work the clay in small batches. This makes it easier to handle. Warm the clay in your hands. The heat helps soften it. Continue kneading until it feels consistent. This process is vital for quality results.
Shaping And Sculpting
Shaping clay allows creativity to flow. Start by forming basic shapes. Use your hands or simple tools. A toothpick or butter knife works well. Focus on the details you want. Be patient as you sculpt. Each piece takes time.
Keep shapes even and balanced. This helps during baking. Uneven shapes might bake poorly. Smooth out any rough edges. Doing so ensures a polished finish. Check for any imperfections. Fix them before baking.
Baking Polymer Clay Safely
Baking polymer clay safely in a toaster oven requires careful attention. You need to ensure the right temperature and baking time. These steps prevent burning or underbaking your creations. Follow these guidelines for smooth and successful clay projects.
Setting The Correct Temperature
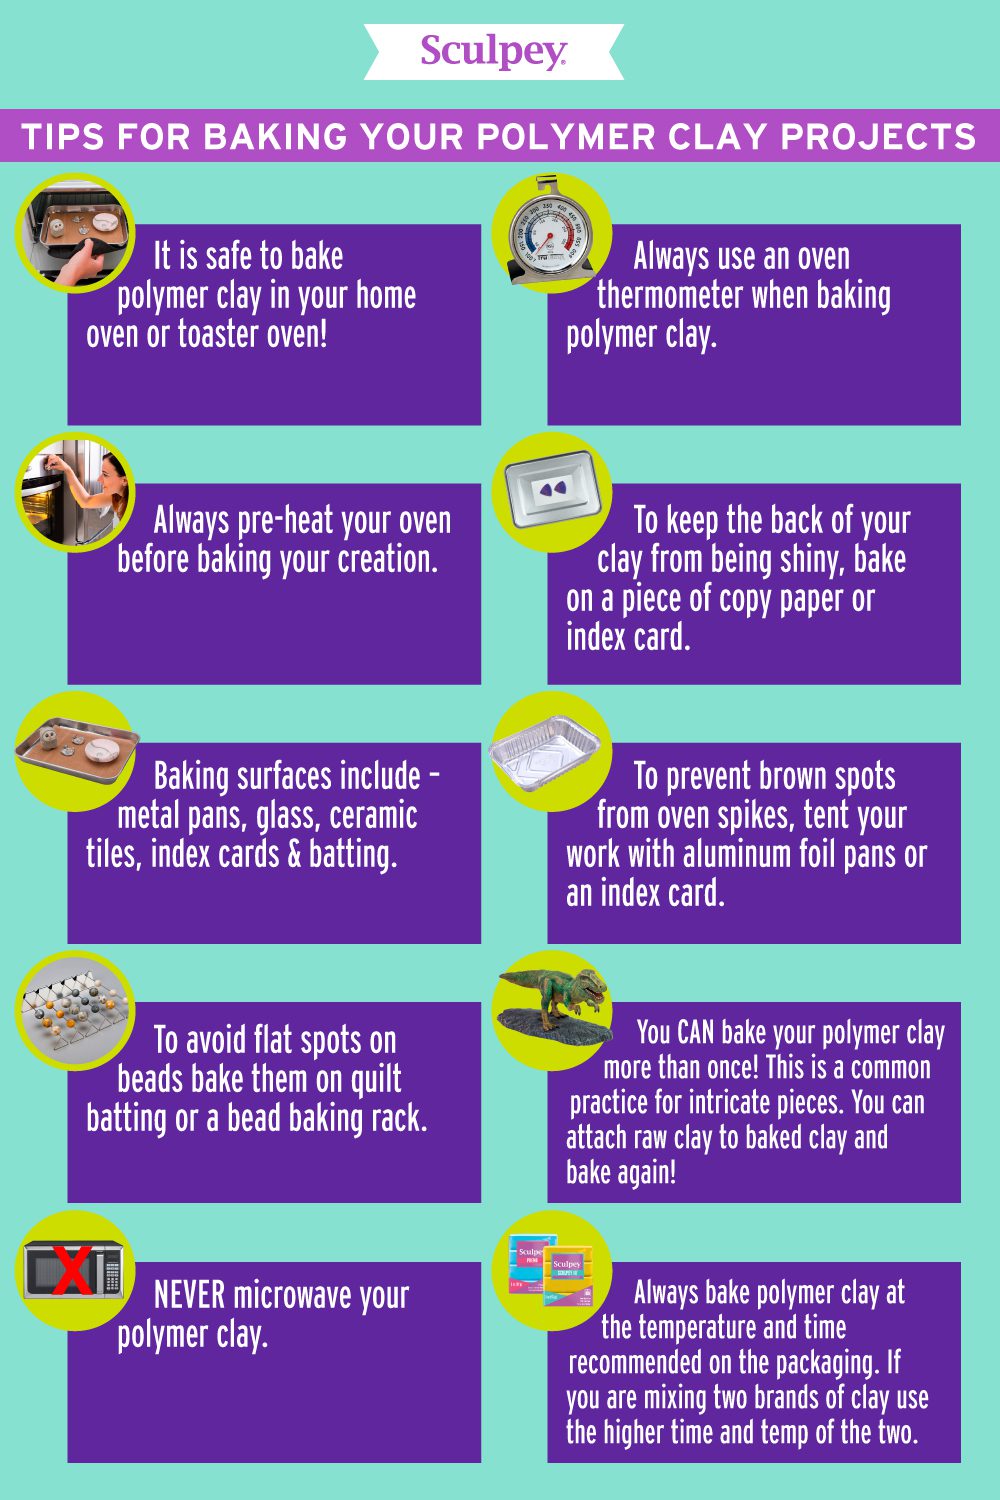
Choose a toaster oven with adjustable temperature settings. Polymer clay usually bakes at 265-275 degrees Fahrenheit. Always check the clay package for specific temperature recommendations. Use an oven thermometer for accurate readings. This helps avoid overheating your clay.
Monitoring Baking Time
Each clay project requires different baking times. Smaller items may need less time than larger ones. Most polymer clay takes 15-30 minutes to bake. Check the clay package for exact times. Set a timer to avoid overbaking. Watch your clay closely during the final minutes. Overbaked clay can become brittle and discolored.
Troubleshooting Common Issues
Working with polymer clay in a toaster oven can be a fun activity. Yet, issues might arise. Understanding common problems helps in achieving the best results. This section covers solutions for frequent issues faced during baking.
Avoiding Burns And Overcooking
Monitor the toaster oven temperature closely. Temperatures can vary. Use an oven thermometer for accuracy. Always preheat before placing the clay inside. Set a timer to avoid overcooking. Check the clay halfway through the baking process. This ensures even cooking and prevents burns.
Preventing Cracks And Bubbles
Cracks often result from sudden temperature changes. Warm the clay gradually before baking. Avoid placing cold clay directly in a hot oven. Bubbles may form due to trapped air. Knead the clay thoroughly to remove air pockets. Use a needle to pop visible bubbles before baking. This ensures a smooth finish.
Creative Crafting Ideas
Craft unique polymer clay creations using a toaster oven for easy baking. This method ensures even heating for durable, vibrant pieces. Ideal for small projects and home crafting.
### Creative Crafting IdeasTurning polymer clay into artistic pieces using a toaster oven can spark your creativity in surprising ways. Imagine having a mini kiln right in your kitchen, ready to bring your ideas to life. Whether you’re a seasoned crafter or a curious beginner, the possibilities are endless.###Jewelry And Accessories
Polymer clay is perfect for crafting unique jewelry pieces. Picture creating bespoke earrings that mirror your personal style or a necklace pendant that becomes a conversation starter.You can shape the clay into various forms like beads, geometric shapes, or delicate flowers. After baking them in your toaster oven, you can add jump rings and hooks to finish your custom accessories.Experiment with colors and textures. Try marbling different clay colors for a dreamy effect or using metallic powders for a luxurious touch.###Decorative Home Items
Consider making decorative items that add a personal flair to your living space. Crafting with polymer clay allows you to design coasters, picture frames, or even small sculptures.These projects not only enhance your home but also make great gifts for friends and family. Imagine the joy of gifting a hand-crafted item that you created in your toaster oven.You might be surprised at how versatile polymer clay can be. Why not try making a set of custom drawer handles or colorful plant markers for your garden?Have you ever transformed a simple tool into a crafting essential? Share your toaster oven clay creations and inspire others to get creative. Your kitchen might just be the new art studio you never knew you had.Care And Maintenance Of Toaster Oven
Using a toaster oven to bake polymer clay is convenient. To keep it working well, regular care is essential. A clean and maintained toaster oven ensures better baking results. It also prolongs the life of the appliance. Let’s explore some tips to keep your toaster oven in top shape.
Cleaning Tips
Clean the toaster oven after every use. This prevents build-up of residue. First, unplug the appliance and let it cool down. Remove any trays or racks inside. Wash them with warm soapy water. Use a damp cloth to wipe the interior walls. Avoid using abrasive cleaners; they can scratch surfaces. Clean the exterior with a soft cloth. Ensure all parts are dry before reassembling.
Regular Maintenance
Check the toaster oven’s cord regularly. Look for fraying or damage. Replace the cord if needed. Inspect the door seal. Ensure it closes properly to avoid heat loss. Test the oven’s temperature accuracy. Use an oven thermometer for this purpose. Adjust the settings if the temperature is off. Keep the toaster oven in a well-ventilated area. This prevents overheating and ensures safe operation.
Credit: www.sculpey.com
Frequently Asked Questions
Can You Bake Polymer Clay In A Toaster Oven?
Yes, you can. A toaster oven works well for polymer clay. Ensure temperature accuracy.
What Temperature Is Best For Baking Polymer Clay?
Bake polymer clay at 265°F to 275°F. Check packaging for specific instructions. Avoid overheating.
How Long Should Polymer Clay Bake In A Toaster Oven?
Bake polymer clay for 15-30 minutes. Time depends on thickness. Monitor closely to prevent burning.
Is A Toaster Oven Safe For Polymer Clay?
Yes, it’s safe. Ensure proper ventilation. Avoid cross-contamination with food items.
Does Polymer Clay Need Preheating In Toaster Oven?
Yes, preheat the toaster oven. Ensure even baking. Helps maintain temperature consistency.
Conclusion
Creating with polymer clay in a toaster oven is simple. It offers an easy and cost-effective method. Perfect for small projects and quick bakes. Ensure the oven maintains a consistent temperature. This prevents clay from burning or under-baking. Always work in a well-ventilated space for safety.
Experiment with different techniques and designs. Let your creativity guide you. Enjoy crafting unique pieces with ease. Remember to follow the manufacturer’s instructions for best results. Happy crafting!