You rely on your Roomba to keep your floors spotless, but what happens when it suddenly stops charging? It’s frustrating, right?
A Roomba that’s not charging can disrupt your cleaning routine, leaving you with a mess and a headache. You might find yourself wondering if it’s a simple fix or if you’ll need to invest in a new one. Don’t worry—this article is designed to help you solve this problem without the stress.
By understanding the common reasons behind this issue, you’ll be back to enjoying a clean home in no time. Ready to get your Roomba back on track? Let’s dive into the solutions that can save your day and your device.

Credit: www.youtube.com
Common Charging Issues
Roomba not charging can frustrate users. Dirty charging contacts often cause this issue. Check the power outlet and battery for faults.
When your Roomba isn’t charging, it feels like your robotic helper is on vacation, leaving you to pick up the slack. If your Roomba suddenly stops powering up, you’re not alone. Many users face common charging issues that can be quickly resolved with a little troubleshooting. Let’s explore the typical problems that can affect your Roomba’s charging and how you can get it back to work.Check The Charging Contacts
A frequent cause of charging issues is dirty or misaligned charging contacts. Over time, dust and debris can accumulate, preventing a good connection between the Roomba and the charging dock. Regularly cleaning the contacts with a dry cloth can ensure a better charge. You might be surprised how a simple wipe can make a difference.Inspect The Charging Dock
A malfunctioning charging dock can also be the culprit. Ensure that the dock is plugged in and the power indicator light is on. If the light is off, try plugging the dock into a different outlet. Just like humans need a consistent power source, so does your Roomba.Examine The Battery
The battery may be the root of the problem if your Roomba still isn’t charging. Roomba batteries have a lifespan, and after a few years, they may need replacing. If your Roomba’s run time has decreased significantly, consider investing in a new battery. It’s a small change that can bring back your Roomba’s vigor.Reset Your Roomba
Sometimes, a system reset can solve mysterious charging issues. To reset, hold down the “Clean” button for about 10 seconds until you hear a beep. This simple action can often clear any glitches and restore normal charging behavior. It’s like giving your Roomba a fresh start.Consult The User Manual
If all else fails, your Roomba’s user manual is a valuable resource. It contains specific troubleshooting steps tailored to your model. While it might seem old school, flipping through the manual can often provide the guidance needed to solve the problem. Consider it your Roomba’s go-to advice column.Before you decide your Roomba is beyond repair, try these practical steps. By addressing these common issues, you can often get your Roomba back to its duty of keeping your floors spotless. What’s your experience with Roomba charging issues? Share your insights in the comments!Checking Power Supply
Experiencing issues with your Roomba not charging can be frustrating. Checking the power supply is crucial. Often, the problem lies in simple overlooked details. Understanding the power supply ensures your Roomba runs smoothly.
Inspect The Power Outlet
Begin by checking the power outlet. Plug another device into the outlet. This confirms if the outlet is functioning. If the device doesn’t work, the outlet might be faulty. Consider using a different outlet.
Examine The Charging Dock
Ensure the charging dock is correctly plugged in. Look for any damage or loose connections. Examine the dock’s pins for dirt or debris. Clean them gently if needed. A clean dock ensures efficient charging.
Verify Power Cords
Check the power cords for wear and tear. Look for any visible damage or fraying. Replace damaged cords immediately. An intact power cord is essential. It ensures a steady flow of electricity.
Check For Indicator Lights
Observe the indicator lights on the charging dock. These lights can reveal charging issues. If lights are off, there may be a power problem. Investigate further if lights are blinking. Blinking lights often signal a malfunction.
Confirm Voltage Compatibility
Verify the voltage compatibility of your Roomba. Ensure your power supply matches its requirements. Different models have different voltage needs. Incorrect voltage can prevent proper charging.
Inspecting Charging Contacts
Roomba vacuums are popular for their autonomous cleaning features. But sometimes they face charging issues. One common problem is dirty or obstructed charging contacts. Inspecting these contacts can often resolve the issue quickly. Proper maintenance ensures optimal performance and longevity of your Roomba.
Inspect The Contacts For Dirt Or Debris
Charging contacts can collect dust and debris over time. This can prevent the Roomba from charging properly. Regularly check the contacts for any visible dirt. Use a soft cloth to gently wipe them clean. Ensure no residue remains.
Check For Rust Or Corrosion
Moisture can cause rust or corrosion on the contacts. Inspect them closely for any signs of rust. Corroded contacts disrupt the charging process. If you find rust, gently clean it with rubbing alcohol. Use a cotton swab for precise cleaning.
Ensure Proper Alignment
The charging contacts must align correctly with the base. Misalignment can stop the charging process. Place the Roomba on the charging station. Listen for the confirmation beep. If there’s no beep, adjust its position. Ensure it sits securely on the base.
Test The Charging Dock
Sometimes the issue lies with the charging dock. Ensure the dock is plugged in and the power light is on. Try plugging it into a different outlet. Faulty outlets can prevent proper charging. If the issue persists, consider replacing the dock.
Consider Contact Replacement
If cleaning doesn’t solve the issue, replacement may be necessary. Worn contacts might not charge the Roomba effectively. Check the user manual for guidance. Purchasing compatible replacements ensures proper function. This can extend the lifespan of your device.
Cleaning Roomba Sensors
Cleaning Roomba sensors can feel like a chore, but it’s a crucial step in ensuring your device charges effectively. Imagine having a Roomba that’s just not holding its charge. It’s frustrating, right? Often, the culprit is dust or debris covering its sensors, affecting its ability to dock properly and recharge. Regular maintenance can prevent these issues, keeping your Roomba running smoothly.
How To Identify Dirty Sensors
Start by observing your Roomba’s behavior. Is it struggling to find its dock? Does it randomly stop working? These are signs that the sensors might be dirty. A quick inspection can reveal dust or dirt accumulation. Take a closer look at the infrared sensors. If they’re covered in grime, it’s time to clean them.
Gathering Your Cleaning Supplies
You don’t need fancy tools to clean Roomba sensors. A soft, dry cloth and some compressed air work wonders. Avoid using wet wipes or cleaning solutions, as moisture can damage the sensors. You might be surprised how simple tools can make a big difference.
Step-by-step Sensor Cleaning
Begin by turning off your Roomba. Flip it over to access the sensors. Use the dry cloth to gently wipe each sensor. Apply compressed air to blow away stubborn debris. Repeat this process every few weeks. Notice how your Roomba docks effortlessly afterward?
Benefits Of Regular Sensor Cleaning
Cleaner sensors mean more efficient charging. Your Roomba will last longer and perform better. Imagine the relief of not having to troubleshoot charging issues frequently. Regular cleaning saves you time and stress, allowing your Roomba to function at its best.
Engaging Your Routine
How often do you check your Roomba sensors? Creating a routine can make cleaning a habit. Consider setting a reminder on your phone. Are you ready to see a noticeable improvement in your Roomba’s performance? Try cleaning the sensors today and experience the difference.
Resetting The Roomba
Experiencing issues with your Roomba not charging? Resetting the device can often solve this problem. Simply hold down the “Clean” button for a few seconds to reboot it. This quick fix may restore its charging function.
Resetting your Roomba can be the magic trick to jumpstart its charging capabilities. Sometimes, like all devices, your Roomba might just need a little reboot to get back on track. It’s akin to giving it a fresh start, a chance to shake off any minor glitches that might be blocking its charging efficiency.How To Reset Your Roomba
Resetting your Roomba is not as daunting as it sounds. It’s a straightforward process that can often solve charging issues. Start by pressing and holding the “Clean” button for about 10 seconds. Release, and you’ll hear a beep indicating the reset is complete.Why Resetting Can Solve Charging Issues
You might wonder why a simple reset can resolve charging problems. The truth is, sometimes your Roomba’s internal memory can become cluttered, affecting its charging cycle. A reset clears this clutter, allowing it to recognize the charging dock more effectively. Think of it as clearing the cache on your smartphone for smoother performance.When To Consider A Reset
Not sure if a reset is necessary? Consider how often your Roomba struggles to charge. If it’s a frequent issue, a reset is worth a try. But if it’s a rare occurrence, you might want to explore other solutions first. Resetting is a quick fix, but it’s not a universal remedy for all charging woes.Sharing Personal Experience
I once faced persistent charging issues with my Roomba, and a reset was my go-to solution. It was frustrating seeing my Roomba idle, but the reset restored its vitality in minutes. Have you tried resetting your Roomba yet? You might be surprised at how it rejuvenates your device.Potential Pitfalls Of Frequent Resets
Resetting too often can lead to wear and tear on your Roomba’s components. It’s crucial to use this method sparingly. If you find yourself resetting frequently, it might indicate a deeper issue that needs attention. Could it be time for a professional check-up?Remember, your Roomba is designed to make life easier, not harder. Resetting is one step you can take to ensure it performs optimally without unnecessary hassle. Keep your Roomba’s manual handy for reference, and don’t hesitate to reach out to customer support for persistent issues.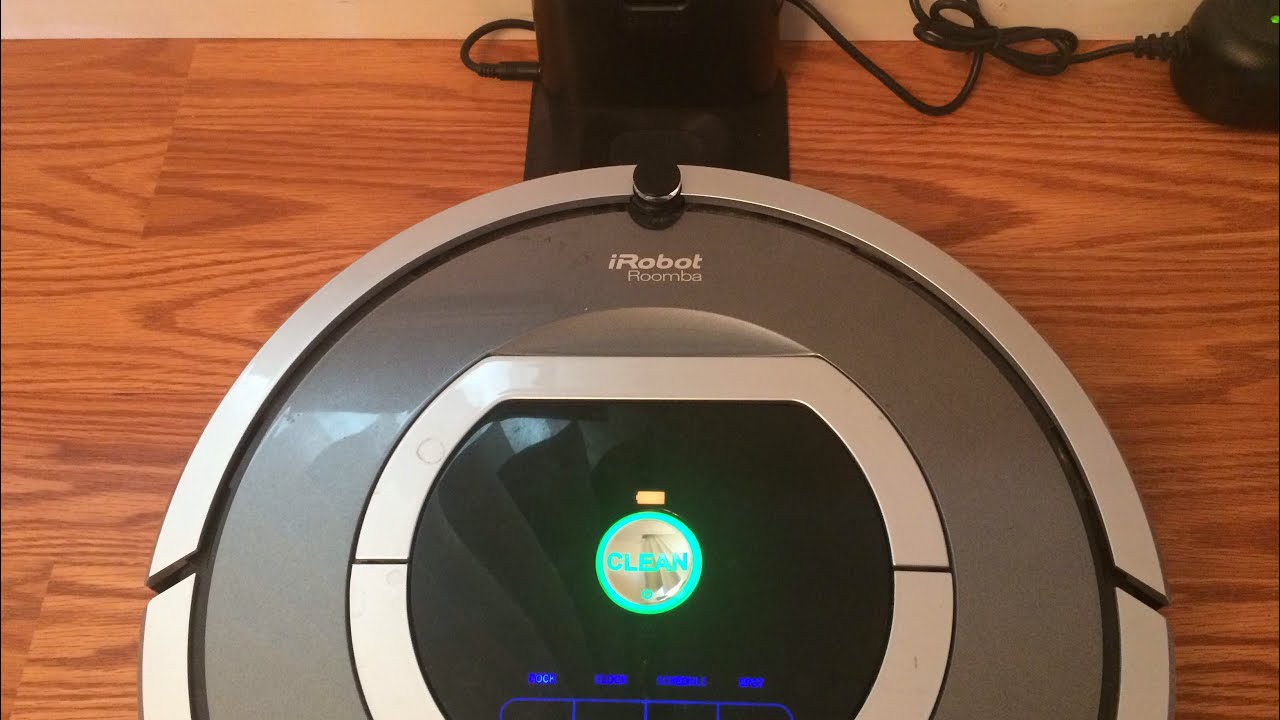
Credit: www.youtube.com
Battery Health Check
Roomba not charging can signal issues with battery health. Regular battery checks help identify problems early. Keeping connections clean and ensuring proper placement on the dock can improve charging efficiency.
Checking the health of your Roomba’s battery can make a significant difference in its performance. It can be frustrating when your Roomba refuses to charge, but often, the solution lies in understanding the battery’s condition. By performing a routine battery health check, you can ensure your Roomba remains efficient and reliable.###Inspect The Battery Contacts
Over time, the battery contacts can gather dust and debris, which can prevent the Roomba from charging properly.Take a moment to inspect these contacts. Are they clean and shiny, or do they look grimy?Use a soft cloth to gently wipe away any dirt.###Assess Battery Age
Batteries have a lifespan, and your Roomba’s might be nearing its end.If your battery is more than two years old, it might be time to consider a replacement.Keep track of your Roomba’s purchase date to easily assess this.###Test With A Multimeter
A multimeter can provide insights into the battery’s current health.Set the multimeter to the correct voltage setting and test the battery.If the reading is significantly lower than expected, it might be time for a new battery.###Perform A Reset
Sometimes, a simple reset can solve charging issues.Remove the battery, wait a few minutes, and then reinsert it.Restart your Roomba and observe if this simple action revitalizes its charging ability.###Monitor Battery Performance
Notice how long your Roomba runs before needing a recharge.Does it clean for the usual time, or is the duration getting shorter?Frequent short runs can indicate a battery that is losing its efficiency.###Consider Environmental Factors
Where you store and charge your Roomba can impact its battery life.Ensure it’s in a cool, dry place, as extreme temperatures can degrade the battery.A consistent environment can prolong your battery’s lifespan.By taking these steps, you can maintain your Roomba’s battery health, ensuring it continues to serve you well. Have you checked your Roomba’s battery lately? If not, now might be the perfect time.Using The Home Base Correctly
Proper placement of the Roomba on its home base is crucial for effective charging. Ensure the docking station is on a flat surface, free from obstructions. Regularly clean the charging contacts to maintain optimal performance.
When your Roomba isn’t charging, it can be frustrating. One common culprit is not using the Home Base correctly. Ensuring your Roomba docks properly is crucial for keeping it powered and ready to clean. Let’s dive into some practical steps to get it right.Understanding The Home Base Setup
The Home Base is where your Roomba rests and charges. Position it on a hard, flat surface against a wall. Avoid placing it on carpets or near stairs. These placements can interfere with the docking process.Ensure there’s at least 1.5 feet of space on each side and 4 feet in front of the Home Base. This helps your Roomba easily find its way back. Check that the power cord is securely connected. A loose connection can prevent charging.Keeping The Home Base Clean
Dust and debris can accumulate on the Home Base’s charging contacts. This prevents a good connection. Regularly wipe the contacts with a dry cloth.I once noticed my Roomba wasn’t charging consistently. A quick clean of the contacts solved the issue. Have you checked the cleanliness of your Home Base lately?Monitor Home Base Placement
Electronics nearby can interfere with the Roomba’s docking signals. Keep the Home Base away from items like TVs or speakers.Consider if there are objects that might block the Roomba’s path. Even a small toy can create issues. Rearrange if needed to allow a clear path.Test The Power Source
Sometimes, the outlet is the problem. Test the outlet with another device to ensure it’s working. If it’s not, try a different outlet for your Home Base.Are you sure the power is on? It might sound simple, but a switch can accidentally be turned off.By taking these steps, you can ensure your Roomba charges properly. Is your Roomba back to its cleaning duties? Share your experiences and tips with others who might be facing similar issues.Firmware Updates
Keeping your Roomba in top condition ensures it performs at its best, and one crucial aspect of this is firmware updates. These updates are like small tweaks that enhance the Roomba’s functionality. If your Roomba isn’t charging, it could be a firmware issue, and updating it might solve the problem.
How To Check For Firmware Updates
Your Roomba is smart, but it needs your help to stay updated. First, connect your Roomba to the iRobot app on your smartphone. Look for the option labeled “Check for Updates.” It’s usually found in the settings section. This step ensures your Roomba is running on the latest software.
Updating Firmware Through The Irobot App
Once you find that updates are available, follow the prompts on the app. The process is straightforward—simply tap “Update Now.” Ensure your Roomba is on its charging dock during this process. This guarantees a smooth and uninterrupted update.
Benefits Of Keeping Firmware Updated
Firmware updates often fix bugs and improve battery management. I once had a similar issue with my Roomba not charging properly. After updating the firmware, it started charging efficiently again. Updates can also add new features, enhancing your cleaning experience.
Troubleshooting Failed Updates
If the update fails, don’t panic. Try restarting your app and reconnecting to the Roomba. Check your Wi-Fi connection—weak signals can interrupt the process. If problems persist, contact iRobot support for help. They can guide you through resolving the issue.
Why Regular Updates Matter
Skipping updates can lead to outdated software, affecting performance and battery life. Imagine missing out on an improved cleaning algorithm just because of an ignored update. Regular updates keep your Roomba working efficiently, saving you time and effort.
So, have you checked your Roomba’s firmware lately? Taking a few minutes to update can make a world of difference in its performance. What’s stopping you from ensuring your Roomba is operating at its best?
Contacting Customer Support
Dealing with a Roomba that refuses to charge can be frustrating. You might have tried all the troubleshooting steps you can think of, but sometimes the best solution is to contact customer support. They have the expertise to guide you through the problem and potentially offer solutions you hadn’t considered.
Why Contact Customer Support?
Customer support is there to help you when you’re stuck. They have insights into common issues that might not be publicly available. Plus, they can provide tailored advice specific to your Roomba model and situation.
Imagine spending hours searching online forums, only to find a quick fix from a support agent in minutes. That’s the advantage of reaching out to the experts directly.
How To Reach Out Effectively
Before you contact support, gather as much information as possible. This includes your Roomba’s model number, purchase date, and a detailed description of the issue.
Be specific about what you’ve tried and any error codes you might have seen. This helps the support team diagnose the problem faster and offer a solution more efficiently.
What To Expect
Support teams often start with basic troubleshooting steps. Don’t be discouraged if they suggest something you’ve already tried—sometimes a fresh perspective can spot what you missed.
If the issue is complex, they might escalate it to a higher level of support or offer repair options. Always ask about warranty coverage or potential costs upfront.
Tips For A Smooth Experience
Keep your communication polite and concise. Remember, the person on the other end is there to help, and a positive attitude can make the process smoother.
If you don’t understand something, ask for clarification. You deserve to fully understand the advice given to you. It’s your device and your peace of mind at stake.
Reflecting On The Value Of Support
Have you ever solved a problem with your Roomba by contacting customer support? Reflect on how that interaction helped you. Did it save you time or prevent further frustration?
Customer support can be a valuable resource, and it’s worth reaching out when you’re in a bind. They can offer solutions that you might not have thought of, helping you get back to a clean home faster.

Credit: www.businessinsider.com
Frequently Asked Questions
Why Is My Roomba Not Charging?
Check the power source. Ensure the charging dock is plugged in and working. Inspect the battery for damage.
How Do I Reset My Roomba Battery?
Press and hold the “Clean” button for 10 seconds. Release to reset the battery. Try charging again.
Can A Faulty Charger Affect Roomba Charging?
Yes, a faulty charger can prevent Roomba from charging. Test with another charger to confirm if it’s the problem.
How Often Should I Replace Roomba Battery?
Replace every 1-2 years, depending on usage. Frequent charging cycles can reduce battery life over time.
Do Dirty Contacts Impact Roomba Charging?
Yes, dirty contacts can hinder charging. Clean them with a dry cloth regularly to ensure proper connection.
Conclusion
Troubleshooting a Roomba not charging can be straightforward. Start with checking the power source. Ensure the charger is plugged in properly. Inspect the battery contacts for dust or debris. Cleaning them can help. If problems persist, consider replacing the battery.
Regular maintenance extends Roomba’s lifespan. Keep it clean and in good working order. Simple steps can prevent charging issues. Understanding these basics ensures your Roomba runs smoothly. Happy cleaning!