Turning on a Luxpro thermostat is simple. It ensures comfort in your home.
Luxpro thermostats are popular for their ease of use and reliability. Whether you are new to using this thermostat or just need a refresher, this guide will help. Learning to operate your Luxpro thermostat ensures you can control the temperature with ease.
This guide will walk you through the steps to turn on your Luxpro thermostat efficiently. You’ll find it straightforward and quick, making your home comfortable in no time. Let’s dive in and explore the steps to get your Luxpro thermostat up and running.

Credit: www.amazon.com
Unboxing And Initial Setup
Setting up your Luxpro thermostat can seem daunting. But it’s easier than you think. Let’s walk through the unboxing and initial setup process.
What’s In The Box
Inside the Luxpro thermostat box, you’ll find several items. There’s the thermostat unit itself. You will also see a mounting plate. The box includes screws and wall anchors. These are for securing the thermostat to the wall. A user manual and a quick start guide are also included. Finally, you will see a set of batteries.
Installing The Batteries
The next step is to install the batteries. Locate the battery compartment on the thermostat unit. Open the compartment and insert the provided batteries. Ensure the batteries are placed in the correct orientation. Once the batteries are in place, close the battery compartment. Your Luxpro thermostat is now powered on and ready for further setup.
Basic Controls
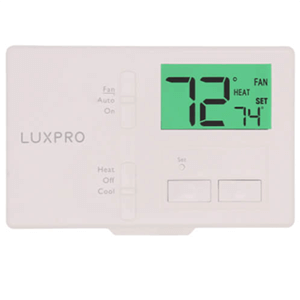
Understanding the basic controls of your Luxpro thermostat can make managing your home’s temperature a breeze. This section will guide you through the essential functions, ensuring you can easily navigate and use your thermostat.
Power Button Location
The power button on your Luxpro thermostat is easy to find. It’s usually located on the front panel. Look for a small button marked with the power symbol. Press this button to turn the thermostat on or off. This simple action will activate your device, preparing it for further settings adjustments.
Navigating The Interface
Once your thermostat is powered on, you will see the main interface. The screen displays the current temperature and other key information. Use the arrow buttons to navigate through different settings. These buttons are typically located below the screen.
To adjust the temperature, simply press the up or down arrows. This will increase or decrease the set temperature. The screen will update to show your new setting. Most Luxpro models have a menu button. Press this to access more advanced options like fan settings and scheduling.
Remember to press the save button after making changes. This will ensure your new settings are applied. The interface is designed to be user-friendly, so you should find it intuitive to use.
Setting The Date And Time
Setting the date and time on your Luxpro thermostat is essential. It ensures accurate temperature control and scheduling. Let’s walk through the steps to set the date and time correctly.
Accessing Date And Time Settings
First, locate the menu button on your thermostat. Press it to access the main menu. Look for the settings option and select it. From there, find the date and time settings.
Adjusting The Clock
Use the arrow buttons to navigate to the date setting. Adjust the day, month, and year using the same buttons. Press confirm after setting the date.
Next, move to the time setting. Use the arrow buttons to set the hour and minute. Ensure you select AM or PM correctly. Confirm the time to save changes.
Programming Temperature Settings
Programming temperature settings on your Luxpro thermostat can greatly enhance comfort and energy efficiency. This guide will help you understand and configure your thermostat to meet your needs. We will discuss using pre-set modes and customizing temperature schedules.
Using Pre-set Modes
Luxpro thermostats come with several pre-set modes for your convenience. These modes include options like ‘Home,’ ‘Away,’ and ‘Sleep.’ Each mode has a default temperature setting. You can select a mode based on your current activity. For instance, use the ‘Home’ mode while at home during the day. The ‘Away’ mode can save energy while you are out. ‘Sleep’ mode ensures comfortable temperatures for a good night’s rest. To select a mode, simply press the mode button and choose your preferred option.
Customizing Temperature Schedules
Customizing temperature schedules allows you to create a personalized heating and cooling plan. Begin by accessing the schedule settings on your Luxpro thermostat. You can set different temperatures for various times of the day. For example, you might want a cooler temperature in the morning and a warmer one in the evening. Use the thermostat’s interface to set your desired temperatures. You can create different schedules for weekdays and weekends. This flexibility ensures that your home is always at a comfortable temperature. Adjust the settings as needed to fit your lifestyle. Regular updates to your schedule can help maintain comfort and efficiency.
Advanced Features
The Luxpro thermostat offers several advanced features that improve comfort and efficiency. These features are designed to be user-friendly and provide better control over your home’s environment. Let’s explore some of the key advanced features below.
Humidity Control
Humidity control is an important feature of the Luxpro thermostat. It helps maintain a comfortable indoor environment. This feature allows you to set the desired humidity level in your home. Proper humidity control prevents the air from becoming too dry or too damp. This is especially useful in areas with extreme weather conditions.
Energy-saving Modes
Energy-saving modes help you reduce energy consumption. The Luxpro thermostat offers several energy-saving options. These modes adjust the temperature settings automatically. This ensures your home remains comfortable while using less energy. Over time, this can lead to significant cost savings on your energy bills.
The thermostat can learn your schedule and adjust settings accordingly. It can lower the temperature when you are not at home. It can also increase it just before you return. This helps maintain comfort without wasting energy.

Credit: www.youtube.com
Troubleshooting Common Issues
Experiencing issues with your Luxpro Thermostat can be frustrating. This guide will help you troubleshoot common problems. From screen display issues to temperature discrepancies, we’ve got you covered.
Screen Display Problems
A blank or unresponsive screen is a common issue with thermostats. Here are some steps to fix it:
- Check the batteries: Replace them if necessary. Use high-quality batteries for the best results.
- Reset the thermostat: Locate the reset button, usually on the front or side. Press and hold it for 5 seconds.
- Inspect the wiring: Ensure all wires are connected properly. Loose connections can cause screen issues.
If the screen still does not work, consider contacting customer support for further assistance.
Temperature Discrepancies
Sometimes, the thermostat may not display the correct temperature. Here’s how to address this:
- Calibrate the thermostat: Many models allow you to adjust the temperature reading. Check the user manual for instructions.
- Check the location: Ensure the thermostat is not near heat sources or drafty areas. These can affect readings.
- Clean the sensor: Dust and debris can interfere with the temperature sensor. Gently clean it with a soft cloth.
If you still encounter temperature discrepancies, it might be a hardware issue. Contact Luxpro support for more help.
Maintenance Tips
To keep your Luxpro Thermostat working efficiently, regular maintenance is essential. Proper care can extend its lifespan and ensure accurate temperature readings. Follow these simple tips to maintain your thermostat and keep it in good condition.
Cleaning The Thermostat
Dirt and dust can affect the thermostat’s performance. Use a soft, dry cloth to clean the surface. Avoid using any liquid cleaners or sprays. Gently wipe the display and buttons to remove any grime. This will help maintain clear visibility and smooth operation.
Replacing The Batteries
Weak batteries can cause the thermostat to malfunction. Check the battery status regularly. Replace the batteries at least once a year. Use fresh, high-quality batteries for the best performance. Turn off the thermostat before removing the old batteries. Insert the new batteries, ensuring the correct polarity. Turn the thermostat back on and check if it functions properly.
Credit: tampa.yorknow.com
Frequently Asked Questions
How Do I Turn On My Luxpro Thermostat?
Press the ‘Power’ button. The screen should light up, indicating it’s on.
Why Is My Luxpro Thermostat Not Turning On?
Check the batteries. Replace them if needed. Ensure the thermostat is properly connected to the power source.
What Settings Should I Use For My Luxpro Thermostat?
Set your desired temperature using the up and down arrows. Refer to the manual for advanced settings.
How Do I Reset My Luxpro Thermostat?
Press and hold the ‘Reset’ button for a few seconds. The screen will restart.
How Can I Change The Mode On My Luxpro Thermostat?
Press the ‘Mode’ button. Choose from Heat, Cool, or Auto by pressing the button until the desired mode appears.
Conclusion
Turning on your Luxpro thermostat is simple and quick. Follow the steps outlined above. Ensure your settings are correct for optimal comfort. A well-adjusted thermostat can save energy. Regular maintenance helps in smooth functioning. Keep this guide handy for future reference.
Enjoy a comfortable home environment effortlessly. Thank you for reading. Happy heating and cooling!