Have you ever used a magic eraser to clean your walls, only to be left with pesky residue that just won’t budge? You’re not alone.
While magic erasers are fantastic for removing scuffs and stains, they can sometimes leave behind a stubborn trail. This residue can be frustrating, especially when you’re striving for spotless walls. The good news is, you don’t have to live with it.
You’ll discover straightforward, effective techniques to eliminate magic eraser residue quickly and effortlessly. Imagine the satisfaction of seeing your walls restored to their pristine state. Keep reading to find out how you can achieve that in just a few simple steps.

Credit: www.reddit.com
Prepping The Area
Prepare the area by clearing any loose items from the wall. Ensure the wall is dry and clean. Use a gentle cloth to wipe away dust or dirt, setting the stage for easy residue removal.
Getting Magic Eraser residue off your wall might seem like a small task, but prepping the area before you start is crucial to achieving the best results. This step ensures you don’t end up causing more harm than good. With a little preparation, you can make the whole process smoother and more effective.###Gather Necessary Materials
Before you begin, collect all the tools you will need for the job. At a minimum, you’ll need a soft cloth, a bucket of warm water, and a mild detergent.It’s a good idea to have some white vinegar on hand, in case the residue is stubborn. If you don’t have these items at home, a quick trip to your local store should do the trick.Organizing your materials in advance saves time and keeps you focused on the task. It prevents the frustration of having to stop halfway through because you forgot something.###Protect Surrounding Surfaces
Protecting the surrounding surfaces is an essential part of the preparation. You don’t want to fix one issue only to create another.Use painter’s tape to cover baseboards and adjacent walls. This will prevent any cleaning solution from accidentally dripping onto them.If you’re working near a carpeted area, lay down some plastic sheeting or old towels. This precaution will keep your floor safe from spills and splashes.Thinking ahead can prevent unnecessary cleaning and save you time in the long run. How often do we wish we’d taken a few extra minutes for preparation before diving into a task?Effective Cleaning Methods
Gently remove Magic Eraser residue from walls using a damp cloth. Softly wipe the affected area until clean. Ensure the cloth is only slightly wet to prevent any damage. For stubborn spots, add mild dish soap. Rinse thoroughly and dry with a clean towel.
Magic Eraser residue on your wall can be surprisingly stubborn. You might have thought your cleaning task was complete only to find a smudge left behind. But don’t worry! With the right approach, you can easily tackle this issue. Let’s dive into some effective cleaning methods to ensure your walls are spotless and residue-free.Using Mild Detergent Solution
A mild detergent solution is often your first line of defense. Mix a small amount of mild detergent with warm water. Use a soft cloth or sponge to gently wipe the area with residue.Remember not to scrub too hard. You don’t want to damage the paint or wallpaper. Rinse the area with clean water and dry it with a towel.Have you noticed that sometimes a simple solution works wonders? Just like when you manage to solve a problem with something you already have at home.Employing Vinegar Mixture
Vinegar is another effective tool in your cleaning arsenal. Create a mixture of equal parts white vinegar and water. Dip a clean cloth into this solution and gently rub the affected area.Vinegar’s natural acidity helps break down residue. If you’re concerned about the vinegar smell, don’t be; it dissipates quickly.Isn’t it interesting how a common kitchen ingredient can be such a powerful cleaner? Plus, it’s an eco-friendly alternative to chemical cleaners.Both of these methods are simple, yet highly effective. Which one will you try first? Remember, the key is gentle cleaning to preserve the beauty of your walls.Gentle Scrubbing Techniques
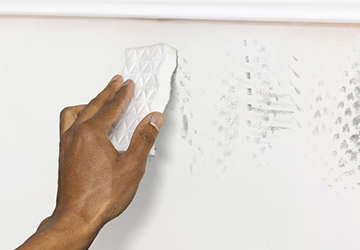
Easily remove Magic Eraser residue with gentle scrubbing techniques. Dampen a soft cloth with warm water and mild soap. Gently rub the affected wall areas until clean, avoiding harsh scrubbing to protect the paint.
Removing Magic Eraser residue from walls can be a bit tricky if you’re not sure how to proceed. While these erasers are excellent at tackling tough marks, they can leave behind a faint residue that might be noticeable on certain wall surfaces. The key is to use gentle scrubbing techniques that effectively clean without causing damage. Let’s dive into some practical steps you can take.Choosing The Right Sponge
Start with selecting a sponge that complements your wall type. A soft, non-abrasive sponge is ideal. Sponges with a smooth surface help prevent scratching or dulling the paint finish.Remember that the sponge’s texture can make a significant difference. Opt for a sponge that’s slightly damp, not dripping, to avoid water stains.Proper Scrubbing Motion
When scrubbing, employ a gentle, circular motion. This helps in evenly distributing pressure and reduces the risk of erasing paint or leaving uneven patches.Apply minimal pressure at first. If the residue persists, gradually increase pressure while keeping the motion consistent.If you’ve ever tried erasing pencil marks from paper, you know that pressing too hard can tear the paper. The same principle applies here. Gentle, consistent strokes work best.By using these techniques, you can effectively remove residue without damaging your walls. Have you found other methods that work? Share your experiences in the comments!Alternative Solutions
Magic Eraser residue can be a pesky problem, leaving unexpected marks on your walls. If you’ve tried scrubbing it away without success, don’t worry. There are alternative solutions that can help you tackle this issue effectively. These methods are not only practical but also easy to implement, making your wall cleaning experience less stressful and more rewarding. Let’s dive into some simple yet powerful techniques to remove Magic Eraser residue.
Baking Soda Paste
Baking soda is a household staple that can be surprisingly effective in removing stubborn residues. Mix baking soda with a little water to form a thick paste. Gently apply this paste to the affected area using a soft cloth or sponge.
Rub gently in circular motions. You’ll notice the residue starting to fade away. Baking soda is mildly abrasive, which helps lift off residues without damaging your walls.
After cleaning, wipe the area with a damp cloth to remove any excess paste. Have you tried using baking soda for cleaning before? It’s fascinating how something so simple can be so effective.
Commercial Cleaning Products
Sometimes, household solutions might not cut it. That’s when commercial cleaning products come into play. Look for cleaners specifically designed to remove scuff marks or Magic Eraser residues. They usually contain ingredients that break down residues effectively.
Read the product labels carefully. Ensure they’re safe for your wall type. Apply the cleaner as directed, and watch the residue vanish. This option is perfect when you’re dealing with tougher stains.
Have you ever found a product that worked wonders for you? Share your experience with fellow readers. It’s incredible how the right product can make cleaning effortless.
Remember, the key is to find a method that suits your needs and preferences. What alternative solution are you excited to try today?
Preventing Future Residue
Preventing future residue from magic erasers on your walls is crucial for maintaining a clean and pristine look. It often comes down to the choices you make and the habits you develop. Let’s dive into some practical tips that will help you keep your walls spotless.
Selecting Appropriate Erasers
Choosing the right eraser can make all the difference. Not all erasers are created equal, and some might be too abrasive for certain types of walls. Check the packaging for suitability with your wall type.
Opt for erasers specifically designed for home use. They’re gentle yet effective. You can ask friends or check online reviews for recommendations.
Consider buying smaller erasers for better control. Larger ones might be tempting but can lead to excessive residue if not handled carefully.
Regular Wall Maintenance
Consistent upkeep is key to preventing residue build-up. Spot clean any marks or dirt as soon as you notice them. This minimizes the need for intensive cleaning later on.
Dust your walls regularly. Dust can obscure marks, making it harder to clean effectively. A simple feather duster or microfiber cloth works wonders.
Have you thought about painting your walls with easy-to-clean paint? Some paints are designed to resist marks and make cleaning simpler. It’s an investment that pays off in the long run.
What maintenance routine do you follow for your walls? Share your thoughts and let’s see how we can improve our strategies together.
Credit: www.hometalk.com
Credit: www.mrclean.com
Frequently Asked Questions
How Do You Remove Magic Eraser Residue From Walls?
Use a damp cloth to wipe the residue. Then dry with a clean towel.
Can Magic Erasers Damage Painted Walls?
Yes, they might. Test on a small spot first. They can remove paint.
What’s The Best Cleaner For Magic Eraser Marks?
Mild soapy water works well. Gently wipe the marks, then rinse.
Are Magic Erasers Safe For All Wall Types?
No, they aren’t. Avoid on glossy or dark-painted walls. They may leave marks.
How Often Should I Use Magic Erasers On Walls?
Use sparingly. Frequent use can wear down paint. Clean only when needed.
Conclusion
Removing magic eraser residue is simple with the right steps. First, gently wipe the area with a damp cloth. This helps lift leftover particles. Next, use mild soap and water to clean. Ensure the wall dries completely to prevent stains.
Regular maintenance keeps walls looking fresh. Always test on a small spot first. Avoid scrubbing too hard. This prevents damage to paint. Keep your home clean and beautiful with these easy tips. Your walls will thank you.