Are you staring at your walls, frustrated by the uneven texture or unsightly bumps on your painted drywall? A bad mud job can turn your dream interior into a DIY nightmare.
But before you consider tearing down the walls or hiring an expensive contractor, there’s good news. You can fix this problem yourself! Imagine transforming your space into a smooth, polished haven, all while saving money and boosting your home improvement skills.
This guide will walk you through simple, effective steps to repair a bad mud job, restoring your walls to their flawless glory. So, roll up your sleeves and get ready to tackle this challenge head-on. Your perfect walls are just a few steps away!

Credit: www.reddit.com
Identifying Common Mud Job Issues
Identifying common mud job issues is crucial for anyone dealing with drywall. Whether you’re a DIY enthusiast or hiring a professional, knowing the signs of poor mud application can save you time and money. Let’s dive into the key indicators of a bad mud job and its impact on painted drywall.
Signs Of Poor Mud Application
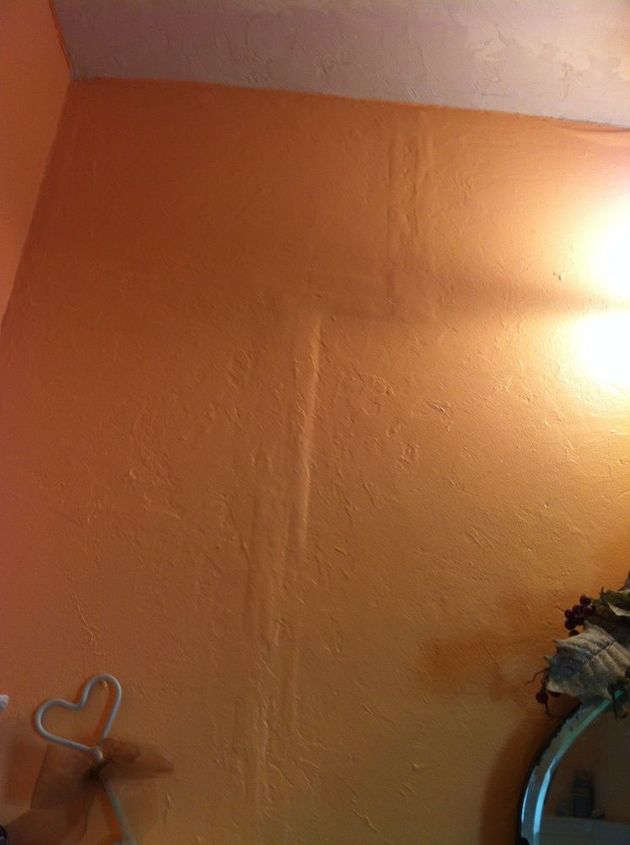
Ever noticed uneven surfaces or visible seams on your drywall? These are classic signs of a bad mud job. Inadequate mud application often leads to bumps or ridges that disrupt the smoothness of the wall.
Another red flag is cracking or peeling of the mud. This occurs when the mud isn’t mixed properly or applied too thinly. It’s like trying to cover a pothole with a layer of paint—it just doesn’t hold.
Are your walls showing unusual shadows or discoloration? This could be due to improper sanding after mudding. It’s a subtle clue but one that might tip you off to a poor mud job.
Impact On Painted Drywall
Poor mud application doesn’t just affect the drywall—it messes with your paint job too. If the mud isn’t smooth, your paint won’t adhere evenly. You’ll end up with patchy or streaky finishes.
Imagine investing hours into painting, only to find lumps and bumps appearing as the paint dries. This happens when mud layers aren’t sanded down properly before painting. It’s frustrating, but fixable.
Have you ever painted over a wall only to see discoloration appear? This could be due to leftover dust from insufficient sanding. Dust affects paint absorption, leading to uneven color distribution.
Identifying these issues early can save you a headache later. So, before you grab that paintbrush, ask yourself: Is my drywall ready for painting?
Preparing The Work Area
Start by clearing the workspace for fixing a bad mud job on painted drywall. Remove nearby furniture and cover the floor to protect it from dust and debris. Proper preparation ensures a clean, efficient repair process.
Preparing the work area is a crucial first step in fixing a bad mud job on painted drywall. Proper preparation not only sets the stage for a successful repair but also helps you avoid common pitfalls. It’s a bit like setting the table before a meal – the more organized and ready you are, the smoother the process will go.###Essential Tools And Materials
You’ll need a few key tools and materials to get started. A utility knife, sanding block, and joint compound are your basic essentials. Remember to grab some drop cloths and painter’s tape to protect surrounding areas.Don’t forget your putty knife – it’s indispensable for applying the compound smoothly. Consider having a dust mask on hand, especially if you’re dealing with a large area.###Safety Precautions
Safety should never be an afterthought. Always use a dust mask to protect your lungs from drywall dust. It may not seem like much, but it can be harmful with prolonged exposure.Ensure your work area is well-ventilated to avoid inhaling fumes from paints or compounds. If you’re using any tools, keep them organized to prevent accidents. Ever tripped over a misplaced tool? It’s not just inconvenient; it can lead to injuries.Have you ever tried to fix something only to realize you forgot a crucial item halfway through? That’s why preparation is key. Before you begin, take a moment to review your tools and materials. This simple step can save you time and frustration.What’s the worst that could happen if you skip preparation? Picture yourself with drywall dust everywhere, a half-finished wall, and a missing putty knife. Doesn’t sound like a fun day, does it? Take the time to prepare, and your future self will thank you.Removing Old Mud Layer
Removing an old mud layer from painted drywall can be challenging. It requires patience and care to achieve a smooth surface. This process involves stripping away the old, uneven mud without damaging the wall. Proper technique is crucial for a clean finish. Below, we explore effective methods for removing the old mud layer.
Effective Techniques For Removal
Use a putty knife to gently scrape the old mud. Begin at one corner and work across the surface. Maintain a steady hand to avoid gouging the drywall. For thick layers, a drywall sander can be helpful. Sand the surface with fine-grit sandpaper. This helps in smoothing out any remaining rough spots. Ensure the area is dust-free before applying new mud.
Avoiding Damage To Drywall
Prevent damage by using the right tools. Opt for a plastic putty knife to reduce the risk of scratching. Apply minimal pressure while scraping to protect the drywall. If using a sander, keep it moving constantly. This prevents uneven sanding and potential damage. Consistent motion ensures a uniform finish. Always test your technique on a small area first.
Credit: www.hometalk.com
Reapplying Joint Compound
Bad mud jobs on painted drywall need careful reapplication of joint compound. Start by sanding the uneven surface to smooth it. Apply a thin layer of joint compound evenly, ensuring the edges blend seamlessly with the surrounding wall.
Reapplying joint compound is your secret weapon for fixing bad mud jobs on painted drywall. If you’ve ever looked at a wall and thought, “I wish that was smoother,” you’re not alone. Many homeowners face the dilemma of uneven drywall, but you can tackle it with a bit of patience and the right know-how.Choosing The Right Compound
Selecting the correct joint compound is crucial for a flawless finish. You might think all compounds are the same, but they aren’t. Lightweight compounds are easier to sand, making them ideal for beginners. All-purpose compounds offer more durability and are perfect for areas prone to wear and tear. It’s essential to read labels and choose a product suited to your needs.Consider your comfort level and the area you’re working on. Are you covering a small patch or an entire wall? The right compound can make a world of difference in your results.Step-by-step Application Process
Here’s a simple, effective process to help you achieve a smooth finish:1. Prepare Your Surface: Ensure your wall is clean and dry. Remove any loose debris or dust before you begin. A clean surface helps the compound adhere better, ensuring long-lasting results.2. Mix Your Compound: If you’re using a powder compound, follow the instructions to mix it properly. It should have a creamy consistency. A well-mixed compound spreads evenly and covers imperfections more effectively.3. Apply the Compound: Use a putty knife to spread the compound over the affected area. Start with thin layers and let each layer dry before applying the next. Thin layers dry faster and are easier to sand, leading to a smoother finish.4. Sand Smooth: Once the compound dries, sand it lightly. Use fine-grit sandpaper to avoid damaging the surrounding paint. Sanding removes excess compound and smooths out the surface.5. Repeat if Necessary: Inspect your work. Are there still visible imperfections? Don’t hesitate to apply another layer. Sometimes, perfection requires a bit of patience and multiple attempts.Reapplying joint compound doesn’t have to be daunting. Just imagine how satisfying it will be to see a perfectly smooth wall. Why settle for less when you can achieve a flawless finish with a bit of effort?Sanding For A Smooth Finish
Fixing a bad mud job on painted drywall requires careful sanding for a smooth finish. Start by gently sanding uneven spots with fine-grit sandpaper. This creates a seamless surface, ready for repainting.
Sanding is a crucial step to fix a bad mud job on painted drywall. It helps achieve a smooth and professional finish. The right approach can transform a rough surface into a flawless one. Mastering the art of sanding can make all the difference. Let’s delve into the essentials of sanding for a smooth finish.Choosing The Right Sandpaper
Selecting the correct sandpaper is vital. It affects the sanding outcome. Start with coarse grit to tackle uneven areas. Use finer grit to refine the surface. Consider sandpaper labeled 120 to 150 grit for initial sanding. Move to 220 grit for a polished finish. Ensure the sandpaper is suitable for drywall use. This prevents damage and ensures efficiency.Proper Sanding Techniques
Effective sanding requires proper technique. Begin with gentle pressure. This avoids gouging the surface. Sand in circular motions for even coverage. Regularly check the surface progress. Dust and inspect frequently. This helps identify missed spots. Consistent motion ensures a seamless finish. Wear a mask to protect from drywall dust. Keep the work area well-ventilated. These practices ensure safety and precision.
Credit: www.reddit.com
Priming And Painting Over Fixed Drywall
Fixing a bad mud job on painted drywall requires precise priming and painting. Sand the surface smoothly, then apply a quality primer to even out imperfections. Finish with a fresh coat of paint for a flawless look.
Priming and painting over fixed drywall is the final step to achieving a flawless finish after fixing a bad mud job. This stage requires attention to detail and the right materials to ensure your walls look smooth and professional. With the right approach, you can transform your walls and make them the highlight of your room.Selecting The Right Primer
Choosing the right primer is crucial. A good primer seals the surface and ensures the paint adheres properly. Look for a primer that is specifically designed for drywall.Consider the state of your repaired area. If the surface is unevenly textured, a high-build primer can help smooth it out. It fills in minor imperfections and provides a consistent base.Make sure the primer is compatible with the paint you plan to use. Checking the labels for compatibility can save you from potential peeling or flaking.Painting Tips For A Professional Look
Start by choosing the right paint finish. A matte finish can hide minor flaws, while a satin or gloss finish will highlight them. Select based on the level of perfection your wall has achieved.Use quality brushes and rollers. They make a significant difference in applying paint evenly and smoothly. Cheap tools can leave streaks or shed bristles onto your freshly painted walls.Apply thin coats of paint. It might be tempting to cover everything in one go, but multiple thin layers will yield a more professional look. Each coat should dry completely before the next application.Have you ever noticed how professional painters take their time? Patience is key. Rushing through this process can lead to drips and uneven coverage.Remember, every detail counts. Stand back and admire your work from different angles to catch any spots you might have missed. This approach ensures you achieve that flawless finish you’re aiming for.Preventing Future Mud Job Issues
Fixing a bad mud job on painted drywall helps prevent future issues. Sand the uneven areas carefully. Apply a thin layer of joint compound. Smooth it out for a flawless finish. Proper techniques and tools are essential. Ensure a smooth and durable surface.
Regular maintenance prevents future complications.
Preventing future mud job issues on your painted drywall is crucial for maintaining a smooth, attractive finish. You might have experienced the frustration of dealing with a less-than-perfect mud job. Fixing it isn’t just about repairing the immediate problem; it’s about ensuring it doesn’t happen again. Let’s dive into some practical tips and tricks to help you master drywall mudding and keep your walls looking pristine.Tips For Proper Mud Application
Proper mud application begins with selecting the right type of joint compound. Lightweight compounds are easier to work with, especially for beginners. However, setting-type compounds are great for those who need a faster drying time.Consistency is key. Ensure your mud is mixed to the right consistency, similar to smooth peanut butter. Too thick, and it won’t spread well; too thin, and it’ll sag.Apply in thin layers. It’s tempting to apply thick layers to speed up the process, but this often leads to uneven surfaces. Aim for multiple thin coats, allowing each to dry before adding the next. Have you ever noticed how patience in this step pays off with a flawless finish?Maintaining Painted Drywall
Once your drywall is perfectly mudded and painted, maintaining it should be your next focus. Regular cleaning with a soft, damp cloth can prevent dust buildup and keep your paint looking fresh. Avoid harsh chemicals that can damage the paint.Check for signs of wear or damage periodically. Small dings or cracks can worsen over time if left unattended. Address these issues promptly to avoid bigger repairs later.Consider using a quality primer before painting. A primer can help the paint adhere better and provide a more durable finish. Have you ever skipped a step and later regretted it? This is one you don’t want to miss.By taking these steps, you can ensure that your drywall remains smooth and beautiful for years to come. Are you ready to tackle your next mud job with confidence?Frequently Asked Questions
What Is A Bad Mud Job On Drywall?
A bad mud job occurs when joint compound isn’t applied smoothly. It leads to uneven surfaces. Flawed finishes.
How Can I Identify A Bad Mud Job?
Look for bumps, ridges, or visible seams. Uneven textures. Poorly blended areas.
Can I Fix A Bad Mud Job Myself?
Yes, you can. Sand the uneven areas gently. Apply a fresh, thin coat of joint compound.
What Tools Do I Need For Fixing Drywall Mud?
Use a drywall knife, sandpaper, and joint compound. These tools help smooth and even the surface.
How Long Does It Take To Fix Bad Mud On Drywall?
It varies. Simple fixes may take a few hours. Bigger projects might need more time.
Conclusion
Fixing a bad mud job on painted drywall is achievable. Start with the right tools and materials. Sand the surface gently and apply new mud evenly. Let it dry, then sand again for smoothness. Paint over the repaired area carefully.
Patience is key. Take your time for the best results. Practice can make this task easier. Your walls will look better, and your space will feel renewed. Remember to always work in a well-ventilated area. Follow these steps, and you’ll see improvement.
Happy repairing!