Have you ever faced the inconvenience of a leaky or broken toilet tank? It’s a common household issue that can disrupt your daily routine and inflate your water bill.
The good news is, you might not need to call a plumber. You have the power to fix it yourself, saving both time and money. Imagine the satisfaction of solving this problem on your own and the peace of mind knowing your toilet is functioning perfectly.
In this guide, we’ll explore whether you can replace a toilet tank by yourself and walk you through the steps to do it efficiently. Get ready to take control of this DIY project and transform your bathroom maintenance skills!

Credit: www.wikihow.com
Tools And Materials Needed
Replacing a toilet tank is a task many homeowners can tackle. Knowing the right tools and materials simplifies the process. Prepare well to avoid delays and complications. This section will guide you on what you need for a smooth replacement.
Essential Tools For The Job
A few basic tools are crucial for this task. A wrench is your best friend for loosening bolts. A screwdriver helps remove screws and secure parts. A sponge or towel is handy to soak up water. Keep a bucket nearby for any extra water. A level ensures the tank sits straight and steady.
Materials Required For Replacement
Gathering the right materials beforehand saves time. You’ll need a new toilet tank, matching your existing toilet bowl. Ensure you have a new tank-to-bowl gasket. It prevents leaks between the tank and bowl. Also, buy new bolts and washers. They secure the tank firmly. Lastly, a new water supply line might be necessary. This connects the tank to your home’s water supply.
Preparing For Replacement
Replacing a toilet tank may seem challenging, but it can be simple. Proper preparation ensures a smooth replacement process. This guide provides essential steps to get ready.
Safety Precautions
Before starting, gather your tools. Wear gloves to protect your hands. Ensure the workspace is well-lit. Use a sturdy step stool if needed. Keep a towel handy for spills. Make sure children and pets stay away. Safety first ensures a smooth task.
Shutting Off Water Supply
Locate the water valve behind the toilet. Turn the valve clockwise to stop the water. Test by flushing the toilet. The tank should not refill. If water still flows, check the valve again. Ensure it is tightly closed. This step prevents mess and water waste.
Removing The Old Tank
Replacing a toilet tank might seem like an intimidating task, but with some careful steps, you can handle it with ease. The first critical phase is removing the old tank. This process requires a methodical approach to ensure your bathroom stays dry and your new tank fits perfectly. Let’s dive into the steps you need to follow to remove the old tank efficiently.
Draining The Tank
Start by turning off the water supply to the toilet. This is usually done by locating the shut-off valve behind the toilet and turning it clockwise until it’s tight. Once the water is off, flush the toilet to remove as much water as possible from the tank.
Use a sponge or towel to soak up any remaining water. Getting the tank as dry as possible will make the removal process smoother. Have a bucket handy to collect any water that might spill during the next steps.
Disconnecting Water Lines
Locate the water supply line connecting the toilet tank to the wall. Use a wrench to loosen the nut and disconnect the line. Be prepared for a small amount of water to escape, so keep your bucket nearby.
This is a good time to inspect the water line for any wear or damage. Consider replacing it if it shows signs of aging. A new water line ensures a secure connection when installing your new tank.
Unscrewing The Tank
Now, look inside the tank for the bolts that secure it to the toilet bowl. Typically, there are two or three bolts. Use a screwdriver to hold the bolt in place while you loosen the nuts underneath with a wrench.
Once the nuts are removed, carefully lift the tank off the bowl. It may be slightly heavy, so take your time and ensure you have a firm grip. Place the old tank somewhere safe, and take a moment to clean the area before installing the new one.
Removing the old tank is a rewarding step in your DIY journey. As you embark on this project, remember that patience and attention to detail are your best friends. Have you ever replaced a toilet tank? What tips made the process easier for you?
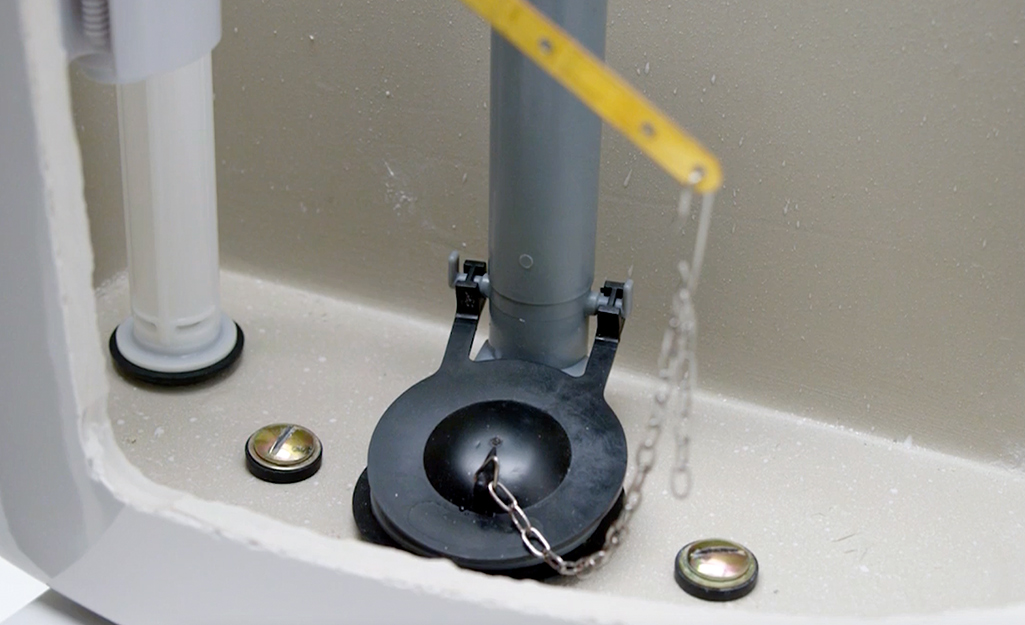
Credit: www.homedepot.com
Installing The New Tank
Replacing your toilet tank can seem daunting. But with the right guidance, it’s straightforward. The new tank brings efficiency and style. This section covers how to install it seamlessly. Let’s dive into the steps.
Positioning The Tank
First, place the tank on the toilet bowl. Align the holes on the tank with those on the bowl. Ensure the rubber gasket sits correctly between the tank and bowl. This prevents leaks and ensures a tight seal. Check the tank’s stability before securing it.
Securing The Tank To The Bowl
Use bolts to secure the tank to the bowl. Insert each bolt through the holes in the tank. Tighten the nuts from underneath the bowl. Avoid overtightening to prevent cracking the porcelain. Ensure the tank feels solid and doesn’t wobble.
Reconnecting Water Supply
Reconnect the water supply line to the tank. Attach it to the fill valve at the base of the tank. Use a wrench to tighten the connection securely. Turn the water supply back on. Check for leaks around the connections. Adjust as necessary to ensure a leak-free system.
Testing And Final Adjustments
After replacing your toilet tank, testing is crucial. This step ensures everything works smoothly. The final adjustments make sure your toilet functions perfectly.
Checking For Leaks
Turn on the water supply. Look for any water around the tank. Check all connections carefully. No water should be escaping. If you find leaks, tighten the connections. Use a wrench if needed. Make sure the tank is dry on the outside.
Adjusting Water Levels
Check the water level inside the tank. It should be below the overflow tube. If it’s too high, lower it using the fill valve. Adjust the float to control the water level. This prevents overflow and saves water.
Ensuring Proper Flush
Flush the toilet to test its operation. Check if the water empties quickly. The flush should be strong and efficient. If the flush is weak, adjust the flapper chain. Make sure the chain allows the flapper to open fully. Test again until the flush is satisfactory.
Troubleshooting Common Issues
Replacing a toilet tank can solve many problems. Yet, some issues might arise during the process. Knowing how to troubleshoot these common problems helps. It saves time and avoids frustration.
Leaks and flush problems are the most frequent issues. Addressing these can restore your toilet’s functionality. Let’s explore these problems in detail.
Addressing Leaks
Leaks can occur around the base or tank. Check the bolts first. Tighten them if they are loose. Use a wrench gently. Over-tightening can crack the porcelain.
Inspect the gasket between the tank and bowl. It should be intact and flexible. Replace it if worn out. Ensure the water supply line is secure. A loose connection can cause leaks.
Fixing Flush Problems
A weak flush often means a problem with the flapper. Check if it seals properly. Adjust the chain if it’s too long or short.
Examine the float. It controls the water level. Adjust it to ensure proper flushing. Clean any mineral deposits from the flush valve. This keeps the mechanism smooth.
Maintenance Tips
Maintaining your toilet tank can be straightforward with the right tips. Regular care not only keeps your toilet functioning efficiently but also extends its lifespan. As someone who once faced a hefty plumbing bill due to negligence, I can assure you, it’s worth the effort! Let’s dive into some practical maintenance tips that you can easily incorporate into your routine.
Regular Inspection Advice
Make it a habit to inspect your toilet tank every few months. Look for leaks or cracks. A small crack can lead to big issues if ignored.Check the water level inside the tank. It should be about an inch below the overflow tube. Adjust the float if it’s too high or too low.Test the flushing mechanism. Ensure that the handle, chain, and flapper work smoothly. Replace any part that seems worn or broken.
Cleaning Techniques For Longevity
Cleaning your toilet tank is crucial for preventing mineral buildup and corrosion. Use a mild detergent and a soft brush. Harsh chemicals can damage the components.Flush the tank before you start cleaning to remove any loose debris. Pay attention to the corners where grime accumulates.For stubborn stains, consider using vinegar. Let it sit for a few hours before scrubbing. This natural cleaner works wonders without harming the tank.
What’s your biggest challenge with toilet maintenance? Share your stories and tips in the comments below. Your experience could help someone else tackle their tank troubles!
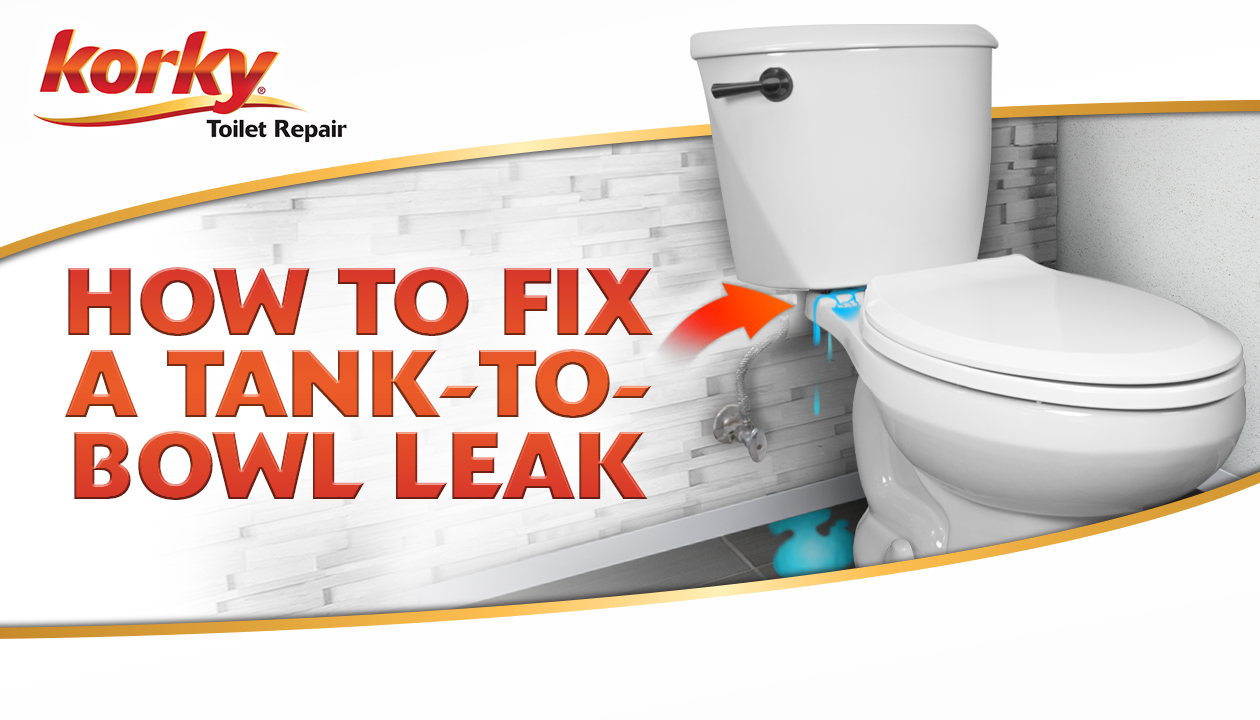
Credit: www.korky.com
Frequently Asked Questions
How To Replace A Toilet Tank Yourself?
First, turn off the water supply. Next, remove old tank bolts and disconnect water line. Attach new tank securely.
What Tools Are Needed For Toilet Tank Replacement?
You need an adjustable wrench, screwdriver, and pliers. These tools help with removing bolts and securing the new tank.
Can Any Toilet Tank Fit Any Toilet Bowl?
Not all tanks fit all bowls. Check the size and model compatibility before purchasing a new tank.
How Long Does It Take To Replace A Toilet Tank?
It usually takes about 1-2 hours. This includes removing the old tank and installing the new one.
Is Replacing A Toilet Tank Costly?
Costs vary. A tank can cost $50-$200, plus any tools needed. DIY can save labor costs.
Conclusion
Replacing a toilet tank is simpler than you think. Basic tools and patience are key. Follow steps carefully for success. Turn off water before starting. Remove old tank gently to avoid damage. Check all connections twice. Tighten bolts securely for no leaks.
Test flushing once installed. See? It’s easier than expected. Save money by doing it yourself. No need for a plumber every time. Just some effort and focus. Enjoy your new, efficient toilet. Share your success with friends. They might need help too.
Happy repairing, and good luck with your next project!